


White Bean Chicken Chili is the kind of meal that makes a busy night feel calmer. This white chicken chili recipe uses tender chicken, creamy beans and bold spices for a bowl that feels warm without being heavy.
Many families look for crockpot white chicken chili because it saves time and creates deep flavor with little effort. If you enjoy comforting meals with chicken, try our Gluten Free Chicken Noodle Soup for another simple bowl idea.
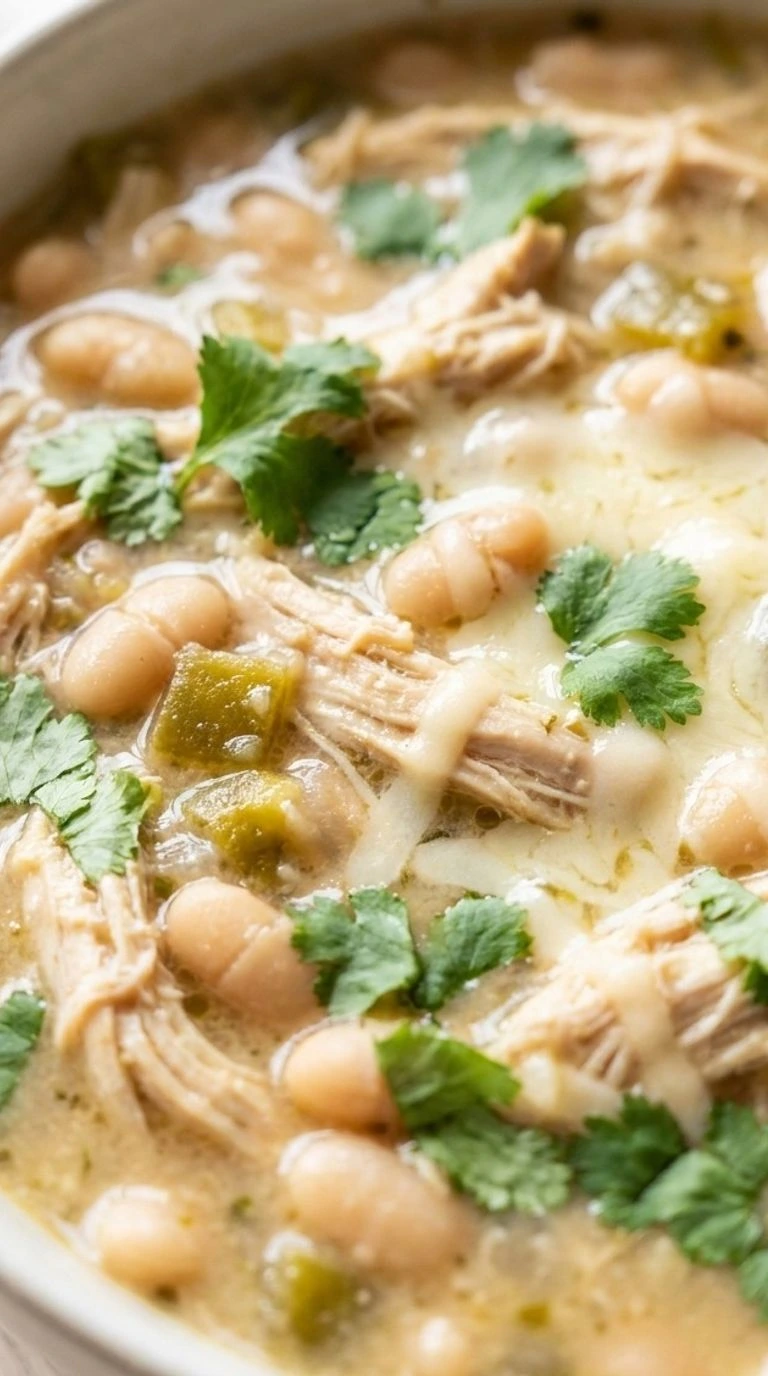
I also love this recipe because it works for casual dinners and gatherings. This easy white chicken chili brings together simple pantry items and fresh flavors, while the creamy broth gives it a special touch.
Why This Recipe Works
This White Bean Chicken Chili works because the beans release natural starch while they simmer, creating a thicker broth without extra flour. Browning the chicken first at medium-high heat for 6 to 8 minutes adds deeper flavor before the creamy base forms.
The cream cheese and sour cream blend slowly at low heat so the texture stays smooth instead of separating. For another comforting chicken meal, try our Chicken Burrito Casserole when you want a baked option.
Ingredients
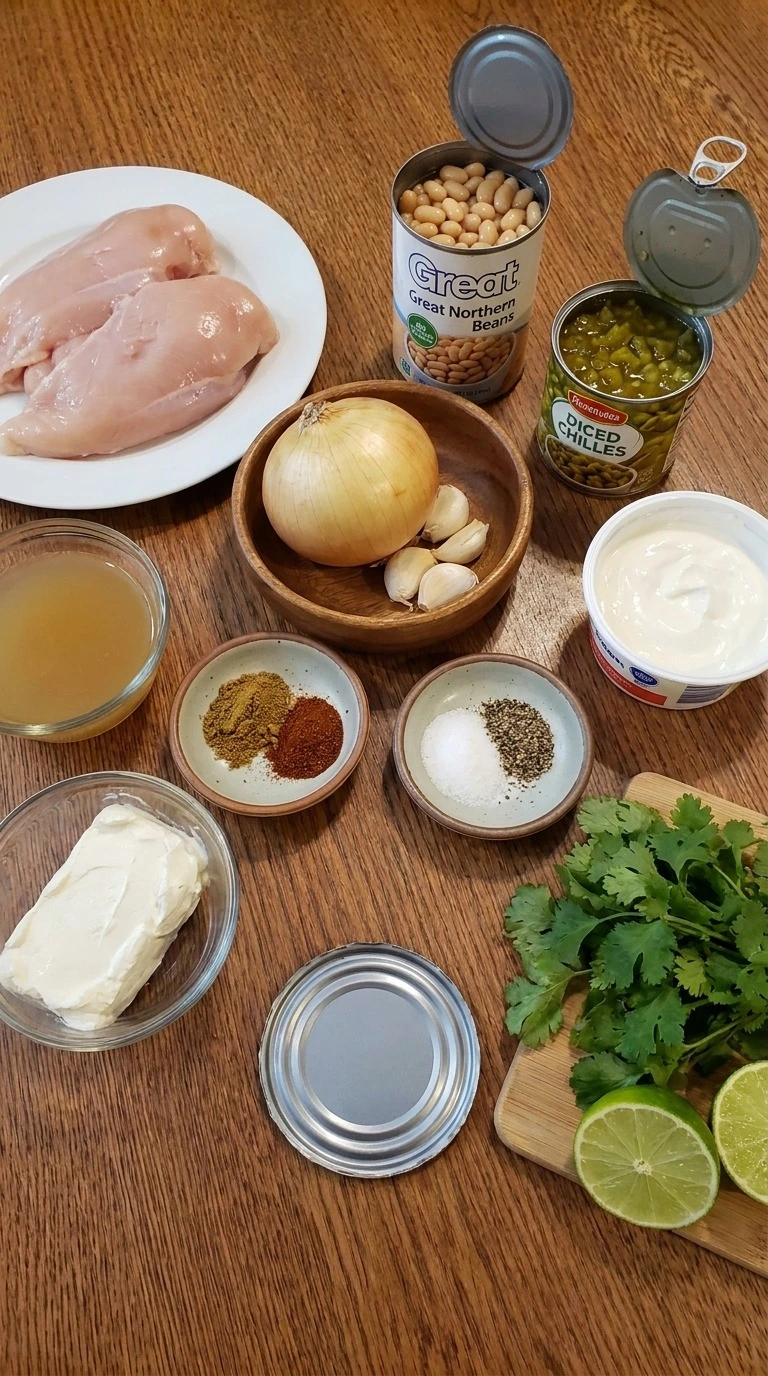
- boneless chicken breast: Cut into 1-inch pieces for even browning and tender bites.
- great northern beans: Drained and rinsed to create a creamy bean base.
- yellow onion: Diced to add sweetness and savory depth.
- garlic cloves: Minced to release a strong aromatic flavor.
- diced green chilies: Added for mild heat and a bright pepper flavor.
- chicken broth: Provides the liquid base for the chili.
- cream cheese: Softened to blend smoothly into the broth.
- sour cream: Adds creamy texture and gentle tang.
- ground cumin: Adds warm earthy flavor.
- chili powder: Builds a mild chili spice profile.
- salt: Balances the flavors throughout the dish.
- black pepper: Adds a light peppery finish.
- fresh cilantro: Chopped and used as a fresh topping.
- lime: Sliced for a bright finishing flavor.
Equipment
- 6-quart heavy-bottomed pot: A 6-quart heavy-bottomed pot holds this chili comfortably and spreads heat evenly so the broth doesn’t scorch, while a thin pot may create hot spots.
- Wooden spoon: A wooden spoon helps stir thick chili gently and should have a strong handle that won’t bend during long mixing.
- Measuring cups and spoons: Accurate measuring tools keep the broth and spice balance consistent, and stainless steel options are durable for repeated use.
Instructions
Step 1: Season and brown the chicken breast pieces
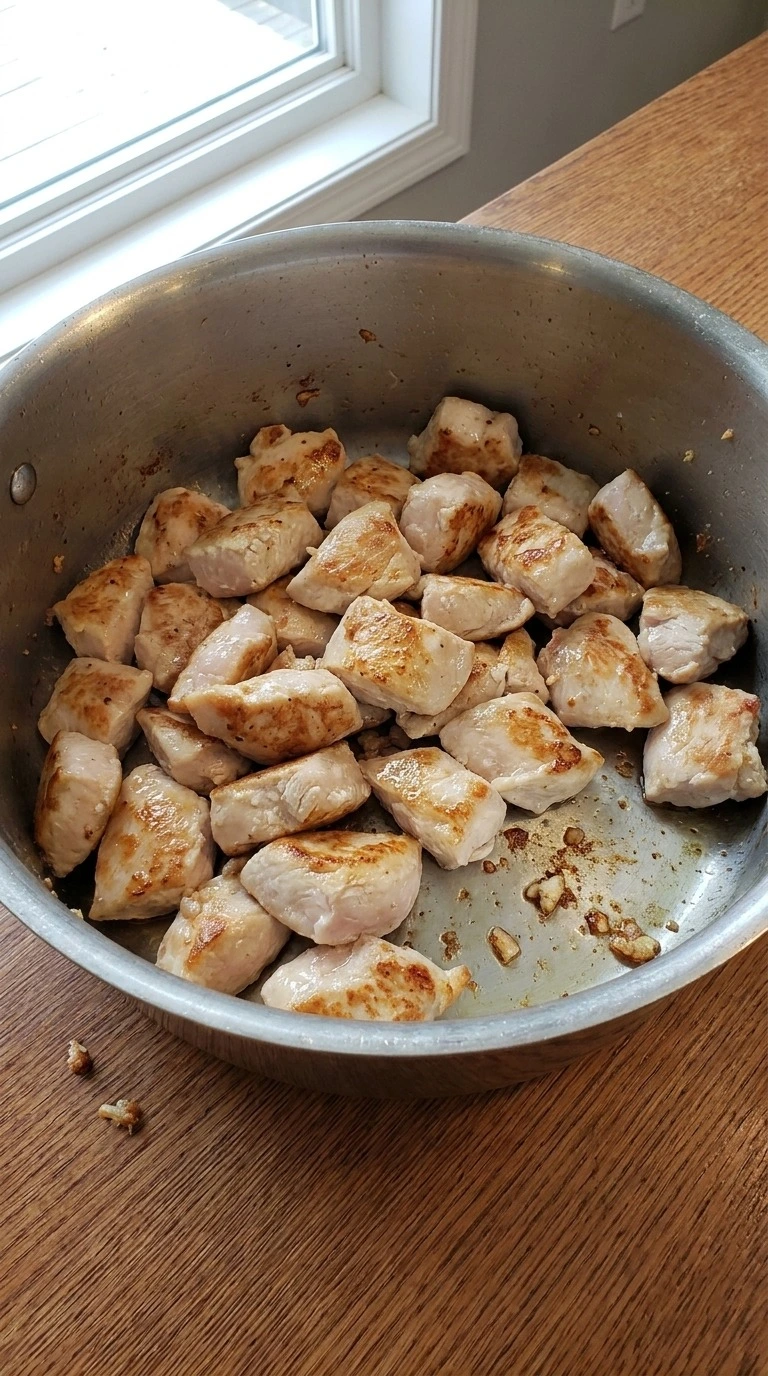
Season 2 pounds boneless chicken breast with spices, then brown the pieces in a large pot over medium-high heat until the surface reaches a golden color, about 6 to 8 minutes. Turn each piece with a spoon and keep the pieces spread apart so they develop color. You’ll hear a light sizzle.
(I tested overcrowding once and the chicken steamed instead of browning. ) The edges should look golden while the centers stay moist and pale. The smell of cumin and garlic starts to rise.
Miss this step and the chili loses a deeper base flavor. Brown at medium-high heat for 8 minutes because surface browning builds savory flavor.
Tip: Cut chicken into similar 1-inch pieces so they finish at the same time during the 30-minute cook.
Step 2: Combine the chili base with beans and broth
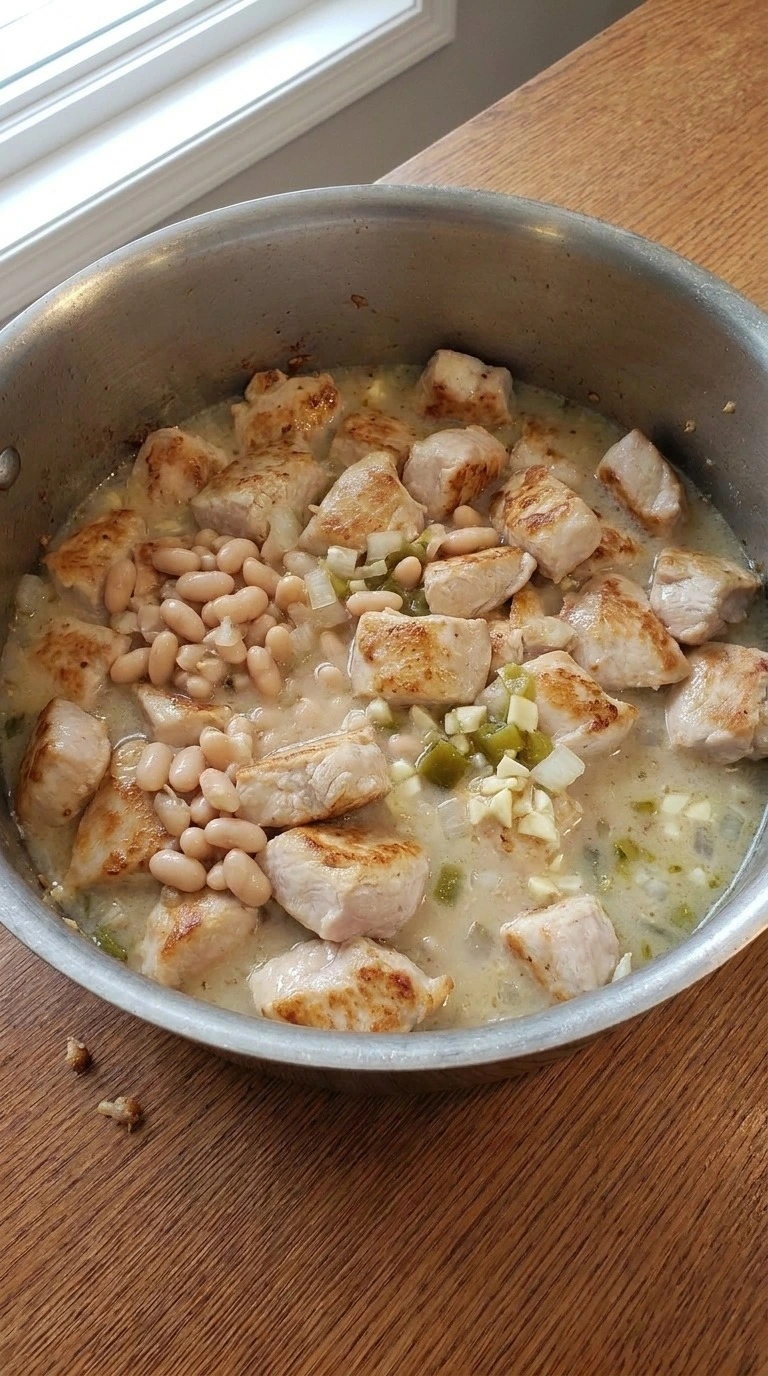
Add 3 cans great northern beans, 1 medium yellow onion, 4 garlic cloves, 2 cans diced green chilies, 4 cups chicken broth, and seasonings to the browned chicken. Stir with a wooden spoon using slow circles and simmer over medium-low heat for 20 to 25 minutes. The mixture should move gently while the broth begins to thicken.
You’ll see the beans soften and the broth turn slightly cloudy from their starch. The aroma becomes richer. Skip the gentle simmer and the flavors won’t blend well.
Simmer slowly because bean starch thickens the chili naturally.
Tip: Mash about 1/2 cup of the great northern beans against the pot side for extra body without adding cream.
Step 3: Thicken the chili with cream cheese and final seasoning
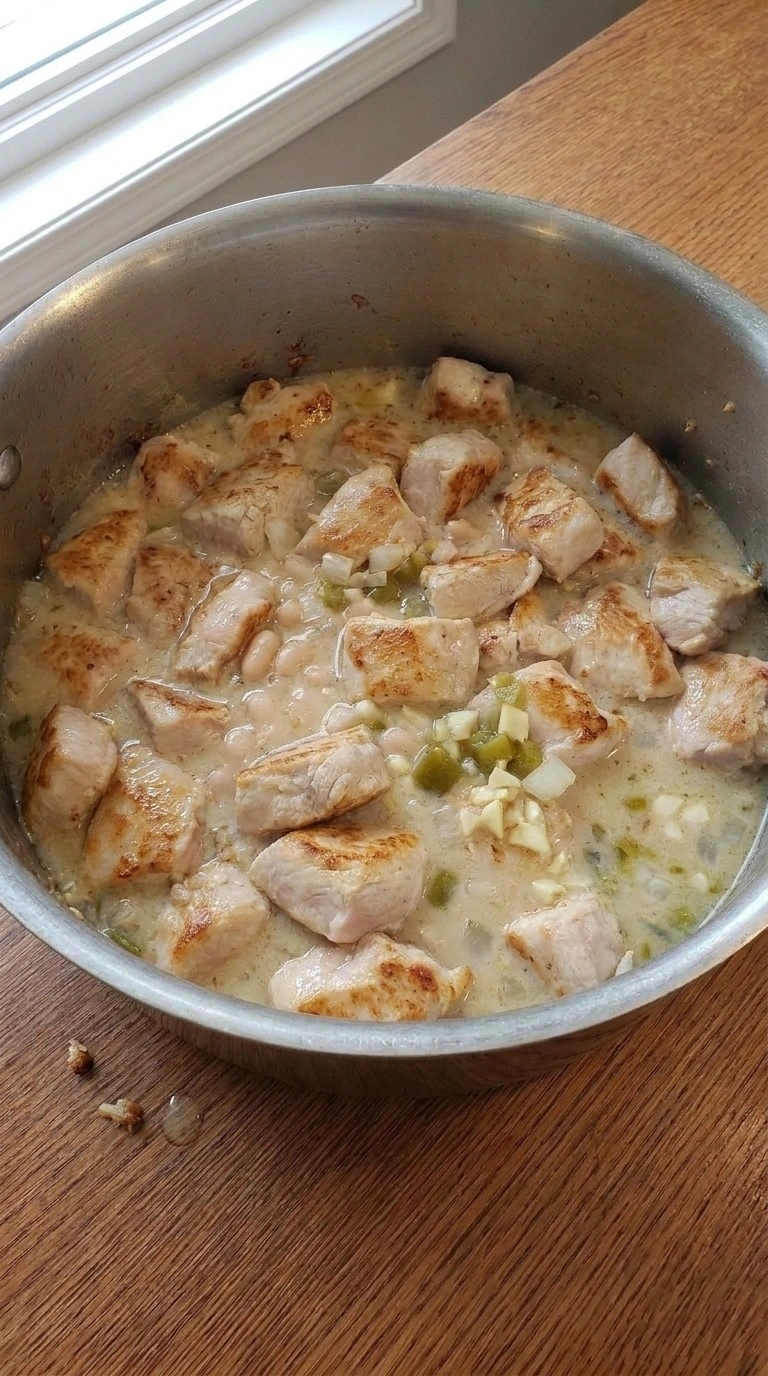
Stir in 8 ounces cream cheese and 1 cup sour cream over low heat at about 200°F for 5 to 7 minutes until the dairy melts smoothly. Fold the mixture slowly with a spoon and scrape the sides so the creamy ingredients blend into the broth without lumps.
The chili becomes thicker and lighter in color. You’ll notice a smooth surface with beans and chicken still visible.
Go too hot and the dairy can separate. Keep the heat low so the cream stays stable and smooth.
Tip: Let cream cheese sit out for 20 minutes before adding so it blends faster into the warm broth.
Step 4: Serve the finished chili with fresh toppings
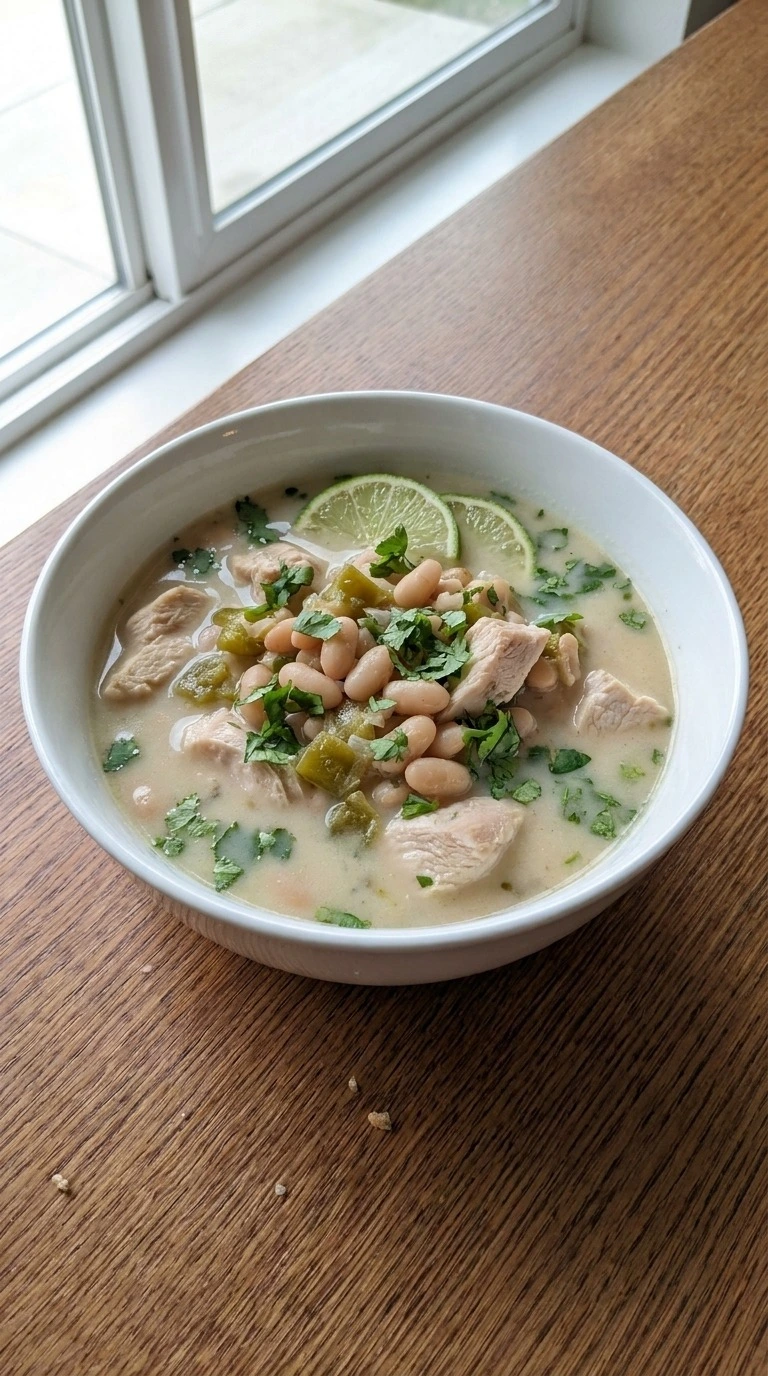
Spoon the finished chili into serving bowls after it rests for 10 minutes off the heat at about 160°F. Add 1/4 cup chopped cilantro and 1 sliced lime as finishing touches, then gently place the toppings over the surface without covering the beans completely.
The bowl should show creamy broth, tender chicken pieces and visible white beans with natural uneven texture. (My first batch tasted flat when I skipped the lime at the end.
The small splash made the flavors brighter. ) Rest 10 minutes before serving because the flavors settle into the broth.
Tip: Serve the chili with warm cornbread or tortilla chips within 15 minutes for the best texture contrast.
Pro Tips
- Brown the boneless chicken breast pieces in batches when possible and keep the pan at medium-high heat for 6 to 8 minutes so the edges turn golden instead of steaming.
- Choose canned great northern beans with no added salt when available because you can control seasoning better. Rinse them for 30 seconds to remove excess liquid.
- Use a 6-quart heavy-bottomed pot because thin pots can create hot spots after 20 minutes of simmering and may scorch the thick bean broth.
- Add the dairy mixture during the final 5 to 7 minutes of cooking and keep the heat near 200°F so the cream stays smooth and doesn’t split.
- Avoid adding extra broth at the start if the chili looks thick because the beans release moisture while simmering. Wait until minute 20 before adjusting the texture.
- Brighten each serving with fresh lime juice and about 1 tablespoon chopped cilantro per bowl. The fresh finish balances the creamy base.
- For meal prep, cool the chili within 2 hours and divide it into 2-cup portions so reheating takes less time on busy days.
- Add 1 cup roasted corn and 1 teaspoon smoked paprika for a sweeter smoky version with extra texture.
- Replace half the great northern beans with black beans for a colorful chili variation with a stronger earthy flavor.
- Mix in 1 diced jalapeño with the green chilies for a hotter version that brings more pepper flavor.
- Use shredded rotisserie chicken instead of browned chicken breast for a faster weeknight version, adding it during the final 15 minutes so it stays tender.
Substitutions
- boneless chicken breast: boneless chicken thigh. Use the same 2-pound amount for a juicier result with a slightly richer flavor. Chicken thighs may need 2 to 3 extra minutes of browning because they contain more fat.
- cream cheese: dairy-free cream cheese alternative. Replace the 8 ounces with an equal amount of dairy-free cream cheese for a lactose-free version. The texture stays creamy but the flavor may have a mild nutty or coconut note depending on the brand.
- sour cream: plain Greek yogurt. Use 1 cup plain Greek yogurt instead of sour cream for more protein and a tangier taste. Add it after lowering the heat because high temperatures can make yogurt separate.
- chicken broth: low-sodium vegetable broth. Swap the 4 cups of chicken broth with vegetable broth if needed. The chili keeps its creamy texture but has a lighter savory flavor.
- great northern beans: cannellini beans. Use 3 cans cannellini beans for a similar creamy texture and size. The beans hold their shape slightly better during simmering, similar to our Healthy Enchilada Skillet.
Storage
Keep leftover chili in airtight glass containers in the refrigerator for up to 4 days. You can freeze it for up to 3 months by cooling it fully and leaving space in freezer-safe containers for expansion.
Reheat on the stovetop at medium-low heat for 10 to 15 minutes and add 2 tablespoons of broth if it becomes thick. Discard leftovers with sour smells, unusual texture, or mold growth.
FAQ
Yes, you can prepare this chili up to 3 days ahead and keep it covered in the refrigerator. Reheat it slowly over medium-low heat for 10 to 15 minutes and stir often so the creamy base stays smooth.
Store leftovers in sealed containers for up to 4 days at 40°F or below. Reheat individual portions until they reach 165°F and add a splash of broth if the texture becomes too thick.
You can freeze it for up to 3 months, but dairy textures may change slightly after thawing. Freeze cooled portions, thaw overnight, then warm gently at low heat while stirring to bring the creamy texture back.
Watery chili usually happens when too much broth is added or the beans haven’t released enough starch. Simmer uncovered for 10 to 15 extra minutes and mash a small portion of beans to help the broth thicken.
Yes, double the ingredients in an 8-quart pot and extend the simmer time by about 10 minutes. Stir every few minutes because the thicker amount needs more attention to prevent sticking.
Serve it with tortilla chips, cornbread, or a fresh salad for a balanced meal. Warm toppings like sliced avocado or extra cilantro can be added right before eating for more freshness.
White Bean Chicken Chili became popular as a lighter alternative to traditional red chili because white beans and chicken create a creamy bowl without relying only on tomatoes.