

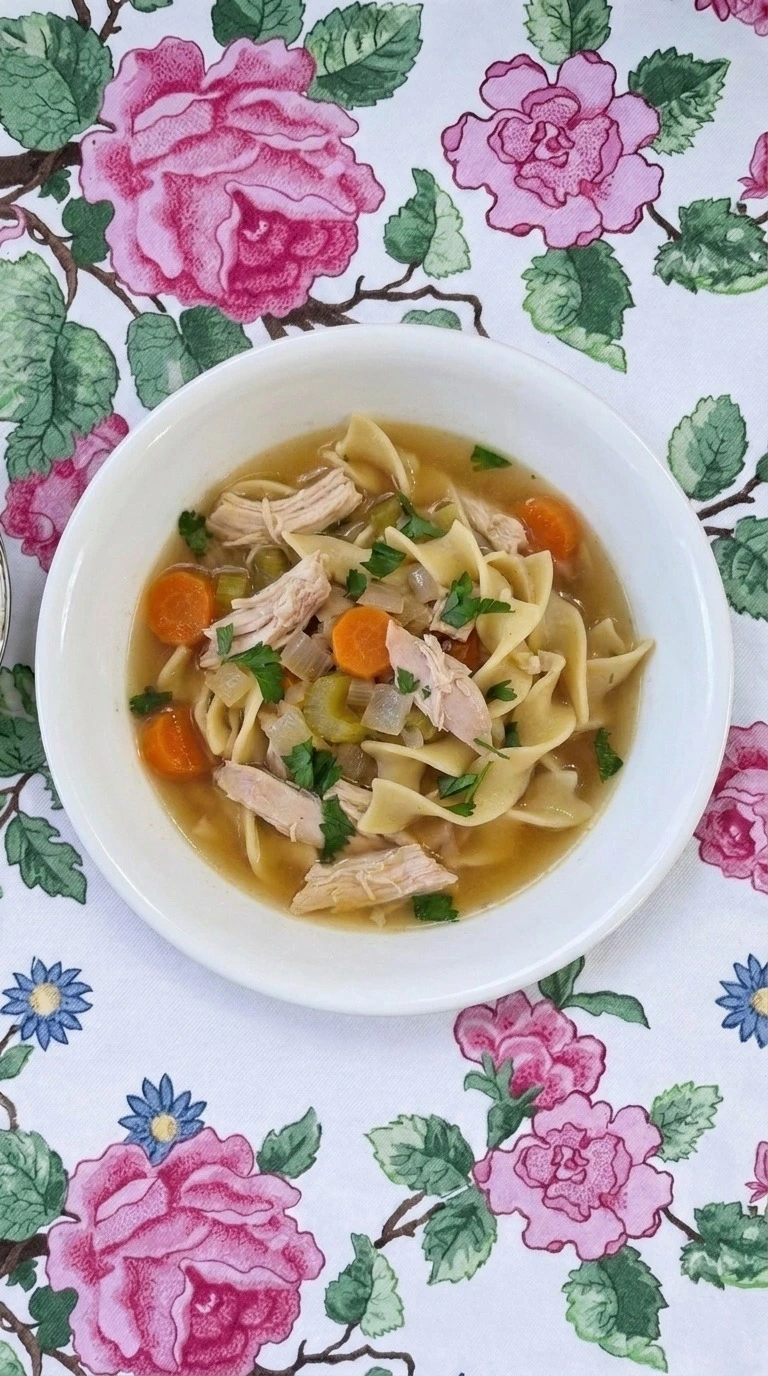
Gluten Free Chicken Noodle Soup is the bowl I make when I want a familiar dinner without wheat hiding in the broth or noodles. The chicken stays tender and the vegetables soften without disappearing. And the broth tastes savory rather than heavy because everything simmers gently instead of boiling hard for the whole cooking time. This gluten free chicken noodle soup also fixes one problem that ruins many homemade versions.
Gluten free noodles can move from pleasantly tender to swollen and soft surprisingly fast when they sit in hot broth for too long. So they go in near the end and the chicken returns only after shredding. I like this method because each stage has a purpose and you can see the soup changing as you cook. First the chicken develops golden edges and then the vegetables soften into the flavorful bits left behind in the pot.
Finally the broth brings everything together. Simple food, but every minute counts.
Why This Recipe Works
Gluten Free Chicken Noodle Soup stays flavorful because the chicken first browns around 400°F and leaves savory fond behind for the vegetables to absorb. Then a 195°F to 200°F simmer finishes the thighs gently to 165°F without the aggressive movement that can make broth cloudy.
The noodles go in only during the final 6 to 8 minutes because gluten-free starches soften quickly in hot liquid. That timing keeps this homemade gluten free chicken soup brothy instead of thick and gummy.
Ingredients
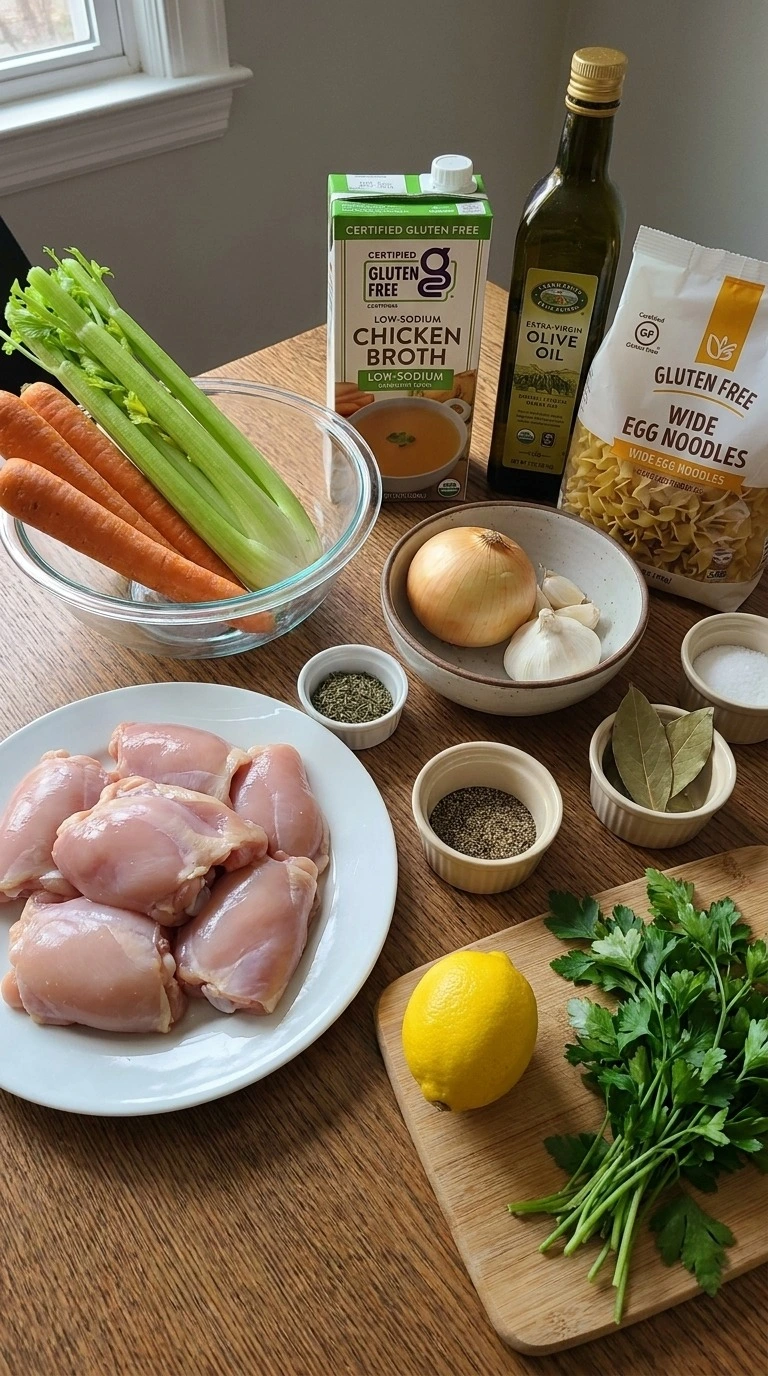
- Boneless skinless chicken thigh: Use 4 medium thighs and pat them dry before seasoning so the surfaces brown instead of steaming.
- Kosher salt: Divide between the chicken and the finished soup so the seasoning stays controlled.
- Ground black pepper: Divide between the chicken and final broth for gentle peppery warmth.
- Extra-virgin olive oil: Use it to brown the chicken and carry the savory flavors into the vegetables.
- Yellow onion: Dice it into roughly 1/4-inch pieces so it softens into the broth without disappearing.
- Carrot: Slice into roughly 1/4-inch rounds so they become tender while keeping visible shape.
- Celery stalk: Slice into roughly 1/4-inch pieces for mild savory flavor and texture.
- Garlic clove: Mince finely and add near the end of the vegetable cooking stage to prevent burning.
- Dried thyme: Use dried thyme for an earthy herbal note that can withstand the simmer.
- Bay leaf: Simmer whole in the broth and remove before adding the noodles.
- Certified gluten-free low-sodium chicken broth: Check the package for gluten-free labeling and choose low sodium so final seasoning stays adjustable.
- Gluten-free wide egg noodles: Cook directly in the broth until flexible but still slightly firm so they don’t become mushy.
- Lemon juice: Stir in at the end to brighten the broth without making the soup taste sharply acidic.
- Flat-leaf parsley: Chop just before serving and divide between the soup and final garnish for fresh herbal flavor.
Equipment
- 6-quart heavy-bottomed pot: A heavy 6-quart pot holds the full soup and spreads heat evenly so the vegetables don’t scorch. Avoid a thin pot that develops hot spots.
- Instant-read thermometer: A fast digital thermometer confirms the chicken reaches 165°F without guesswork. Choose one that reads within 2 to 3 seconds for better timing.
- Chef’s knife: An 8-inch chef’s knife makes consistent vegetable slices so the carrots and celery soften together. A dull blade can crush the vegetables and slow prep.
- Cutting board: A board at least 12 by 18 inches gives enough room to cut vegetables safely. A tiny board makes ingredients pile up and increases slipping.
- Tongs: Long tongs make it easier to turn and remove hot chicken without piercing it. Short or weak tongs can drop the meat back into hot broth.
- Soup ladle: A ladle with about a 4-ounce bowl portions broth and solids together. A very shallow spoon tends to leave the noodles and chicken behind.
Instructions
Step 1: Brown the chicken thighs
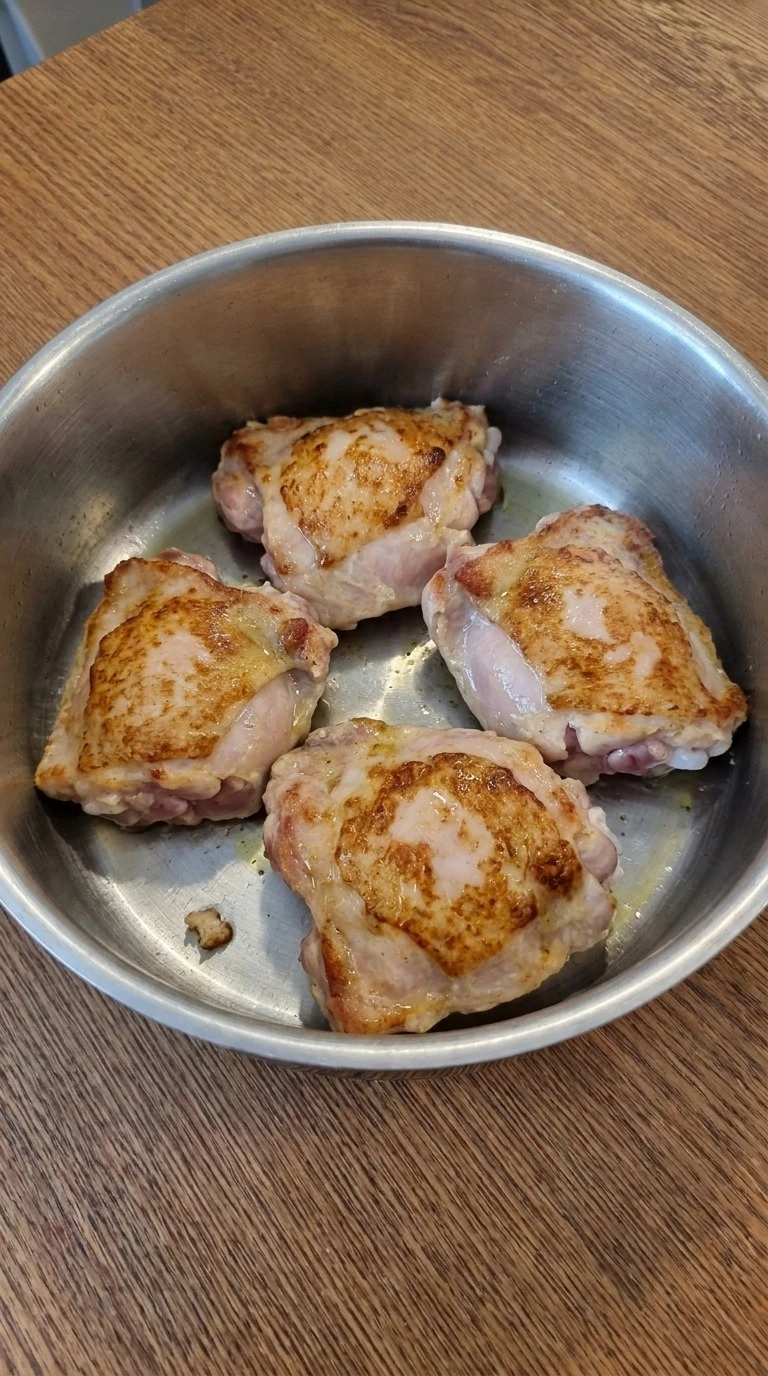
Pat the chicken thighs dry and season them with 1/2 teaspoon kosher salt and 1/4 teaspoon black pepper. Heat the extra-virgin olive oil over medium-high heat, about 7 on a 10-dial, until it reaches roughly 400°F. Add the chicken in one layer and leave it untouched for 2 to 3 minutes per side.
Don’t crowd it. The center doesn’t need to reach 165°F yet. You’ll hear a steady sizzle and see deep golden patches forming where the chicken touches the pot while the centers remain pale and slightly pink.
Remove the chicken after 5 to 6 minutes total. Go much longer and the exterior starts drying before the later simmer finishes the center. Brown at high heat because fast Maillard browning builds savory flavor without overcooking the meat.
Tip: Let the chicken sit at room temperature for 15 minutes before searing so the surface browns more evenly.
Step 2: Soften the onion, carrots and celery
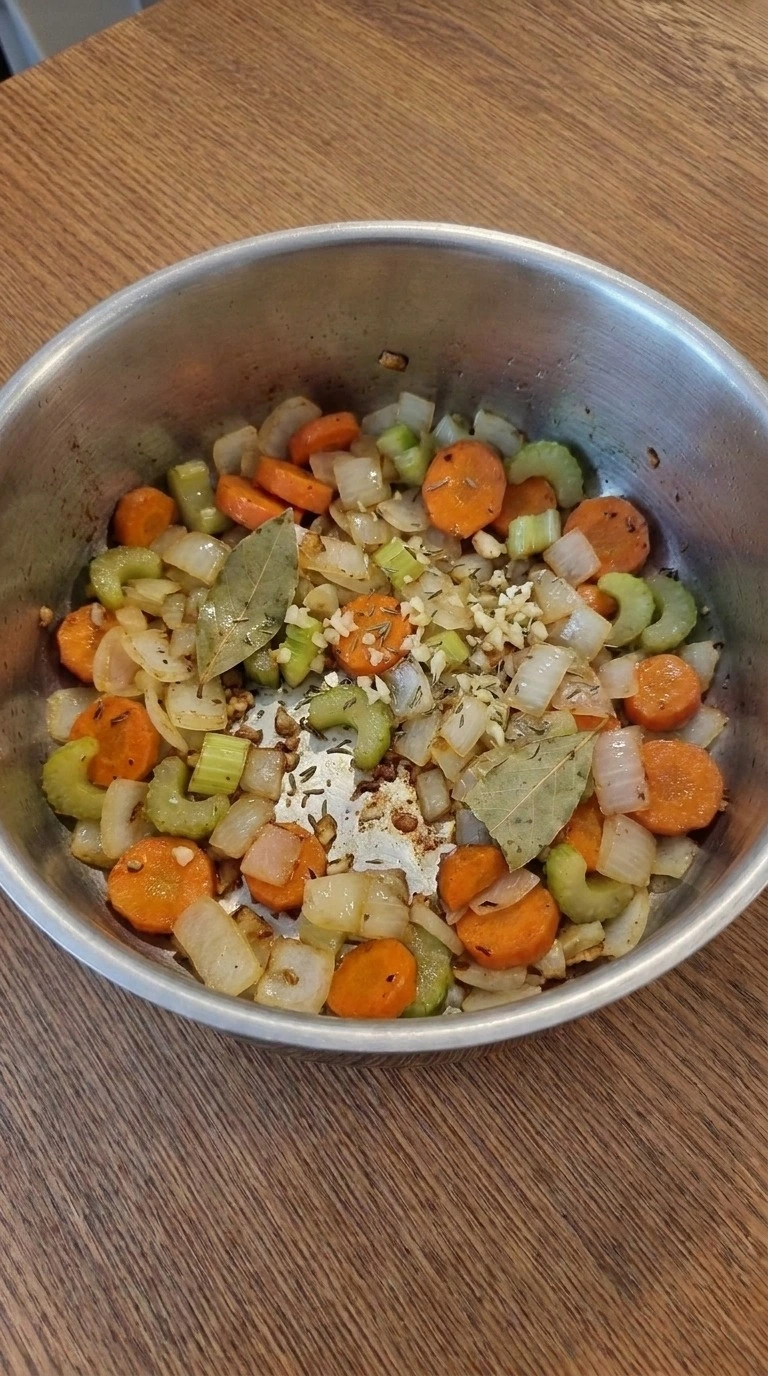
Lower the heat to medium, about 5 on a 10-dial, and add the yellow onion, carrots and celery to the browned bits left in the pot. Cook for 6 to 8 minutes while stirring every 60 to 90 seconds and scraping the bottom. Then stir in the garlic, dried thyme and bay leaves for exactly 45 seconds. Keep the vegetables moving so the garlic doesn’t scorch.
The onion should turn translucent and the carrot edges should look slightly softened while still holding their shape. You’ll smell garlic and thyme clearly after about 30 seconds. If the garlic turns dark brown then the broth can taste bitter. (I once added the garlic with the carrots and it dulled before they softened.
Adding it last works better. ) Use moderate heat because it softens the vegetables without burning the aromatics.
Tip: Cut the carrots and celery into roughly 1/4-inch slices so they soften at a similar rate during the later simmer.
Step 3: Simmer the chicken in the broth
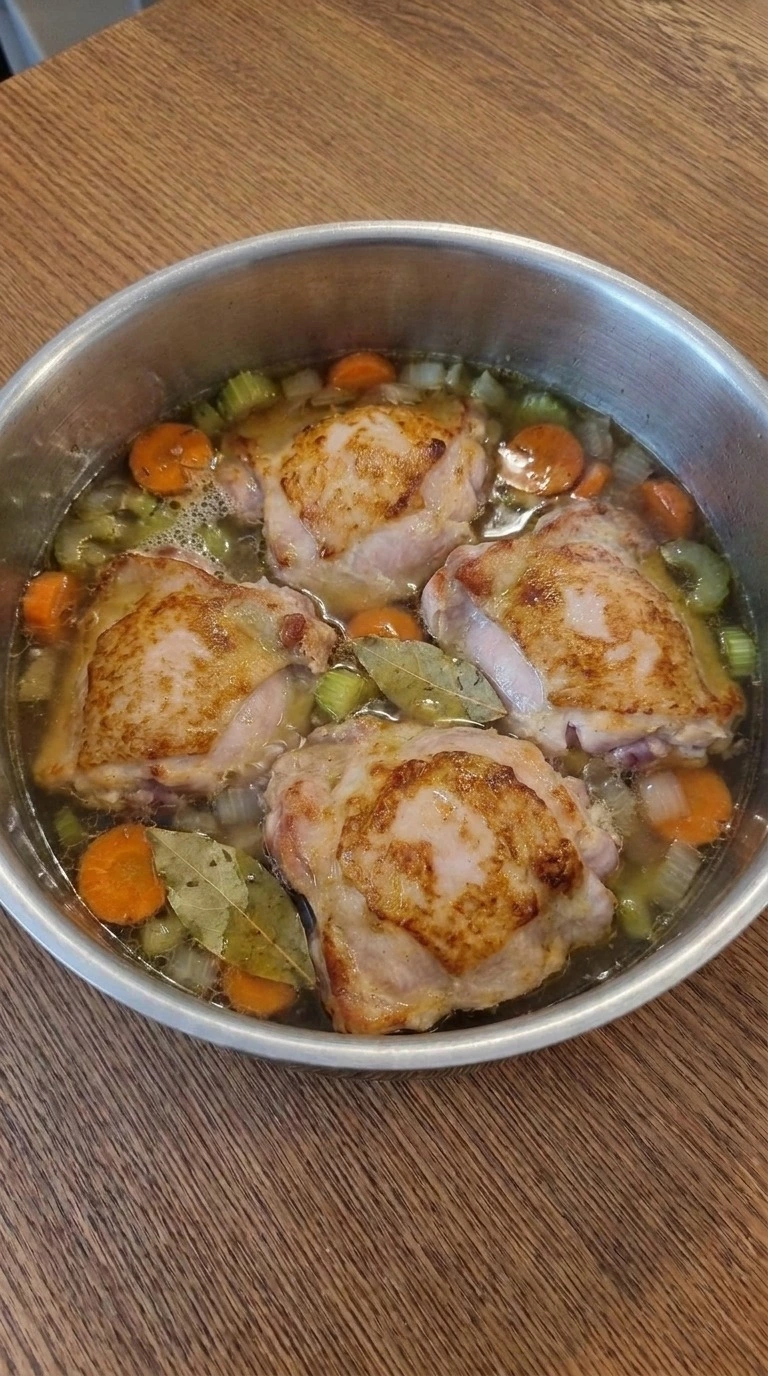
Pour in the certified gluten-free low-sodium chicken broth and scrape the bottom until the browned bits loosen into the liquid. Return all 4 chicken thighs and bring the broth to 195°F to 200°F over medium heat. Then reduce to medium-low and maintain a gentle simmer for 15 to 18 minutes.
Turn each thigh once around minute 8 so the thicker sections heat evenly. Small bubbles should rise steadily around the edges without a rolling boil and the broth will deepen from pale gold to a richer amber shade. Check the thickest thigh with a thermometer.
It needs to reach 165°F. A hard boil can tighten the chicken and cloud the broth. Keep the simmer gentle because controlled heat cooks the chicken through while preserving tenderness.
Tip: Use low-sodium broth so you can adjust the final salt level after the noodles absorb some seasoning.
Step 4: Shred the chicken and cook the noodles
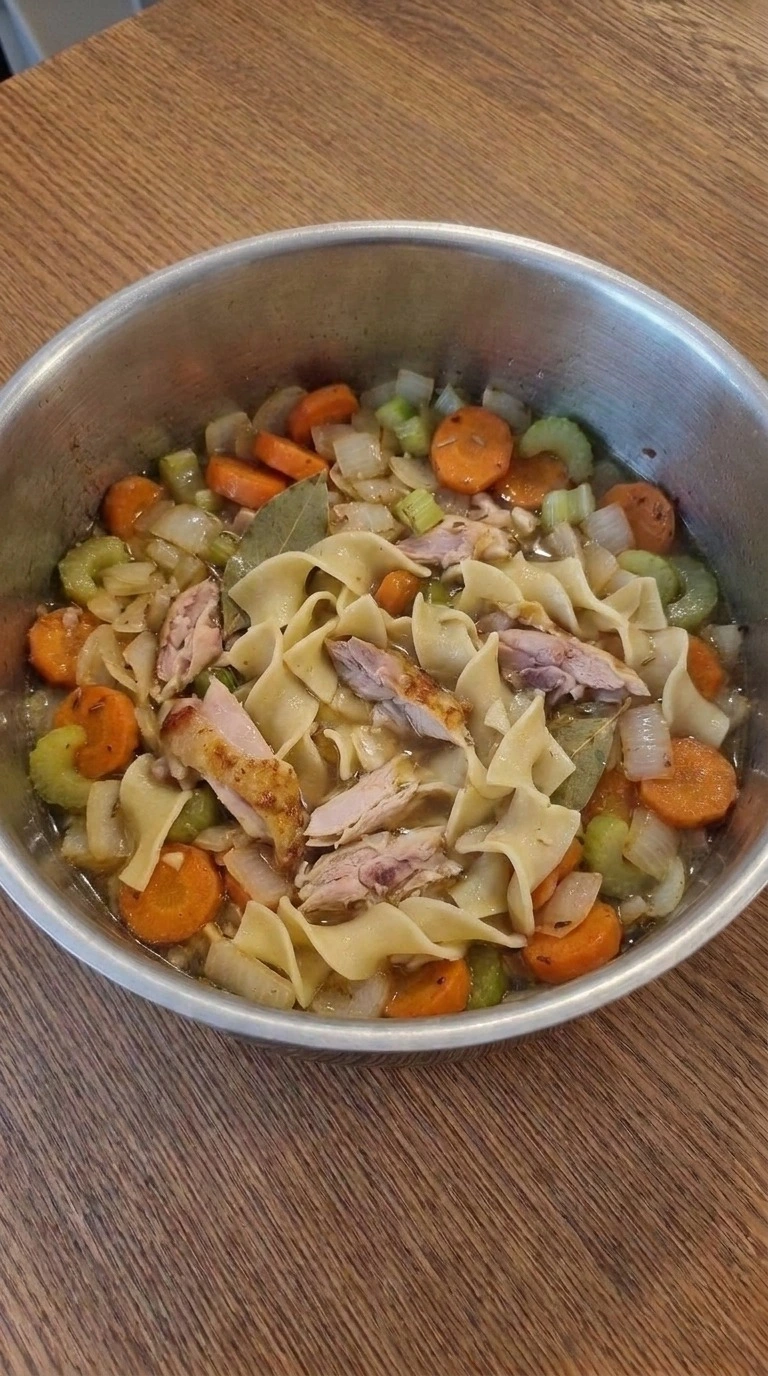
Lift out the 4 chicken thighs and shred them into uneven bite-size pieces while the broth stays at a gentle 195°F to 200°F simmer. Remove the bay leaves. Add the gluten-free wide egg noodles and cook for 6 to 8 minutes or until they bend easily but still have a slight bite.
Stir every 2 minutes so the noodles separate instead of sticking together. The noodles should swell slightly and soften while keeping distinct edges. Then return the shredded chicken for the final 2 minutes and stir with a slow folding motion so you don’t break the noodles.
Taste one at minute 6. Go too far and gluten-free noodles can become soft and release extra starch into the broth. Short cooking protects their structure because gluten-free starches hydrate quickly.
Tip: If your noodle package lists a shorter cook time, start checking 2 minutes before that number because brands soften differently.
Step 5: Finish the soup with lemon and parsley
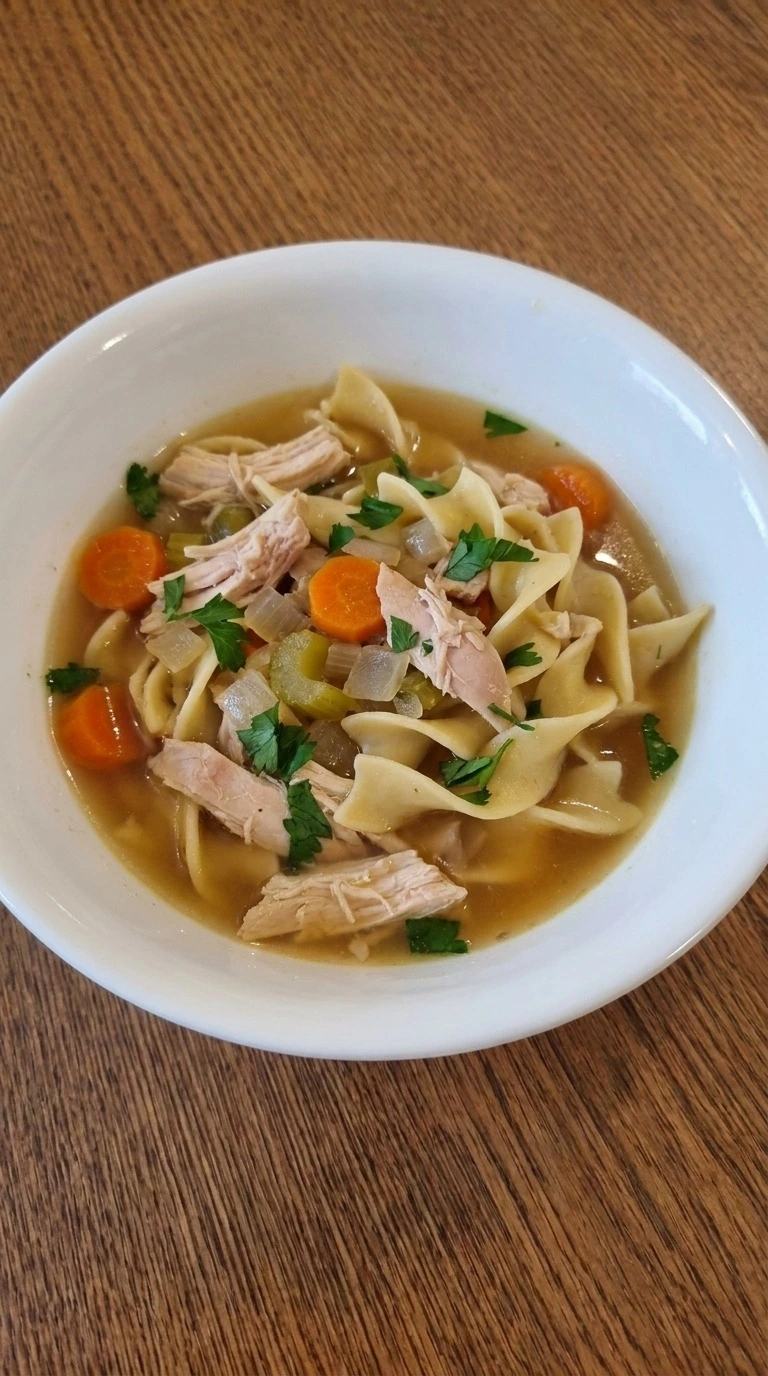
Turn the heat to low, about 2 on a 10-dial, and keep the soup around 170°F to 180°F for 2 minutes. Stir in the lemon juice, remaining 1/2 teaspoon kosher salt and remaining 1/4 teaspoon black pepper. Then fold in most of the chopped flat-leaf parsley with two slow turns so the noodles and chicken stay intact.
Taste and remove the soup from the heat. The broth should smell brighter and look clear amber with visible green parsley between the uneven chicken pieces and noodles. Ladle one serving into a soup bowl and scatter the remaining parsley over the top.
Don’t keep simmering after the lemon goes in or the noodles continue softening. Finish at low heat because gentle handling keeps the broth clear and the noodles intact.
Tip: Let each bowl stand for 3 minutes before eating so the broth cools slightly and the flavors become easier to taste.
Pro Tips
- Pat the 4 chicken thighs very dry before seasoning because even a thin film of moisture can prevent strong browning during the first 2 to 3 minutes.
- Keep the broth between 195°F and 200°F after adding the chicken. A rolling boil can toughen the meat and make the broth noticeably cloudier.
- Slice carrots and celery about 1/4 inch thick so both vegetables soften within the same 15 to 18 minute simmer without turning mushy.
- Check the gluten-free noodles 2 minutes before the package’s suggested finish time because some brands soften much faster when cooked directly in broth.
- Use a 6-quart heavy-bottomed pot so 8 cups of broth can simmer without crowding. A smaller pot makes stirring noodles harder and encourages spills.
- Wait until the final 2 minutes to return the shredded chicken. Longer simmering can make those small pieces dry even when the broth stays gentle.
- Add 1 tablespoon lemon juice only after lowering the heat. The fresh acidity should brighten the broth without tasting sharp or dominating the thyme.
- Chop the 1/4 cup parsley just before serving. Freshly cut leaves smell brighter and keep their green color better than parsley chopped 30 minutes early.
- Add 1 teaspoon smoked paprika with the dried thyme for a warmer and slightly smoky broth that still keeps the familiar chicken soup character.
- Replace 1 cup of broth with 1 cup unsweetened full-fat coconut milk after the chicken cooks for a creamier dairy-free variation with a mild coconut note.
- Add 1 cup frozen green peas during the final 3 minutes so they stay bright green and add a sweeter vegetable bite without extending the cooking time.
- Stir in 2 packed cups baby spinach during the final 60 seconds for extra greens. Stop cooking once the leaves wilt but still look vivid.
Substitutions
- Gluten-free wide egg noodles: Gluten-free brown rice noodles. Use the same 8-ounce amount but start checking them after 5 minutes. Brown rice noodles are slightly firmer and can release more starch into the broth.
- Gluten-free wide egg noodles: Egg-free gluten-free rotini. Use 8 ounces for an egg-free version and follow the package timing closely. Rotini gives the soup a springier bite and usually needs 1 to 3 extra minutes.
- Boneless skinless chicken thigh: Boneless skinless chicken breast. Use 1.25 pounds and remove the chicken as soon as the thickest part reaches 165°F. Breast meat tastes lighter but dries faster than thighs.
- Certified gluten-free low-sodium chicken broth: Certified gluten-free vegetable broth. Replace it cup for cup with 8 cups. The soup becomes less chicken-forward and slightly sweeter, so taste before adding the final salt.
- Extra-virgin olive oil: Avocado oil. Use the same 1 tablespoon amount. Avocado oil has a milder flavor and handles the roughly 400°F browning stage without changing the soup’s dairy-free profile.
Storage
Refrigerate Gluten Free Chicken Noodle Soup in airtight containers within 2 hours of cooking and keep it at 40°F or colder for up to 4 days. For freezing, the best texture comes from freezing the chicken, vegetables and broth without noodles for up to 3 months.
Leave about 1 inch of headspace in each freezer-safe container because the liquid expands. Reheat refrigerated soup over medium-low heat for about 6 to 10 minutes until it reaches 165°F.
Add 1/4 cup fresh gluten-free broth per serving if the noodles absorbed too much liquid. Discard the soup if it develops a sour smell, unusual bubbling, slimy noodles or a noticeably cloudy appearance that wasn’t present when stored.
FAQ
Yes. Make the broth, chicken and vegetables up to 2 days ahead and refrigerate them below 40°F without the noodles. When you’re ready to serve, bring the soup to a gentle 195°F simmer and cook the noodles for 6 to 8 minutes. Keeping them separate prevents swelling and keeps the broth from turning overly starchy.
Store the finished soup in an airtight container for up to 4 days at 40°F or colder. The noodles will continue absorbing broth during storage, so the soup gets thicker each day. Add about 1/4 cup fresh gluten-free broth per serving while reheating if you want a looser consistency.
Yes. Replace the gluten-free wide egg noodles with 8 ounces of certified gluten-free egg-free rotini or brown rice noodles. Start checking the texture after 5 minutes because different blends soften at different rates. Confirm the broth label is egg-free too if you’re cooking for an allergy rather than a preference.
They probably stayed in hot broth too long. Begin checking at minute 5 and remove the pot from the heat as soon as the noodles bend easily but still have a slight bite. Even after the burner is off, broth near 180°F continues softening gluten-free starches for several minutes.
Yes, but use at least a 10-quart pot for a double batch so the soup has room to circulate. Double every ingredient and keep the same 195°F to 200°F simmer rather than increasing the heat. The chicken may need 2 to 4 extra minutes to reach 165°F because the larger batch recovers heat more slowly.
Freeze the chicken, vegetables and broth without the noodles for up to 3 months. Cool the soup completely and leave about 1 inch of space in the freezer container for expansion. Thaw overnight in the refrigerator and reheat to 165°F, then add fresh gluten-free noodles and cook them for 6 to 8 minutes.
Serve it with a simple green salad or toasted gluten-free bread for a fuller meal. Warm the bread at 350°F for 6 to 8 minutes so the edges become crisp while the center stays soft. A squeeze of lemon at the table also works well if you prefer a brighter broth.
Chicken noodle soup became a household staple long before gluten-free noodles were widely available. Today, rice and corn blends can mimic the familiar tender noodle texture surprisingly well.