

There’s something about a basket of warm Parker House Rolls that makes a holiday dinner feel complete. The tops are golden and soft. Pull one apart and you’ll find a light fluffy center with a buttery fold that practically begs for another swipe of butter. And that smell? It’s the kind that brings everyone into the kitchen before dinner’s even on the table. I’ve always loved how a simple pan of homemade bread can turn an ordinary meal into something worth gathering around.
These easy parker house rolls use basic baking ingredients and a simple folding method that gives every piece its classic shape. They’re especially good next to a big bowl of Loaded Baked Potato Soup when you want something warm and filling. You don’t need fancy ingredients or professional baking skills. Just give the dough time to rise. And if you’re planning a Thanksgiving spread, these soft homemade dinner rolls deserve a spot beside the turkey and gravy. You can make the dough ahead and let the final rise happen while the rest of dinner takes shape.
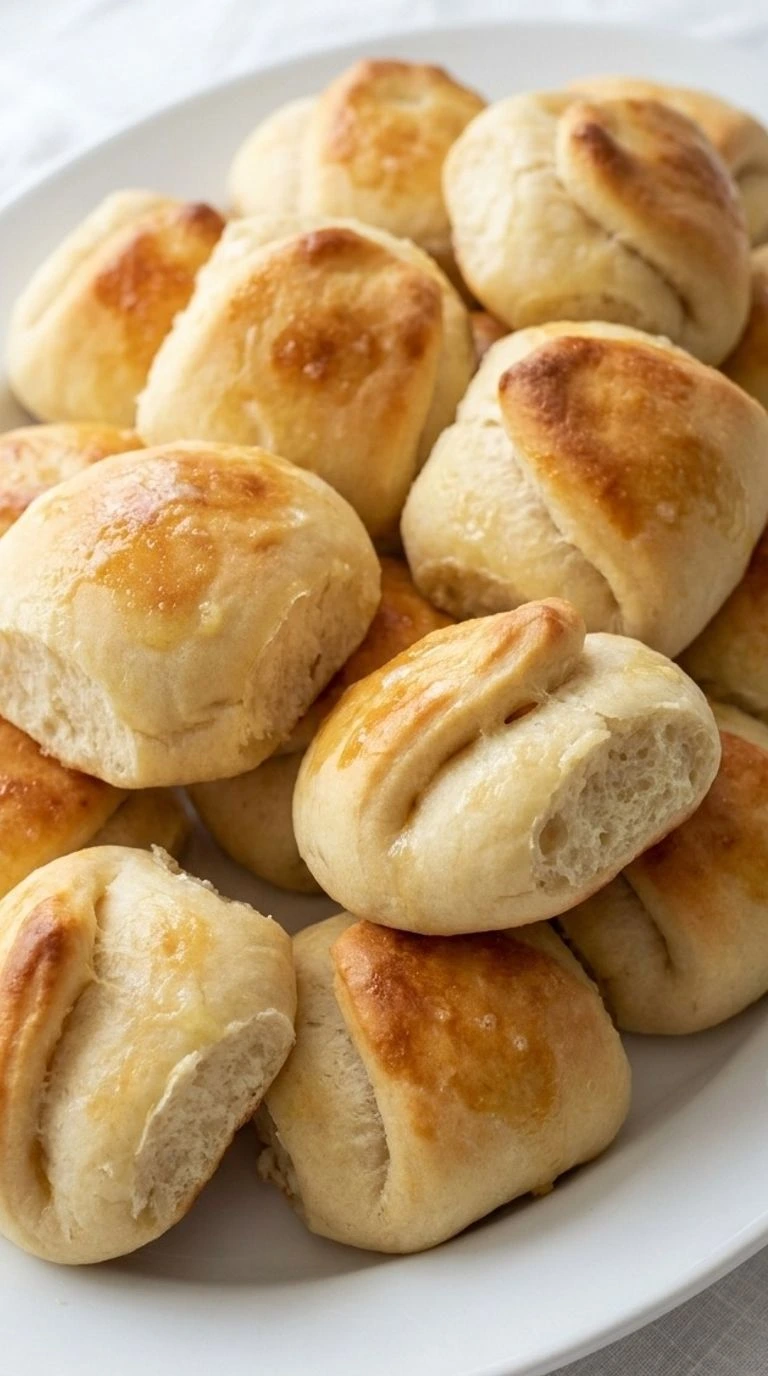
They’re rich without feeling heavy and tender enough to pull apart with your fingers. Plus the golden tops look lovely piled into a bread basket. Keep a little extra butter nearby. Someone always asks for it.
Why This Recipe Works
Parker House Rolls get their soft crumb from whole milk and butter, which help keep the baked bread tender. Kneading for 8 to 10 minutes builds enough gluten to trap yeast gas while the first rise lets the dough expand before shaping.
The offset fold also gives each roll a buttery pocket instead of a plain round center. Then a 375°F oven browns the tops without drying the middle before it reaches 190°F to 200°F.
If you enjoy rich homemade bakes, our Cookies and Cream Cinnamon Rolls offer another sweet way to use yeast dough.
Ingredients
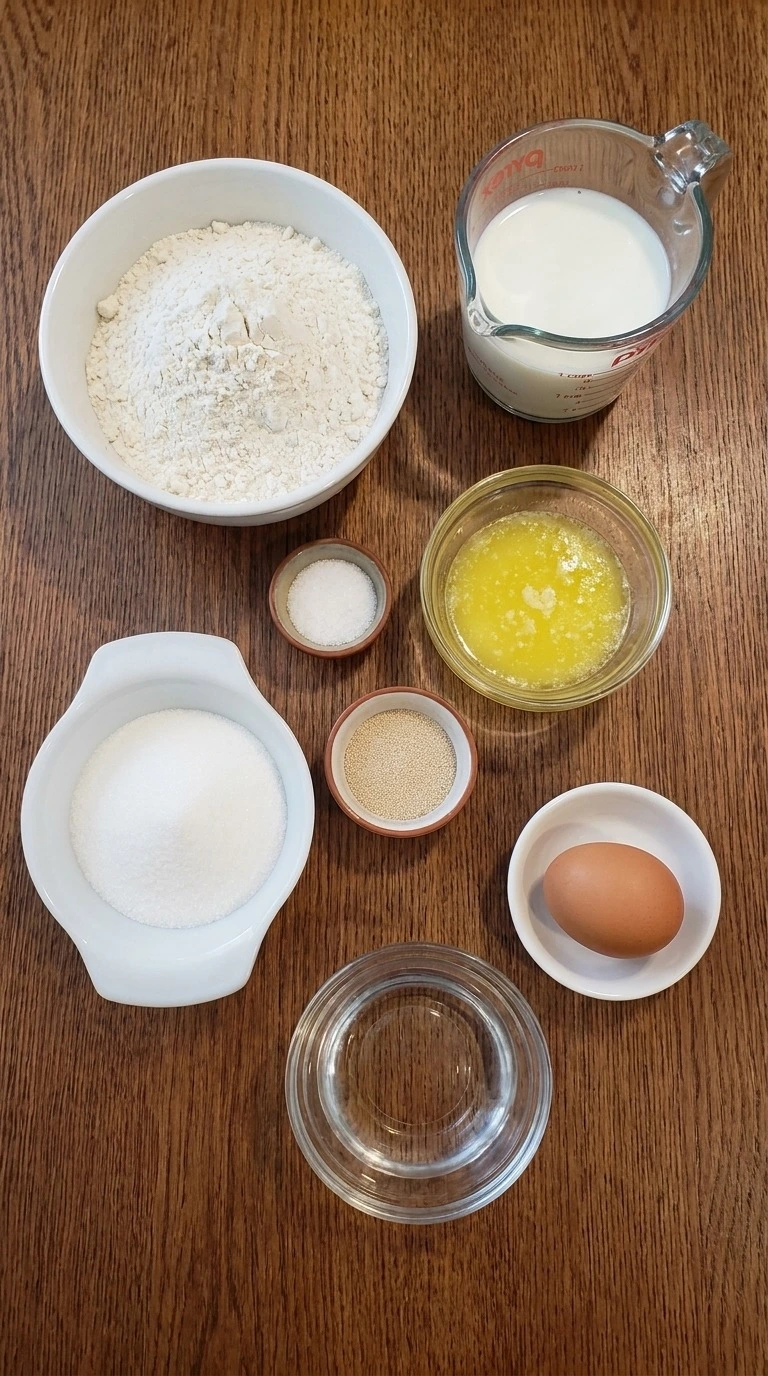
- unbleached all-purpose flour: Spoon into the measuring cup and level the top to avoid excess flour. Provides a tender but sturdy dough.
- whole milk: Warm to 105°F to 110°F before adding the yeast. Adds richness and helps the bread brown.
- active dry yeast: Use one standard packet and check its expiration date. Creates the gas that makes the dough rise.
- granulated white sugar: Dissolve in the warm milk to lightly sweeten the dough and support yeast activity.
- large egg: Bring close to room temperature before mixing. Adds richness and helps create a soft crumb.
- unsalted butter: Melt and divide into 3 tablespoons for the dough, 1 tablespoon for shaping and 1 tablespoon for brushing after baking.
- fine sea salt: Mix evenly with the flour to balance the sweetness and help strengthen the dough.
Equipment
- Large mixing bowl: Use a 4-quart glass or stainless steel bowl for kneading and the first rise because a smaller bowl may overflow as the dough doubles.
- Instant-read kitchen thermometer: Choose a fast digital model that reads between 100°F and 200°F so you can check both warm milk and the baked centers without guessing.
- Measuring cups and spoons: Use level dry measuring cups and marked liquid cups for accurate amounts because excess flour makes the rolls dense.
- Rolling pin: A 15-inch rolling pin helps form an even dough sheet, while a short pin also works if you roll in smaller passes.
- Bench scraper or dough cutter: A straight-edged 6-inch scraper cuts the soft dough into neat rectangles without dragging the folds out of shape.
- 9 by 13-inch rectangular metal baking pan: A light-colored pan holds all 18 folded rolls in three rows of six, while a dark pan may brown their bottoms faster.
- Pastry brush: A 1-inch silicone or natural-bristle brush spreads butter thinly over the dough and baked tops without flattening the folds.
- Clean kitchen towel or reusable bowl cover: Choose a cover large enough for a 4-quart bowl and 9 by 13-inch pan so the dough stays moist without being compressed.
Instructions
Step 1: Mix and Knead the Soft Yeast Dough
Warm the whole milk to 105°F to 110°F. Stir in the granulated white sugar and sprinkle the active dry yeast over the milk. Leave it for 5 to 10 minutes until small bubbles and a light foam form on top. Then whisk in the large egg and 3 tablespoons of melted unsalted butter that has cooled below 110°F.
Add the unbleached all-purpose flour and fine sea salt. Stir until you have a rough dough with no dry flour left. Knead for 8 to 10 minutes by hand using the heel of your palm to push and fold the dough. Turn it a quarter turn between folds.
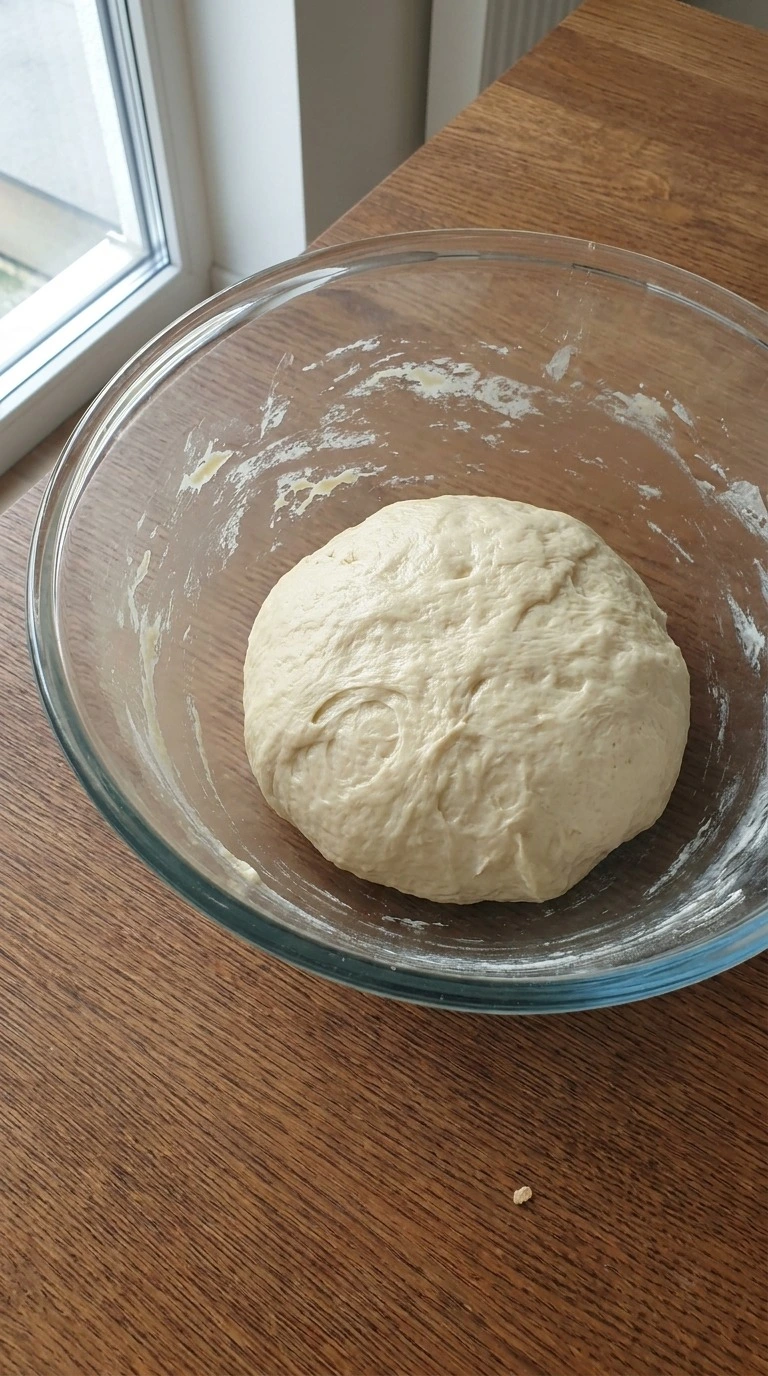
The dough should look smooth and feel soft with a slight tackiness. It shouldn’t leave thick paste on your fingers. Don’t add lots of extra flour because that makes the rolls dense. The gentle kneading builds gluten so the bread can hold the gas made by the yeast.
Tip: If the dough clings heavily after 5 minutes of kneading, dust your hands with 1 teaspoon of flour instead of adding a large handful.
Step 2: Let the Dough Rise Until Doubled
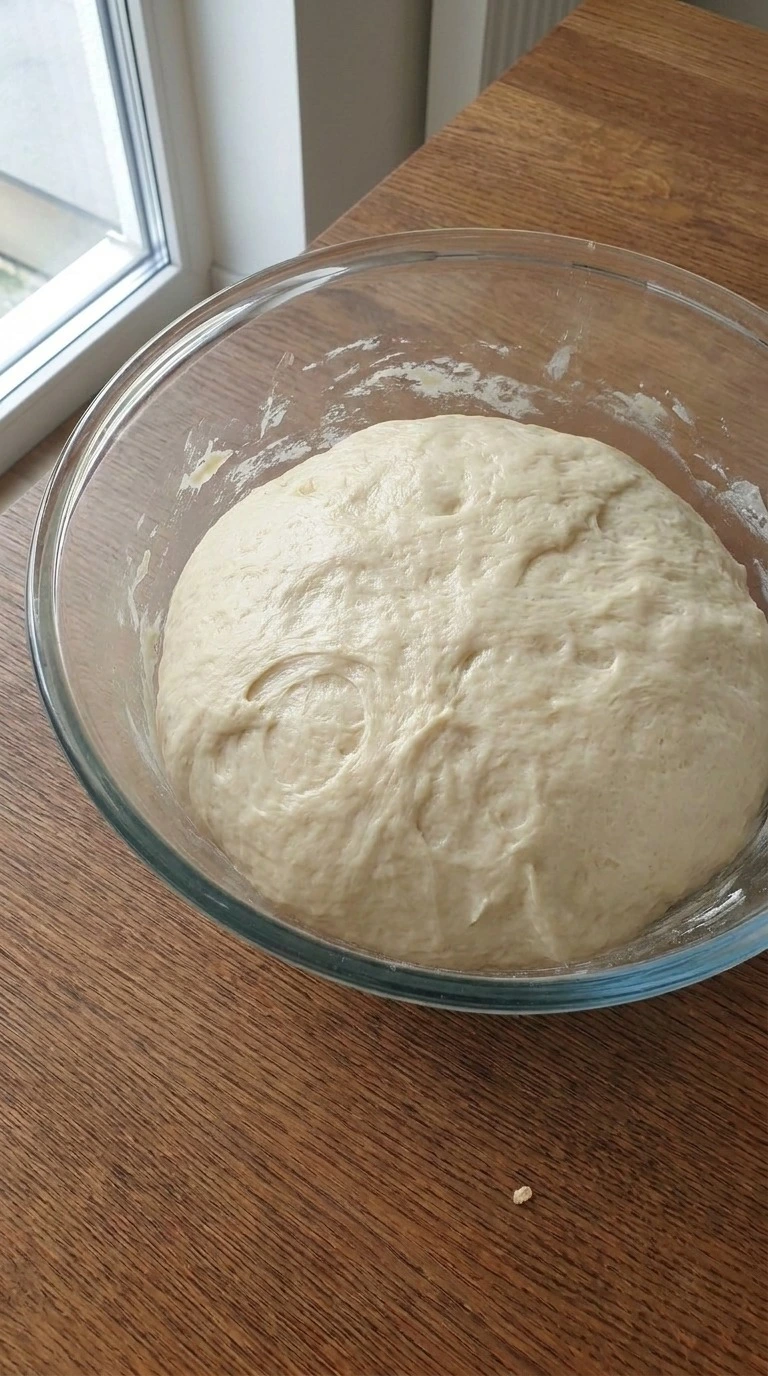
Gather the kneaded dough into a smooth ball and place it back in the bowl. Cover the bowl and set it in a draft-free spot around 75°F to 80°F. Let the dough rise for 60 to 90 minutes until it looks nearly twice its starting size. Check the volume rather than relying on the clock alone because a cool kitchen slows yeast activity.
Next, press one floured fingertip about half an inch into the dough. If the dent slowly fills partway, the first rise has gone far enough. The dough should feel light and pillowy. You’ll see a rounded top with tiny air pockets under the surface.
Don’t leave it until the dough collapses because that can weaken its structure. A full first rise builds gas for a soft crumb.
Tip: Mark the starting height with a small piece of tape on the bowl so you can spot a twofold rise without guessing.
Step 3: Cut and Fold the Classic Roll Shapes
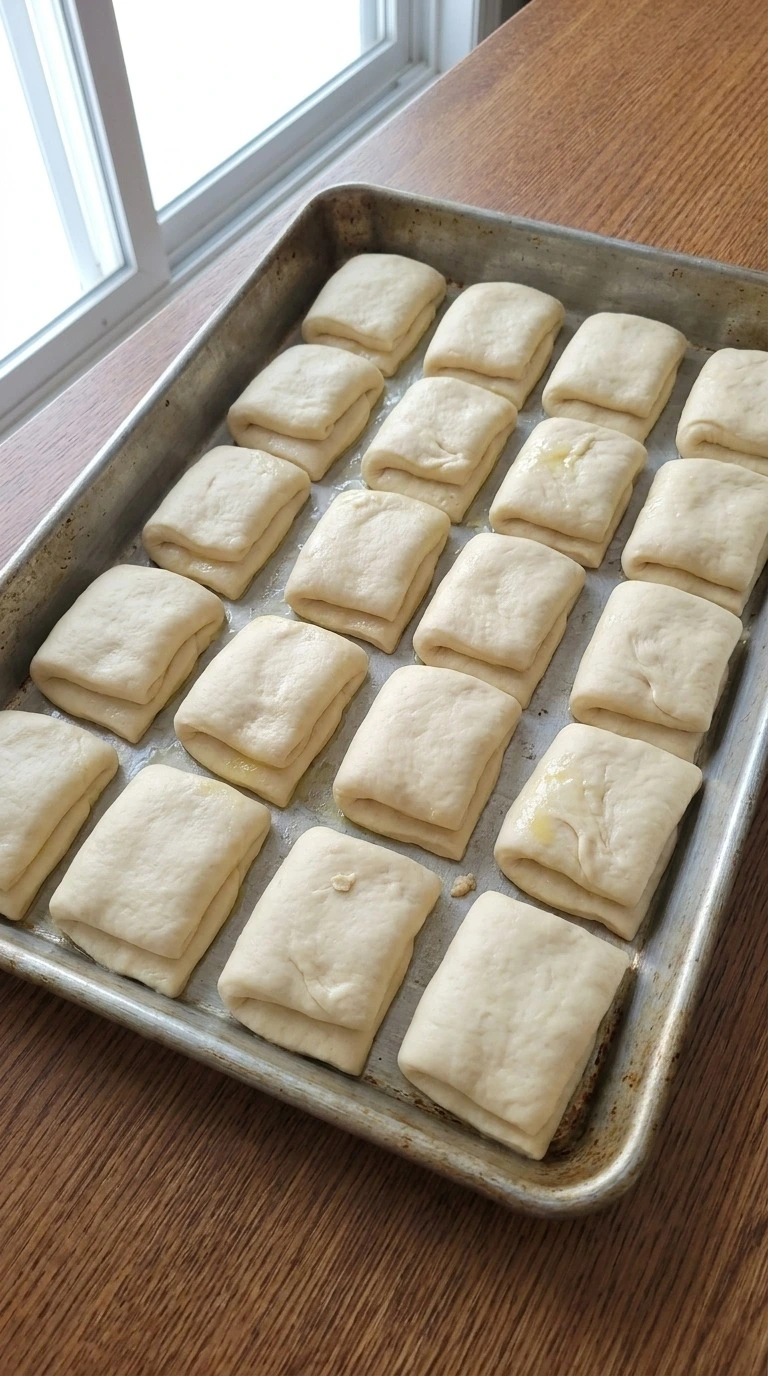
Turn the risen dough onto a lightly floured work surface and press out the large air pockets. Roll it into a rectangle measuring about 12 by 18 inches with an even thickness near 1/4 inch. Cut it into 18 rectangles measuring roughly 4 by 3 inches each. Brush the tops lightly with 1 tablespoon of melted unsalted butter.
Then fold each rectangle across its 4-inch length so the top flap ends just short of the bottom edge. Press gently near the fold so it stays closed. Arrange the pieces in three rows of six inside a greased 9 by 13-inch baking pan. Each piece should show a clear folded edge and a slightly longer lower flap.
Small size differences are fine. If you press the entire roll flat, it won’t puff as freely. The offset fold forms the classic split and tender middle.
Tip: Use a ruler for the 12 by 18-inch dough sheet, but don’t trim every edge. Slight differences give the 18 rolls a natural homemade shape.
Step 4: Proof the Shaped Rolls Until Puffy
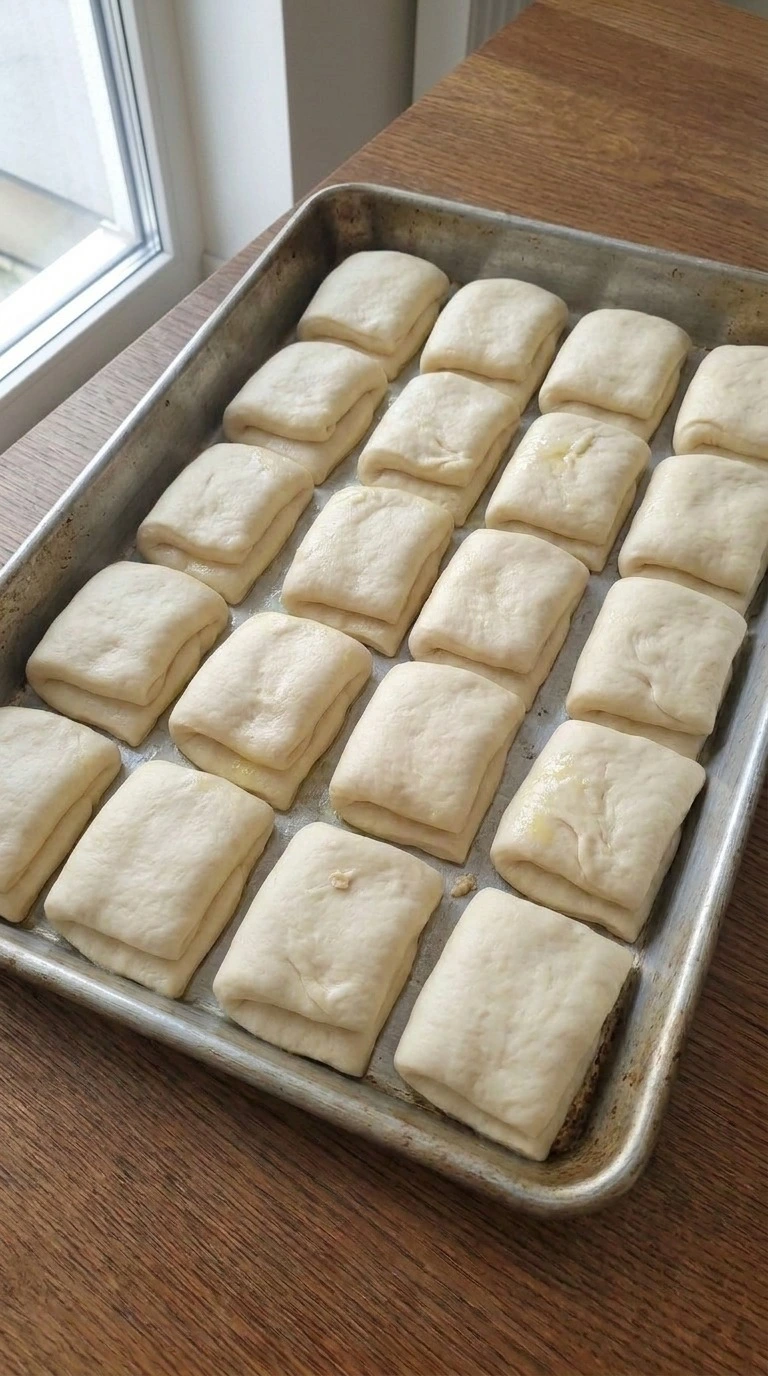
Cover the pan loosely and let the 18 shaped pieces rise at 75°F to 80°F for 35 to 50 minutes. The dough should grow taller and fill most of the gaps between the rolls. Keep the cover loose so it doesn’t press the folds flat. Meanwhile, set your oven to 375°F about 20 minutes before the second rise ends.
Check the dough after 35 minutes because the warmth of your kitchen can speed things up. The pieces should look fuller and gently touch along several edges without losing their folded shape. You’ll notice soft domed tops and seams that have opened a little. That’s what you want.
Don’t wait until the dough starts to sag. This shorter second rise helps the rolls spring upward in the oven.
Tip: If your kitchen runs below 68°F, let the dough rise in an unheated oven with the light on, provided it stays under 85°F.
Step 5: Bake Until Golden and Brush With Butter
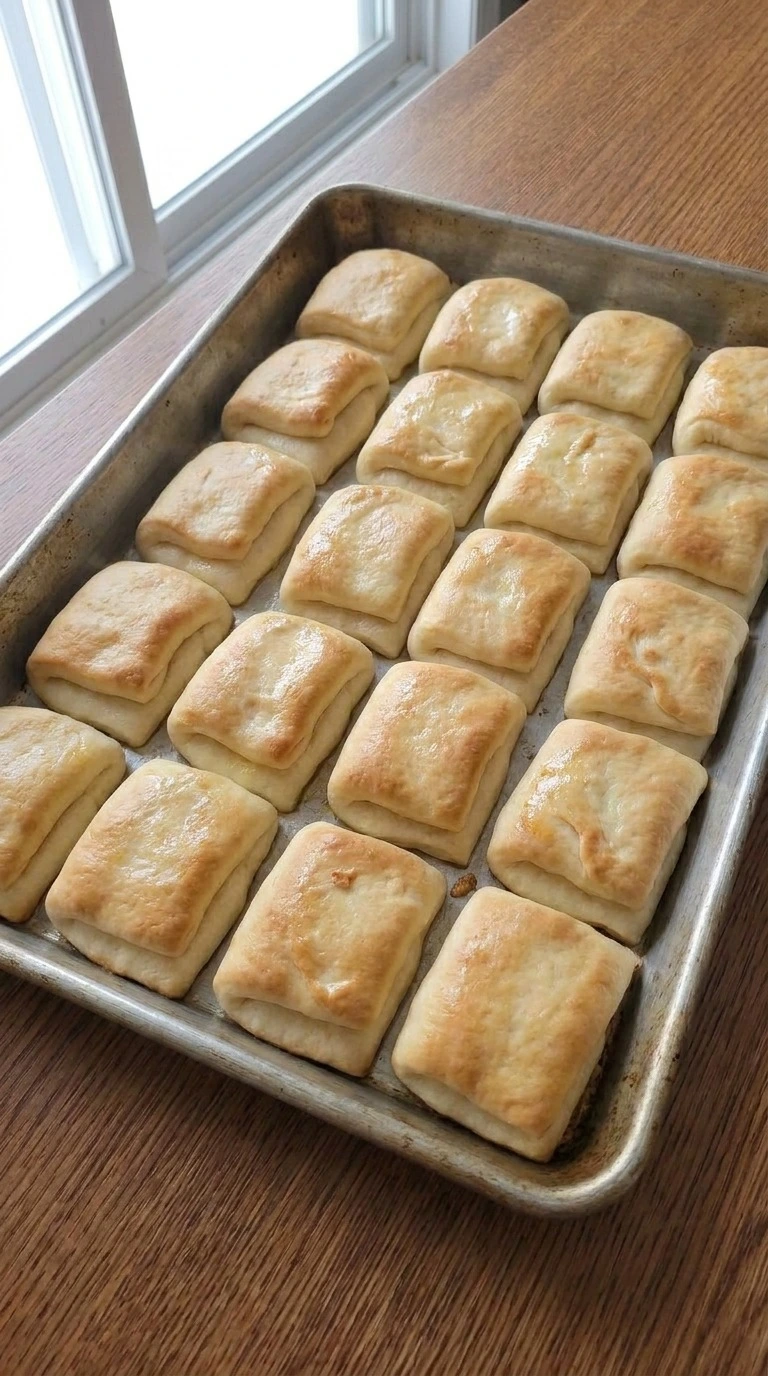
Place the risen pan on the middle oven rack and bake at 375°F for 18 to 22 minutes. Start checking at minute 18 and rotate the pan once halfway through if your oven browns unevenly. The tops should turn golden brown while the folded edges remain a little lighter. Use an instant-read thermometer to check a center roll.
Aim for 190°F to 200°F inside. Once the rolls reach that range, take the pan out and brush the remaining 1 tablespoon of melted unsalted butter across the warm tops. Let them settle in the pan for 5 minutes. Look for thin amber crusts and soft sides where the rolls touch.
You’ll smell warm butter and fresh bread. Don’t let the tops turn dark brown because they’ll lose moisture. Baking to the right center temperature keeps the crumb light without leaving doughy patches.
Tip: For deeper color without a hard crust, move the baking pan one rack higher during the final 2 minutes if the tops still look pale.
Step 6: Separate and Serve the Warm Rolls
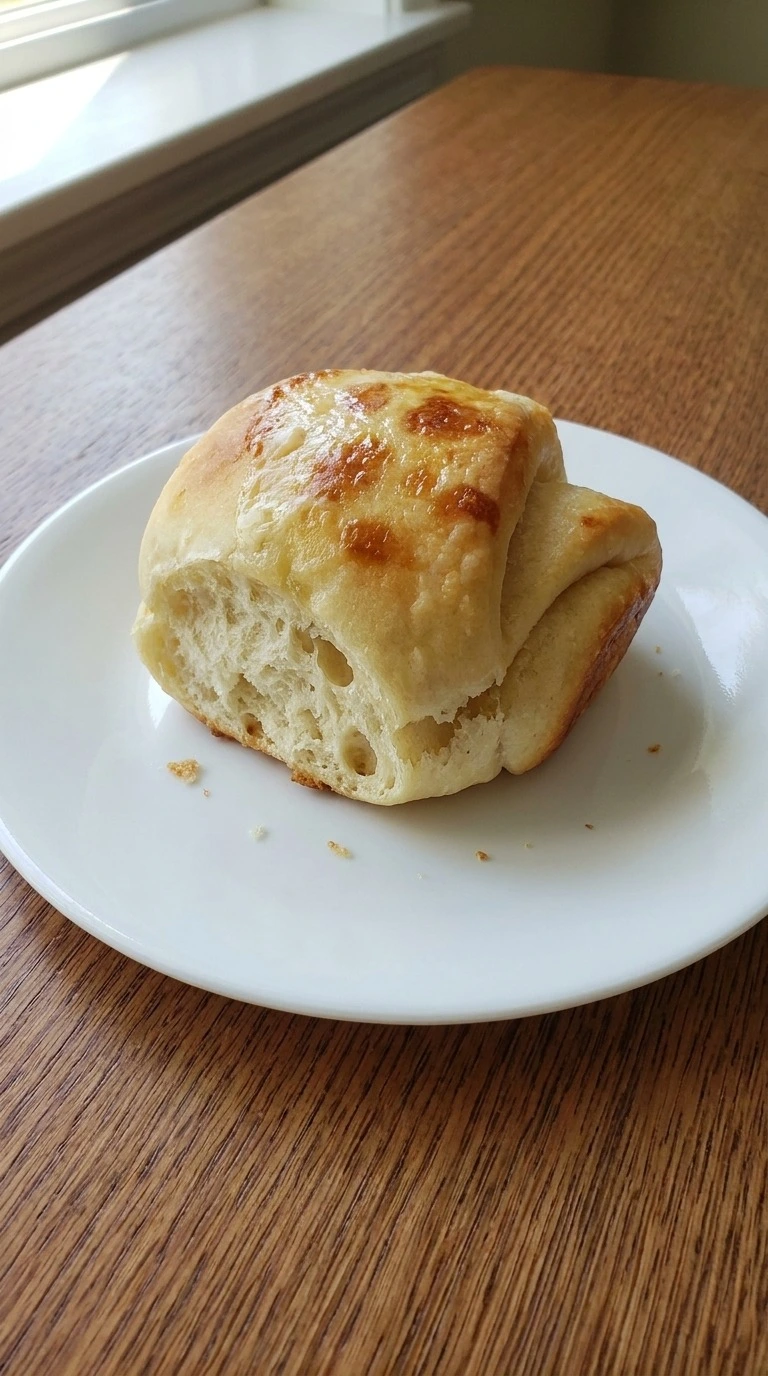
Let the baked rolls rest for 5 minutes after brushing them with butter. Then lift one from the edge of the pan and ease the touching sides apart with your fingers. Move a warm roll to a serving plate and open its fold slightly to show the soft center.
Keep the rest loosely covered until dinner. If the rolls have cooled too much, warm them at 300°F for 4 to 5 minutes before serving. Don’t pull hard while they’re fresh from the oven because the tender crumb can tear unevenly.
The bread should open with a light pull and show small soft air pockets. Each bite should feel tender rather than gummy. Give the rolls a short rest so the crumb sets before serving.
Tip: For a buffet, keep the remaining rolls loosely covered in a bread basket and serve within 30 minutes for the best soft texture.
Pro Tips
- Weigh 420 grams of unbleached all-purpose flour for the most consistent dough. Too much flour creates dry rolls with a tight crumb.
- Warm the whole milk to 105°F to 110°F before adding yeast. If it feels hot rather than comfortably warm, check it with a thermometer.
- Knead the dough for 8 to 10 minutes until the surface looks smooth and feels slightly tacky. Don’t keep adding flour to remove every trace of stickiness.
- Roll the dough to roughly 1/4 inch thick before cutting. A much thicker sheet makes the folded pieces bulky and less even.
- Use a light-colored 9 by 13-inch baking pan for the 18 rolls. Dark metal can brown the bottoms before the centers reach 190°F.
- For holiday baking, shape the dough up to 12 hours ahead and refrigerate it covered. Let the rolls grow visibly puffy before they go into the oven.
- Keep the upper flap slightly shorter than the lower flap when folding each rectangle. This small difference creates the familiar split along the side.
- Brush the hot tops with 1 tablespoon of melted unsalted butter after baking. The thin coating softens the crust and adds a rich finish.
- For rosemary butter rolls, mix 1 teaspoon of finely chopped fresh rosemary into the final tablespoon of melted butter before brushing the warm tops.
- For honey butter rolls, combine 1 teaspoon of mild honey with the final tablespoon of melted unsalted butter for a lightly sweet finish.
- For garlic herb rolls, stir 1/4 teaspoon of garlic powder and 1 teaspoon of finely chopped fresh parsley into the finishing butter.
- For savory holiday rolls, mix 1/2 teaspoon of freshly cracked black pepper into the flour and sprinkle a small pinch of flaky sea salt over the buttered tops.
Substitutions
- whole milk: Replace 1 cup of whole milk with 1 cup of unsweetened plain oat milk. Oat milk makes the dough slightly less rich and may produce a lighter crust. Warm it to 105°F to 110°F before adding the yeast. Use dairy-free baking butter as well if you’re avoiding dairy.
- unsalted butter: Replace all 5 tablespoons of unsalted butter with 5 tablespoons of dairy-free baking butter. Choose a firm baking-style butter with a high fat content rather than a low-fat spread. The rolls may have a milder flavor and slightly different crumb. Melt the replacement gently and let it cool below 110°F before mixing it into the dough.
- unbleached all-purpose flour: Use a gluten-free bread flour blend specifically formulated for yeast baking. A direct cup-for-cup swap isn’t reliable for this folded bread. Follow the blend’s liquid and binder instructions because gluten-free dough often needs more moisture. Expect a denser crumb and less defined folds. A regular gluten-free cake flour blend won’t give the same result.
- large egg: Replace 1 large egg with 3 tablespoons of unsweetened plain applesauce. The dough will be a little softer and the finished rolls may rise less and brown more lightly. Add 1 teaspoon of extra flour only if the dough feels too sticky to handle. For another comforting family meal, try our Chicken and Dumplings with Biscuits.
- active dry yeast: Replace 2.25 teaspoons of active dry yeast with 2.25 teaspoons of instant yeast. Mix instant yeast directly into the flour instead of proofing it separately. The dough may rise 10 to 15 minutes faster. Watch for the dough to nearly double rather than waiting for the full suggested time.
Storage
Keep leftover Parker House Rolls in an airtight container at room temperature for up to 2 days. They’ll stay softer this way than in the refrigerator. If you need longer storage, refrigerate them for up to 4 days but expect the crumb to firm up. For freezing, cool the rolls completely and wrap them tightly in small groups.
Place the wrapped portions in a freezer-safe bag and freeze for up to 2 months. Press out as much air as possible before sealing. To reheat, cover the rolls loosely with foil and warm them in a 300°F oven for 8 to 10 minutes. Add a light brush of fresh melted unsalted butter to bring back their soft finish.
Don’t keep rolls that show mold or develop an unusual smell or sticky surface. Discard the entire affected batch rather than cutting away spoiled spots.
FAQ
Yes. Shape all 18 rolls and arrange them in the baking pan before covering and chilling for up to 12 hours. The next day, let them stand until puffy, which may take 60 to 90 minutes depending on your kitchen. Then bake at 375°F for 18 to 22 minutes and check that the centers reach 190°F to 200°F.
Dense rolls often come from excess flour, weak yeast or dough that hasn’t risen enough. Measure 420 grams of flour and keep the milk between 105°F and 110°F when activating the yeast. After kneading, let the dough nearly double before shaping. If your kitchen is below 70°F, the first rise may take longer than 90 minutes.
You can replace the large egg with 3 tablespoons of unsweetened plain applesauce. However, the rolls may turn out a little denser and less golden because the egg adds structure and richness. Keep the oven at 375°F and check the center temperature rather than judging only by color. Aim for 190°F to 200°F.
Let the rolls cool fully before wrapping them in small groups and placing them inside a freezer-safe bag. They’ll keep their best texture for about 2 months. Thaw them while wrapped so they don’t dry out. Then cover loosely with foil and warm at 300°F for 8 to 10 minutes before serving.
Absolutely. Double every ingredient and divide the dough into 36 folded pieces after the first rise. Arrange them in two separate 9 by 13-inch baking pans so they have room to expand. Bake at 375°F and rotate the pans halfway through if needed. Check the center rolls for an internal temperature of 190°F to 200°F.
A little opening is normal because the dough expands as it bakes. However, a completely unfolded roll often means the crease wasn’t pressed firmly enough during shaping. Press gently along the fold and place each piece with its longer flap underneath. During the 35 to 50-minute second rise, keep the dough covered loosely so the folds aren’t disturbed.
These soft rolls taste wonderful with roast turkey and gravy because their folded centers catch a little sauce. They’re also great with thick soups and holiday casseroles. For an everyday dinner, serve them alongside Loaded Baked Potato Soup. Warm the rolls at 300°F for 4 to 5 minutes if they’ve cooled before serving.
These folded dinner rolls take their name from Boston’s historic Parker House Hotel, which opened in 1855. Their off-center fold creates a soft buttery pocket that makes them different from ordinary round dinner rolls. The exact story of how the fold was invented varies, but the shape has remained a favorite for generations.