

Last fall, we visited friends for a small gathering, and my friend made this Friendsgiving Pie Party dessert. Everyone kept going back for another mini pie. I watched her make the little crusts and fillings, and I noticed her secret was simple: she didn’t overload the cups. She kept each pie easy and balanced.
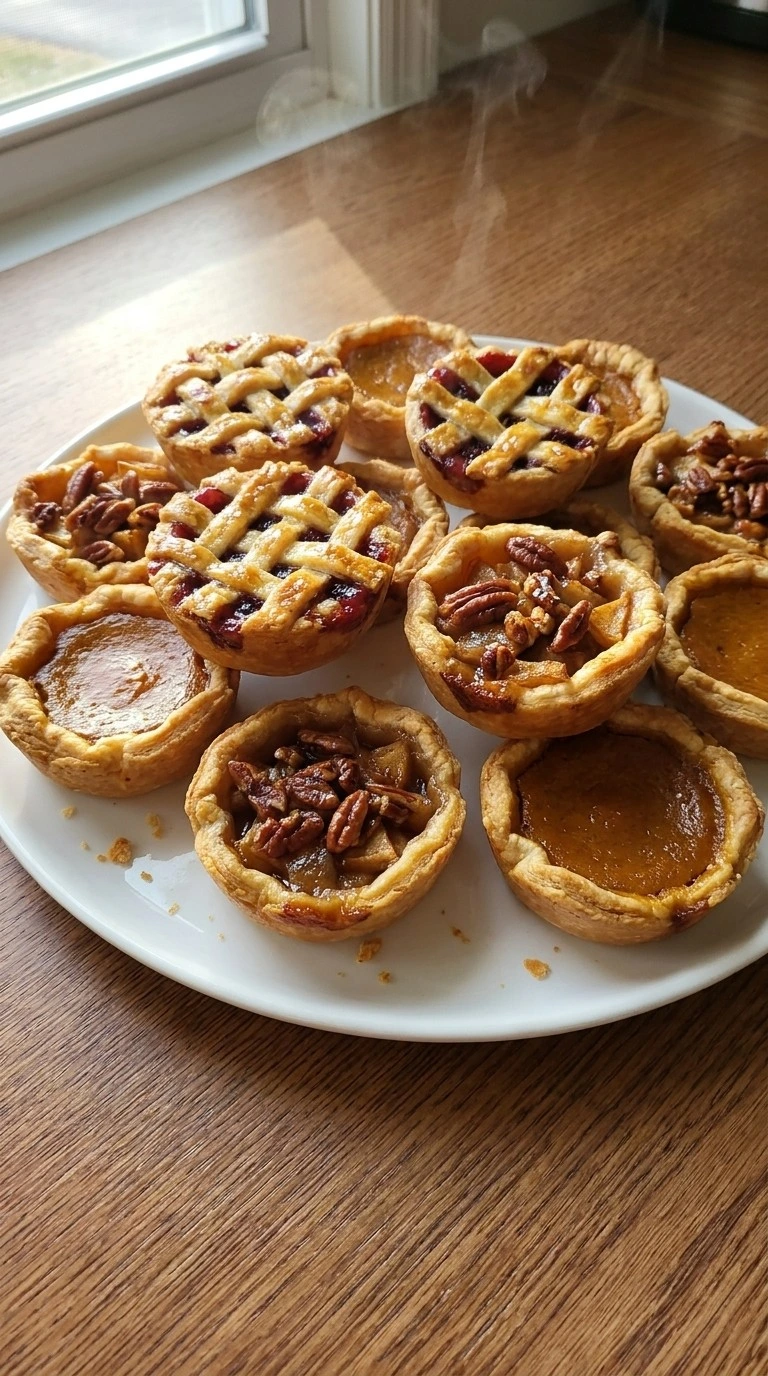
Now it’s something I make whenever we host. It actually took me three tries to get the filling texture right because my first batch was way too loose. These tiny pies are fun because everyone can grab the flavor they want without waiting for someone to cut slices. The table also feels more festive when you’ve got different fillings mixed together.
I usually serve them beside other cozy treats like Fudgy Chocolate Brownies when friends come over for dessert. A Friendsgiving Pie Party works especially well when you want something homemade that feels relaxed but still a little special. You can prepare parts ahead of time, so you won’t be stuck in the kitchen while everyone else is visiting. Guests can enjoy a mix of classic flavors, and it’s the kind of dessert that brings everyone around the table and helps create those small holiday memories.
Ingredients
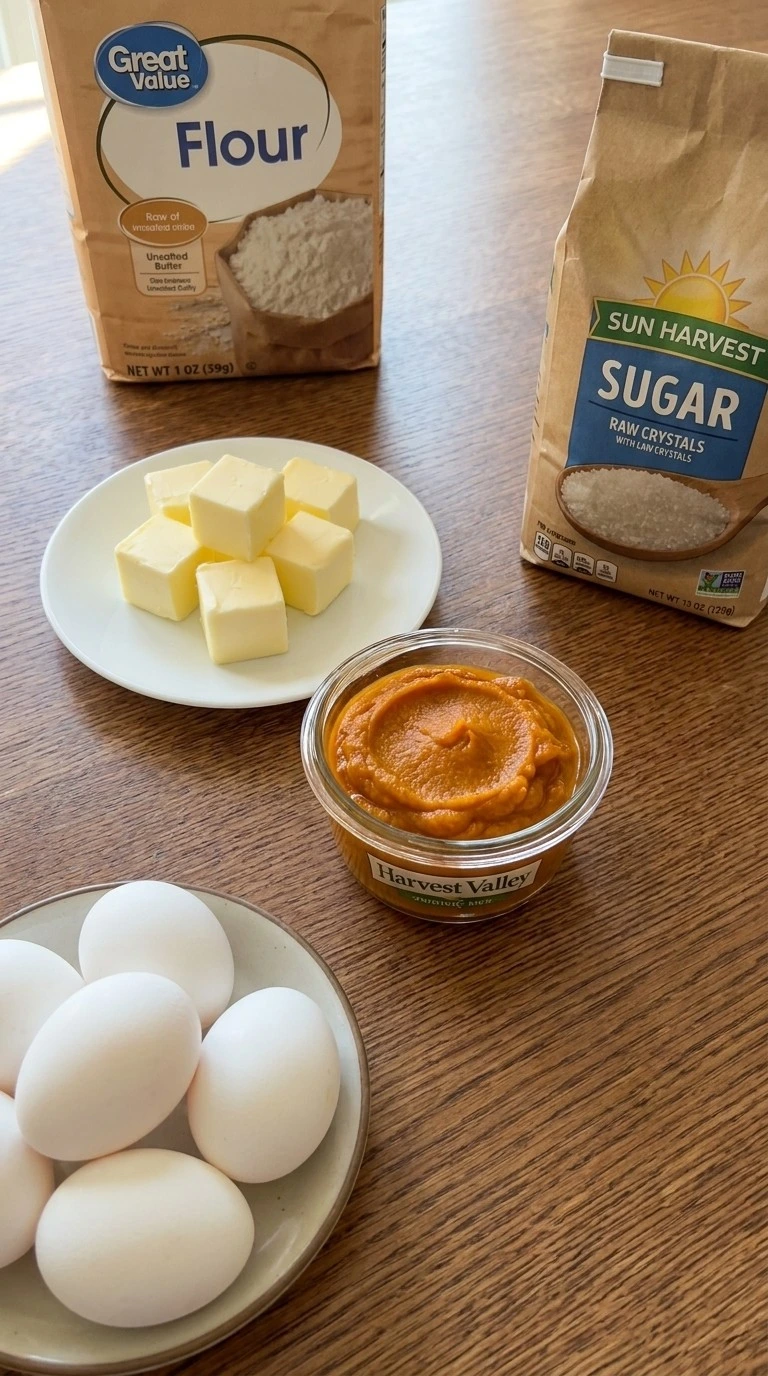
Here’s what I use for this recipe and you can always make substitutions if you prefer.
- all-purpose flour: Used for the dough base and creates the flaky structure of each mini pie crust.
- unsalted butter: Cold and cut into pieces to create buttery layers in the crust.
- cold water: Added gradually to bring the dough together without making it tough.
- granulated sugar: Sweetens the seasonal fillings and helps create a balanced dessert flavor.
- pumpkin puree: Provides a smooth autumn filling with a creamy texture.
- apple filling: Adds fruit flavor and a soft texture inside selected mini pies.
- ground cinnamon: Adds warm spice notes to the pie fillings.
- large eggs: Helps the filling set during baking.
- heavy cream: Creates a richer filling texture and smooth consistency.
Tools You’ll Need
- 9-inch rolling pin: A sturdy rolling pin helps create even dough thickness for mini pie shells and should feel comfortable because uneven pressure causes thin spots.
- 12-cup muffin pan: A standard 12-cup pan shapes the mini pies consistently and should have a strong coating because sticking can damage delicate crust edges.
- Mixing bowl: A medium bowl combines the dough ingredients evenly and should have enough space to prevent flour spilling during mixing.
Instructions
Step 1: Mix the pie dough
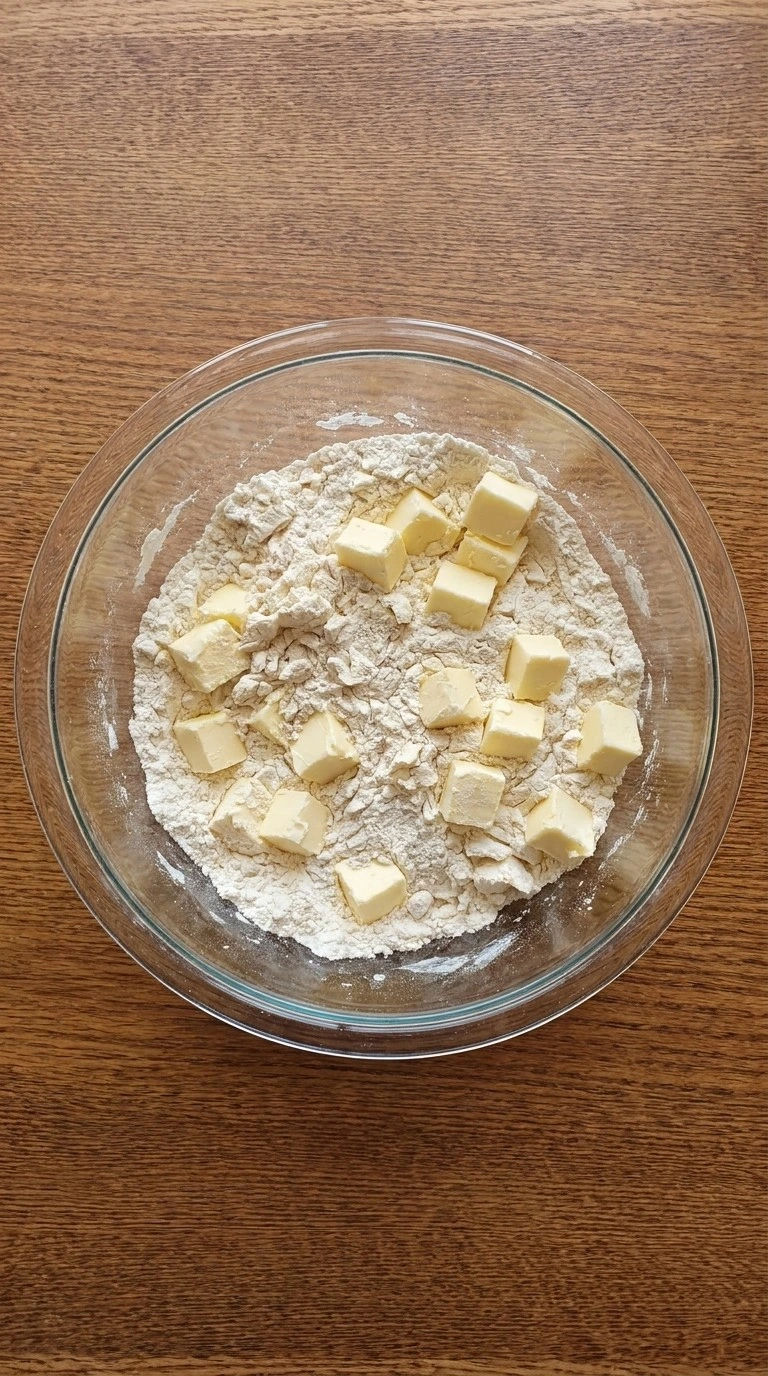
Preheat the oven to 375°F. Combine 2 cups all-purpose flour, 1 cup unsalted butter and 1/3 cup cold water in a bowl at room temperature for 8 to 10 minutes. Cut the butter into the flour using a pastry cutter motion until coarse crumbs form.
Fold the dough gently until it holds together. The dough should look shaggy with small butter pieces visible and smell lightly buttery. Chill it at 375°F is not needed here, but keep the dough cold for 30 minutes before shaping.
Skip the chill and the crust can shrink while baking. Resting the dough 30 minutes keeps gluten relaxed for a tender crust.
Tip: Measure flour by spooning it into the cup and leveling it because packed flour makes the crust dry.
Step 2: Shape the mini pie shells
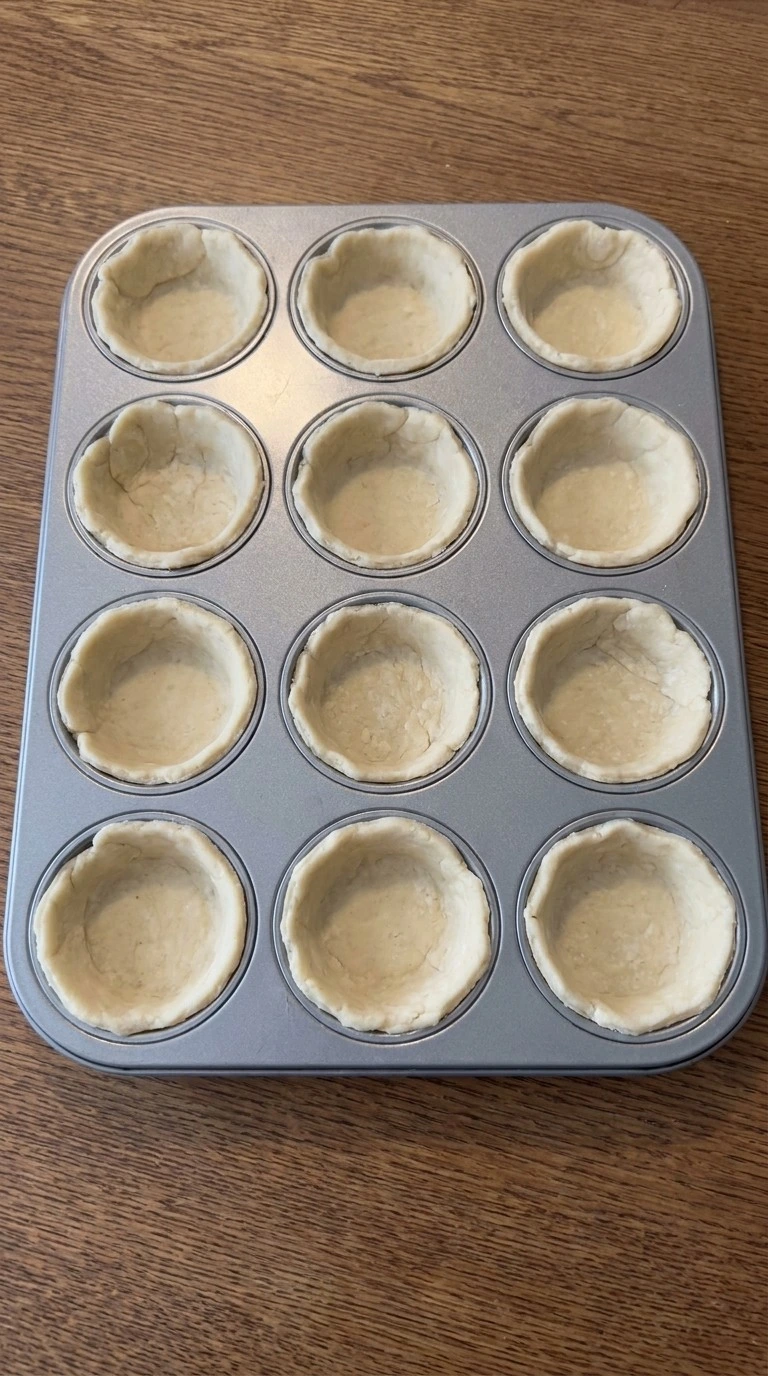
Roll the chilled dough on a lightly floured surface for 8 to 12 minutes and press portions into small pie cups. Use your fingers to press the dough evenly against the sides and create slightly uneven handmade edges. Bake the empty shells at 375°F for 10 minutes until lightly set.
The crust edges should look pale golden and feel firm while the center stays soft. You’ll smell toasted butter when the shells are ready. Miss this timing and the crust may become tough instead of flaky.
(I tested a thicker crust first and the filling ratio felt wrong. A thinner shell gives the best balance. ) Partial baking protects the crust structure before adding wet fillings.
Tip: Keep the shaped shells slightly uneven because homemade edges bake more naturally than perfect circles.
Step 3: Fill the pie shells
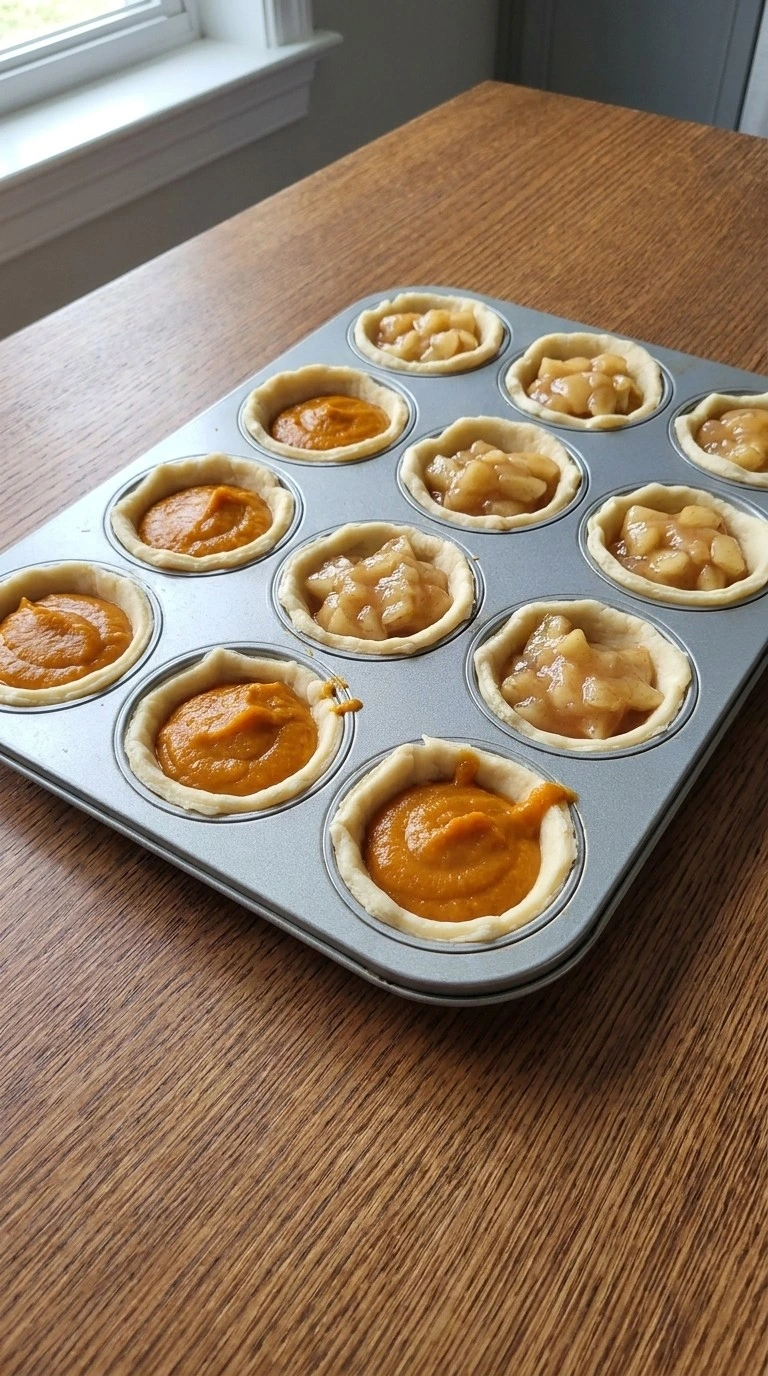
Add pumpkin filling and fruit fillings into the prepared shells at 350°F baking temperature for the next stage. Spoon the mixtures carefully and leave a small space below the edge. Use a gentle circular motion to spread the filling without pressing the crust down.
The fillings should look smooth with different colors across the pies. You’ll see the pumpkin surface become glossy and the fruit fillings settle naturally. Overfilling causes bubbling and messy edges during baking.
Bake the filling until the center sets because controlled heat prevents cracking.
Tip: Fill each shell only three quarters full so the topping area stays clean after baking.
Step 4: Bake the mini pies
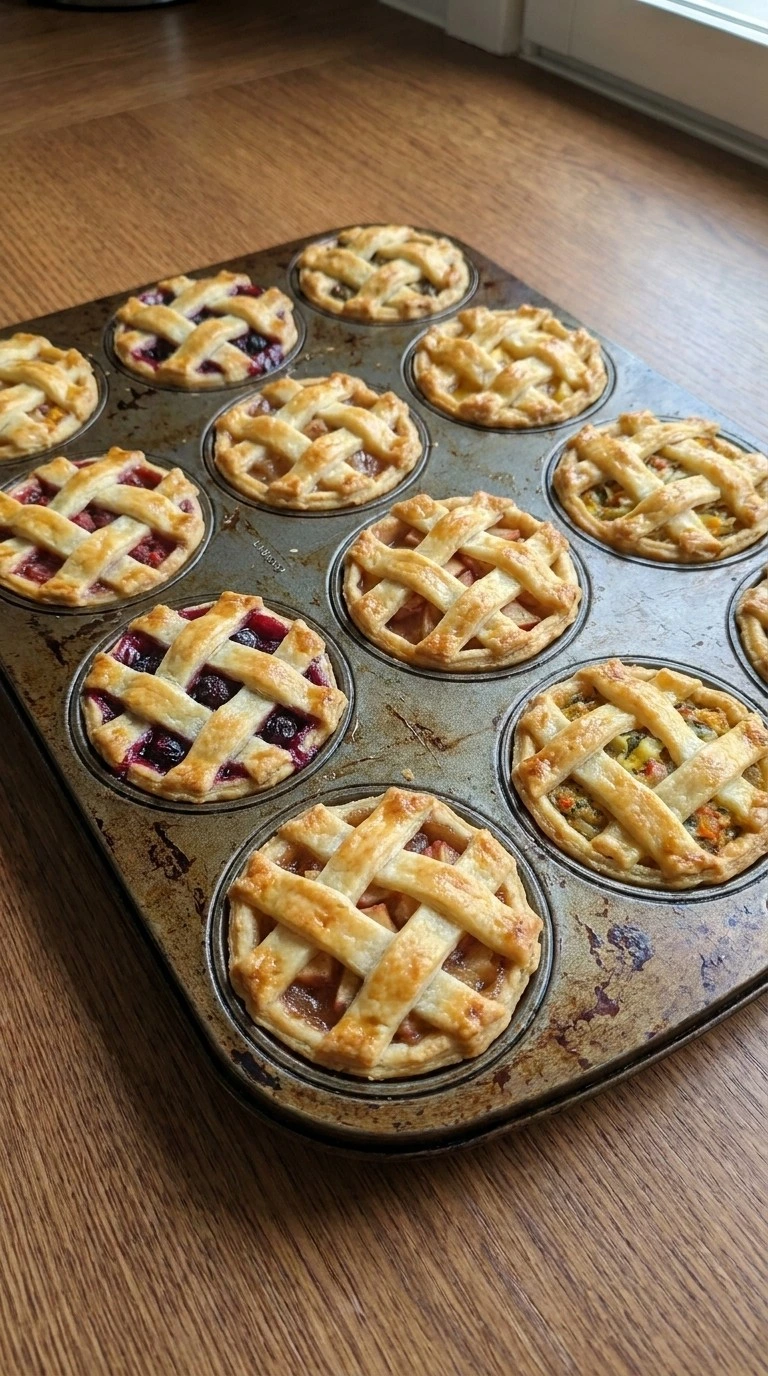
Bake the filled mini pies at 350°F for 25 to 30 minutes until the crusts deepen to golden brown. Rotate the tray halfway through baking and check the centers with a gentle touch. The pies should stay in place while the filling becomes firm.
The tops should show uneven browning and the crust should sound slightly crisp when tapped. You’ll smell warm spices and baked butter near the end. Go past 30 minutes and delicate fillings may dry out.
The right baking temperature sets the filling while keeping the crust tender.
Tip: Let the pies rest for at least 20 minutes because hot filling is softer than cooled filling.
Step 5: Plate and serve the pies
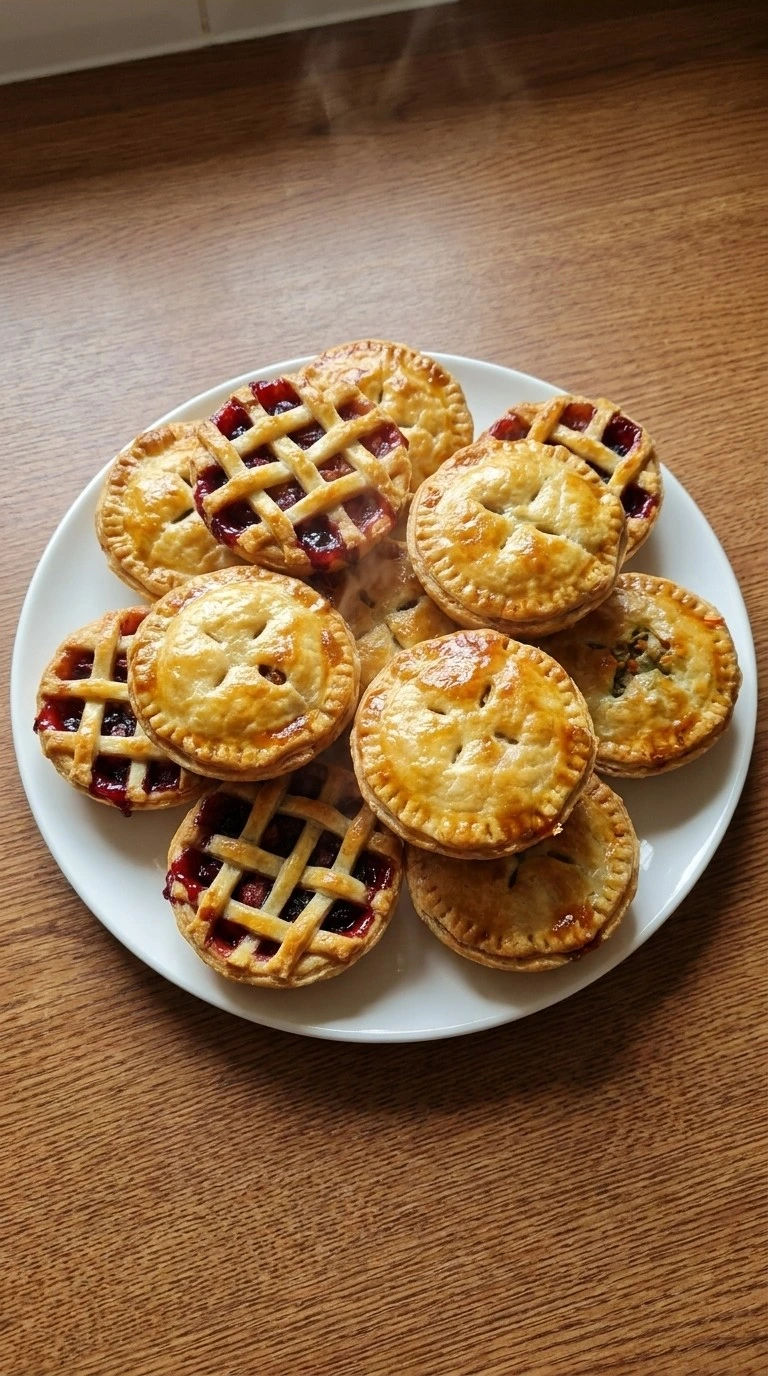
Transfer the baked mini pies onto a serving plate and arrange them loosely for 5 minutes before serving. Add small finishing touches while keeping natural gaps between different flavors. Use a gentle lifting motion so the crust edges stay intact.
The finished Friendsgiving Pie Party should show golden crusts, varied fillings and handmade shapes. Each pie should have slight differences in color and texture. (My first serving attempt was too rushed and the warm centers slid out.
) Cooling briefly helps the fillings hold their structure.
Tip: Serve different pie flavors together so guests can compare textures and fillings.
Pro Tips
- Chill the pie dough for at least 30 minutes before shaping because cold butter creates flaky layers and prevents shrinking during the 350°F bake.
- Choose pure pumpkin puree instead of pumpkin pie filling for better control over sweetness and spice. The label difference changes the final flavor balance.
- Bake a test mini pie first when making a large batch because one extra minute past 30 minutes can dry the filling edges.
- Use a 12-cup muffin pan with light-colored metal when possible because dark pans can brown the crust too quickly at 350°F.
- Don’t fill the shells above three quarters full because bubbling filling can overflow and cover the golden crust edges.
- Let the pies cool for 20 minutes before serving because the filling texture becomes cleaner and easier to hold.
- Add 1/2 cup chopped pecans to the pumpkin filling for a crunchy holiday twist with a nutty texture.
- Replace half of the pumpkin filling with apple cinnamon filling for a mixed Friendsgiving Pie Party tray with different flavors.
- Use 1 teaspoon orange zest and 1/2 cup fresh cranberries for a brighter seasonal variation.
- Create a chocolate version by adding 1/2 cup melted dark chocolate to the filling for a deeper dessert flavor.
Storage Instructions
Keep baked Friendsgiving Pie Party mini pies in an airtight container in the refrigerator for up to 4 days. You can freeze them for up to 2 months when wrapped individually in plastic wrap and placed inside a freezer container.
Thaw frozen pies overnight before serving so the filling texture stays smooth. Reheat individual pies at 325°F for 8 to 10 minutes until the crust feels crisp again.
Avoid microwaving because it softens the crust quickly. Discard pies with sour smells, watery filling, mold spots or unusual texture changes.
Print
Friendsgiving Pie Party
- Total Time: 60 minutes
- Yield: 12 mini pies servings 1x
Description
This easy Friendsgiving Pie Party recipe brings together simple mini pies with flaky crusts and sweet seasonal fillings for a quick holiday dessert. The best part is the simple preparation and healthy balance of homemade ingredients. These little pies are great ideas for a holiday party, brunch, meal prep or potluck. The trick is baking until the crust turns golden while the centers stay soft. You’ll love the warm smell and rustic texture.
Ingredients
- 2 cups all-purpose flour
- 1 cup unsalted butter
- 1/3 cup cold water
- 3/4 cup granulated sugar
- 1 cup pumpkin puree
- 1 cup apple filling
- 2 teaspoons ground cinnamon
- 2 large eggs large eggs
- 1/2 cup heavy cream
Instructions
- Preheat the oven to 375°F. Combine 2 cups all-purpose flour, 1 cup unsalted butter and 1/3 cup cold water in a bowl at room temperature for 8 to 10 minutes. Cut the butter into the flour using a pastry cutter motion until coarse crumbs form. Fold the dough gently until it holds together. The dough should look shaggy with small butter pieces visible and smell lightly buttery. Chill it at 375°F is not needed here, but keep the dough cold for 30 minutes before shaping. Skip the chill and the crust can shrink while baking. Resting the dough 30 minutes keeps gluten relaxed for a tender crust.
- Roll the chilled dough on a lightly floured surface for 8 to 12 minutes and press portions into small pie cups. Use your fingers to press the dough evenly against the sides and create slightly uneven handmade edges. Bake the empty shells at 375°F for 10 minutes until lightly set. The crust edges should look pale golden and feel firm while the center stays soft. You’ll smell toasted butter when the shells are ready. Miss this timing and the crust may become tough instead of flaky. (I tested a thicker crust first and the filling ratio felt wrong. A thinner shell gives the best balance.) Partial baking protects the crust structure before adding wet fillings.
- Add pumpkin filling and fruit fillings into the prepared shells at 350°F baking temperature for the next stage. Spoon the mixtures carefully and leave a small space below the edge. Use a gentle circular motion to spread the filling without pressing the crust down. The fillings should look smooth with different colors across the pies. You’ll see the pumpkin surface become glossy and the fruit fillings settle naturally. Overfilling causes bubbling and messy edges during baking. Bake the filling until the center sets because controlled heat prevents cracking.
- Bake the filled mini pies at 350°F for 25 to 30 minutes until the crusts deepen to golden brown. Rotate the tray halfway through baking and check the centers with a gentle touch. The pies should stay in place while the filling becomes firm. The tops should show uneven browning and the crust should sound slightly crisp when tapped. You’ll smell warm spices and baked butter near the end. Go past 30 minutes and delicate fillings may dry out. The right baking temperature sets the filling while keeping the crust tender.
- Transfer the baked mini pies onto a serving plate and arrange them loosely for 5 minutes before serving. Add small finishing touches while keeping natural gaps between different flavors. Use a gentle lifting motion so the crust edges stay intact. The finished Friendsgiving Pie Party should show golden crusts, varied fillings and handmade shapes. Each pie should have slight differences in color and texture. (My first serving attempt was too rushed and the warm centers slid out.) Cooling briefly helps the fillings hold their structure.
Notes
Pro Tips:
- Chill the pie dough for at least 30 minutes before shaping because cold butter creates flaky layers and prevents shrinking during the 350°F bake.
- Choose pure pumpkin puree instead of pumpkin pie filling for better control over sweetness and spice. The label difference changes the final flavor balance.
- Bake a test mini pie first when making a large batch because one extra minute past 30 minutes can dry the filling edges.
- Use a 12-cup muffin pan with light-colored metal when possible because dark pans can brown the crust too quickly at 350°F.
- Don’t fill the shells above three quarters full because bubbling filling can overflow and cover the golden crust edges.
- Let the pies cool for 20 minutes before serving because the filling texture becomes cleaner and easier to hold.
Storage: Keep baked Friendsgiving Pie Party mini pies in an airtight container in the refrigerator for up to 4 days. You can freeze them for up to 2 months when wrapped individually in plastic wrap and placed inside a freezer container. Thaw frozen pies overnight before serving so the filling texture stays smooth. Reheat individual pies at 325°F for 8 to 10 minutes until the crust feels crisp again. Avoid microwaving because it softens the crust quickly. Discard pies with sour smells, watery filling, mold spots or unusual texture changes.
- Prep Time: 30 minutes
- Cook Time: 30 minutes
- Category: Dessert
- Cuisine: American
Nutrition
- Serving Size: 155g
- Calories: 418
- Sugar: 19g
- Sodium: 31mg
- Fat: 23g
- Carbohydrates: 53g
- Fiber: 3g
- Cholesterol: 119mg
Frequently Asked Questions
Yes, prepare the pie shells and fillings up to 2 days ahead and keep them covered in the refrigerator. Bake the pies within 24 hours of filling them for the best crust texture and bake at 350°F until the centers set.
Store the baked mini pies in an airtight container in the refrigerator for up to 4 days. Place parchment between layers if stacking them because the crust can soften from moisture.
Watery filling usually happens when the pies are removed before the center sets or when extra liquid is added. Bake another 5 to 8 minutes at 350°F and cool completely before checking the texture.
Yes, freeze fully cooled pies wrapped individually for up to 2 months. Thaw them overnight in the refrigerator and warm at 325°F for 8 to 10 minutes before serving.
Double the ingredients and bake in batches instead of overcrowding the pan. Keeping the same 350°F temperature helps each batch develop golden crusts without uneven cooking.
Final Thoughts
Every time I make this I think about the first time I tried this Friendsgiving Pie Party, nervous about getting the crust right and convinced I’d need more experience. Turns out it’s one of those desserts that forgives small mistakes.
You can miss the timing like I did those first attempts and it still feels special. If you try this Friendsgiving Pie Party, leave me a comment below because I read every single one.
And if you enjoyed it, check out Soft Chocolate Chip Cookies for another cozy treat with friends.