

Christmas Crinkle Cookies have a way of making an ordinary baking day feel like the holidays. They’re rich and soft in the middle with dark chocolate peeking through snowy cracks. So pretty. If you’ve been looking for a christmas crinkle cookies easy recipe that doesn’t need fancy decorating skills, these are a lovely place to start. They’re the kind of christmas cookies that disappear while you’re still filling the cookie tin.
I love how the dough changes in the oven. It starts as a dark little ball covered in sugar and then spreads into a soft cookie with a patchwork top. The first bite has a thin sweet crust followed by a tender chocolate center. And if your family likes soft cookies, our Soft Chocolate Chip Cookies are another batch worth making. These chocolate crinkle cookies are also handy when your holiday plans get busy because you can mix the dough a day ahead and bake it when you need fresh treats.
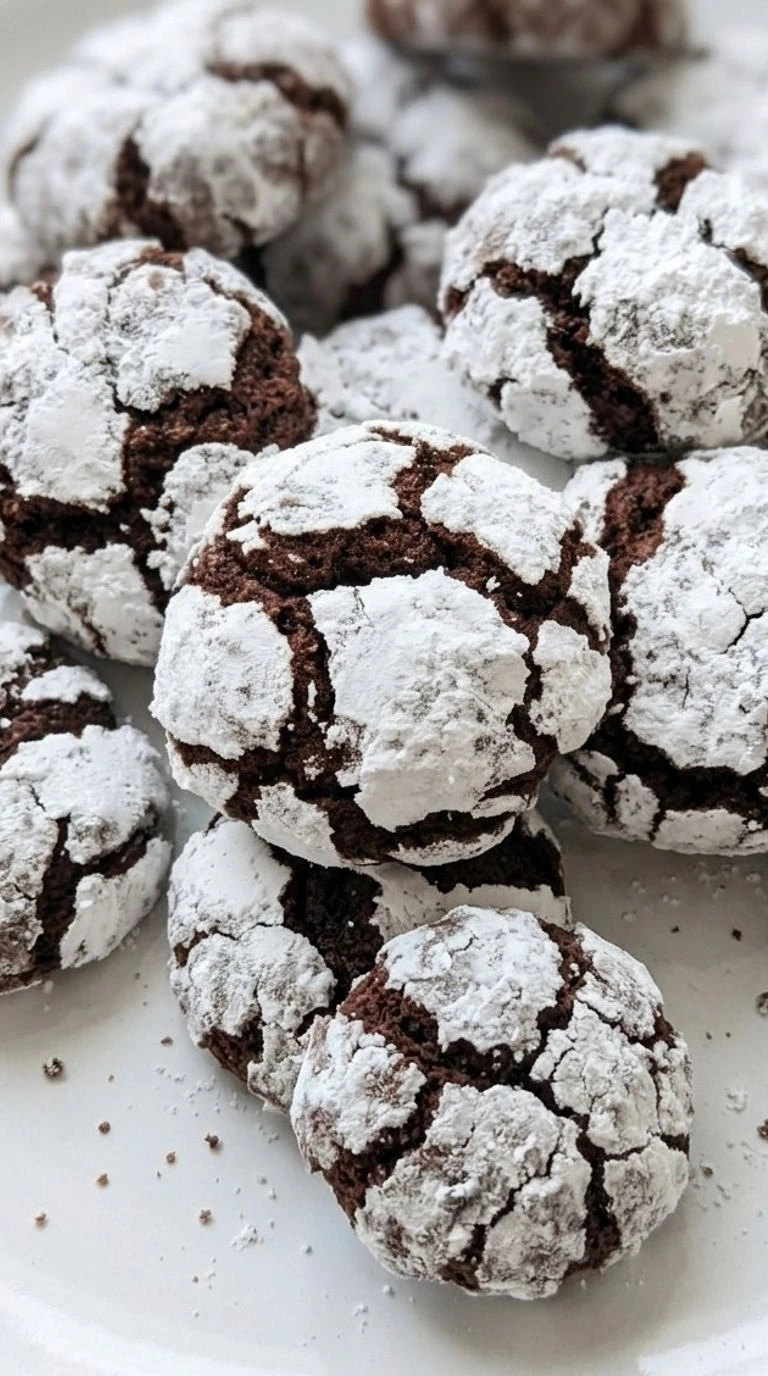
No icing bags. No tricky shapes. Just a few basic baking ingredients and a good chill in the fridge. I like setting aside a small plate for the kitchen before packing the rest into gift boxes because someone always asks for another.
Why This Recipe Works
Christmas Crinkle Cookies get their bold cracks from a cold chocolate dough that spreads as it heats in a 350°F oven. The baking powder helps the centers rise while the sugar coating splits.
Rolling the dough in granulated sugar before powdered sugar also slows moisture from soaking into the white layer. Chilling for at least 2 hours keeps the cookies thick and soft instead of flat.
If you enjoy tender centers, try our Soft Chocolate Chip Cookies for another batch with a gentle bite.
Ingredients
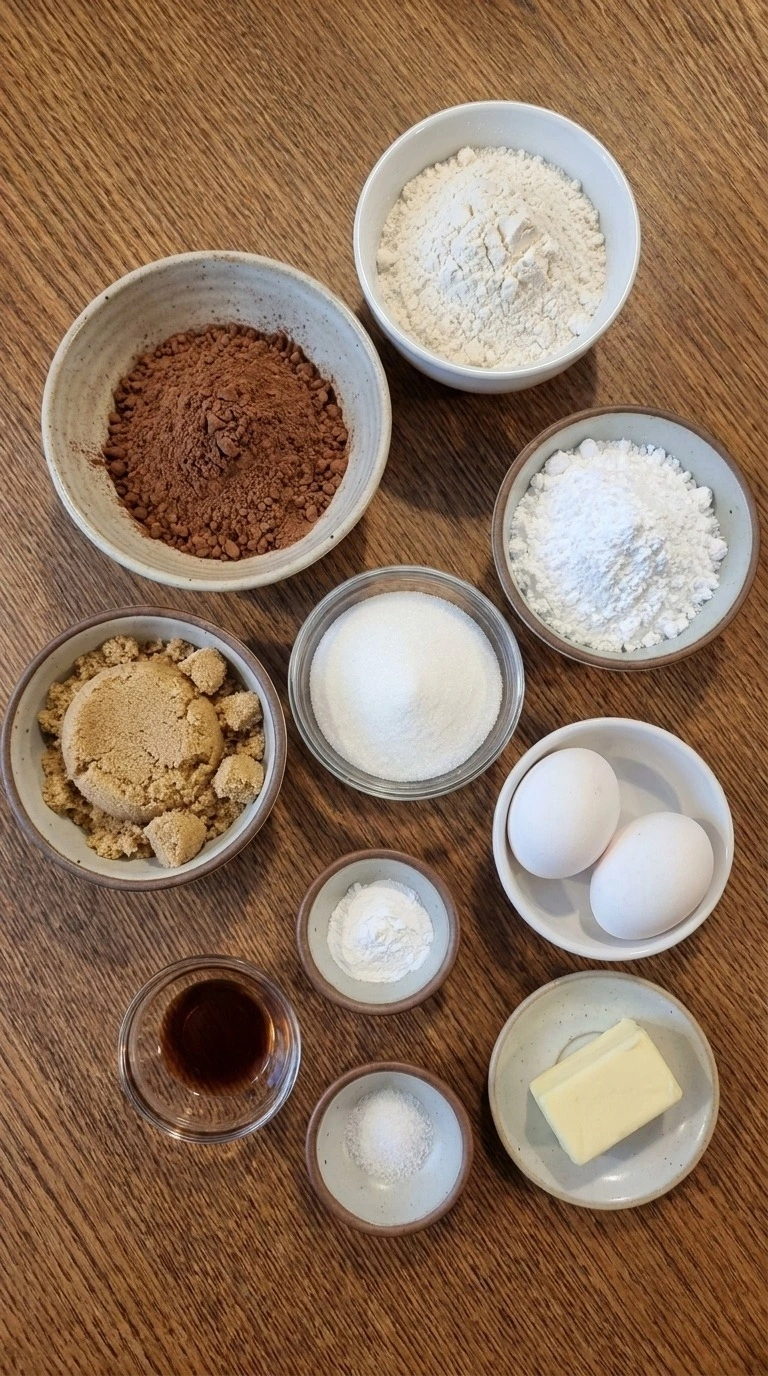
- Unsalted butter: Softened to about 68°F to 72°F for a creamy base and tender cookie texture.
- Granulated white sugar: Use 3/4 cup in the dough and reserve 2 tablespoons for the first coating that helps keep the powdered sugar bright.
- Light brown sugar: Packed into the measuring cup to add moisture and a mild caramel flavor.
- Large eggs: Added one at a time to bind the dough and give the cookies structure.
- Pure vanilla extract: Mixed into the wet base to bring out the rich cocoa flavor.
- All-purpose flour: Spoon into the measuring cup and level it to avoid adding too much flour.
- Unsweetened natural cocoa powder: Use natural unsweetened cocoa for the deep chocolate color and the intended reaction with baking powder.
- Baking powder: Whisk into the dry ingredients so the dough puffs and develops its cracked top.
- Fine sea salt: Distribute through the flour mixture to balance the sweetness and sharpen the chocolate flavor.
- Powdered sugar: Use for the generous outer coating that forms the snowy white cracks during baking.
Equipment
- Electric hand mixer: A hand mixer with two beaters creams the butter and sugars evenly, and a model with at least three speed settings helps prevent splashing when mixing small batches.
- Large mixing bowl: Use a 3-quart or larger glass or stainless steel bowl to leave room for folding the thick dough, because a smaller bowl can spill flour over the sides.
- Medium mixing bowl: A 2-quart bowl gives enough space to whisk flour and cocoa together without spills, while a very shallow bowl makes dry ingredients harder to combine.
- Rubber spatula: Choose a flexible heat-safe spatula with a firm handle so you can scrape the bowl and fold thick chocolate dough without leaving dry pockets.
- Measuring cups and spoons: Use level measuring cups and spoons with clear markings, or a digital kitchen scale for greater accuracy, because excess flour can dry out these cookies.
- Cookie scoop: A 1-tablespoon scoop helps divide the dough into 24 similar portions, and a sturdy spring-release design works better than a flimsy scoop with cold dough.
- Rimmed baking sheets: Use two light-colored baking sheets around 13 by 18 inches for even baking, because very dark sheets can brown cookie bottoms before their centers set.
- Parchment paper: Choose oven-safe parchment rated for at least 425°F and trim it to fit the baking sheets, since loose overhanging edges can curl near heating elements.
- Wire cooling rack: A sturdy cooling rack at least 12 inches wide lets air move around the cookies, which prevents moisture from making their bottoms soft.
- Two shallow dishes: Use two dishes about 5 to 6 inches wide to hold the separate sugar coatings, because crowded dishes make the dough harder to roll evenly.
Instructions
Step 1: Cream the butter and sugars into a fluffy base
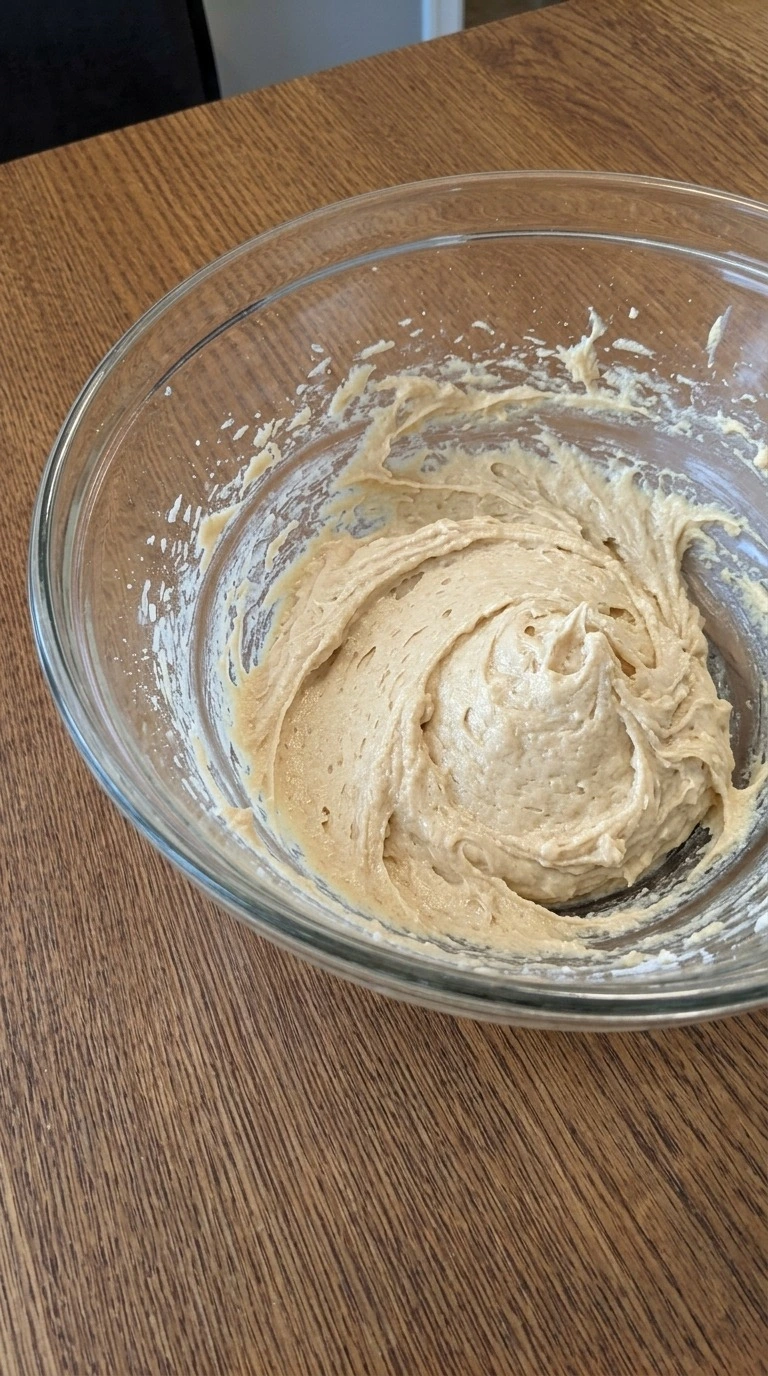
Let 1/2 cup unsalted butter soften on the counter at about 68°F to 72°F for 30 to 45 minutes. It should give a little when pressed but shouldn’t look oily. Beat it with 3/4 cup granulated white sugar and 1/4 cup packed light brown sugar for 2 to 3 minutes. Then add 2 large eggs one at a time and beat for about 20 seconds after each.
Pour in 2 teaspoons pure vanilla extract and mix for another 15 seconds. Scrape the sides once so no thick streaks stay stuck to the bowl. The base should look lighter and creamy with no large butter lumps. Stop before it gets greasy.
If you beat the mixture too long after adding the eggs, the dough can turn loose. This short mixing time keeps the base smooth.
Tip: Use a butter knife to test softness. If it slides through the butter with gentle pressure and leaves a clean groove, it’s ready to cream.
Step 2: Fold the cocoa and flour into chocolate dough
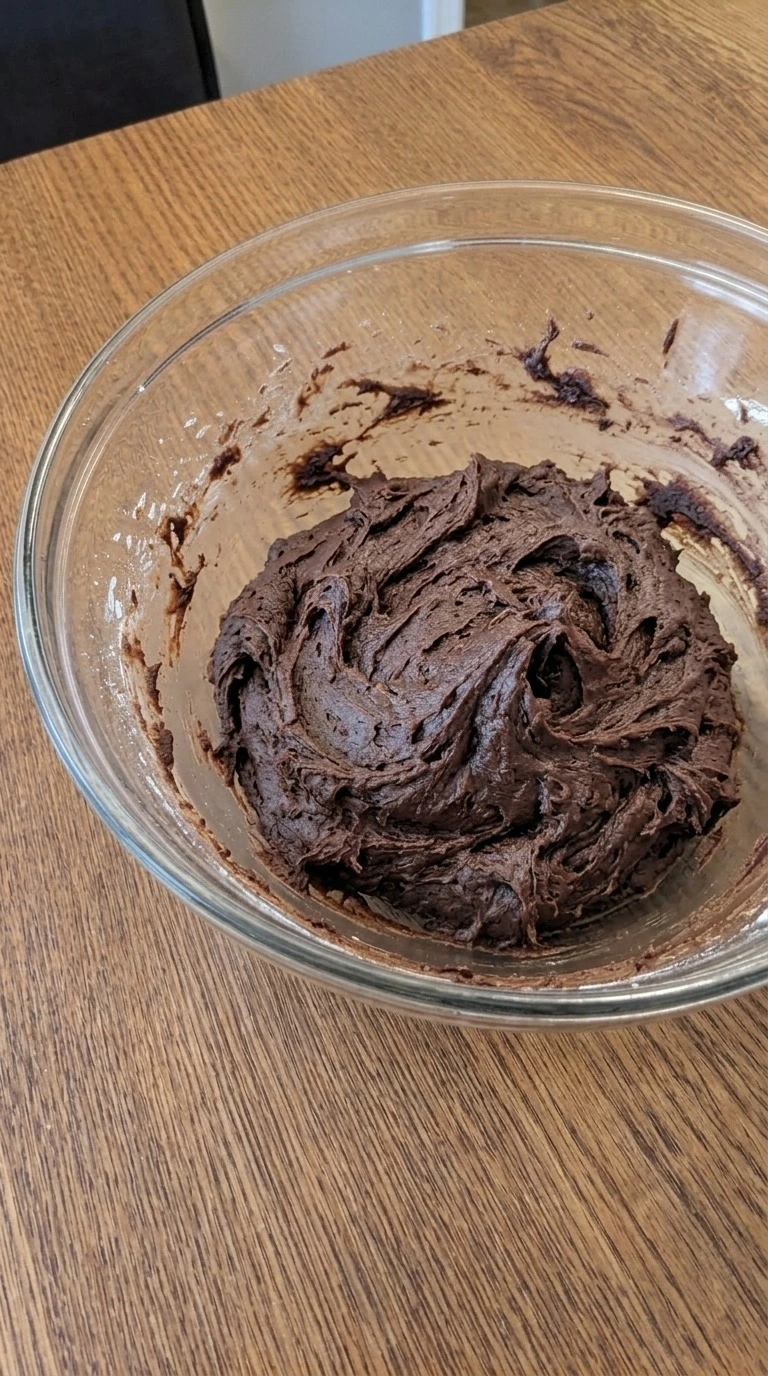
In a separate bowl whisk 1 1/2 cups all-purpose flour with 1/2 cup unsweetened natural cocoa powder and 2 teaspoons baking powder. Add 1/4 teaspoon fine sea salt and mix for 30 seconds to break up the dry clumps. Tip the dry mix into the wet base in two parts. Fold with a rubber spatula for 60 to 90 seconds and scrape along the bottom after each turn.
Keep folding until the pale streaks fade and the dough turns an even dark brown. Don’t beat it hard because too much mixing can make the cookies tough. You’ll see a thick and sticky dough that holds soft ridges. A few small lumps are fine.
Stop once the flour disappears because extra mixing can make the dough dense. Gentle folding keeps the crumb tender.
Tip: Spoon flour into the measuring cup and level it with a straight edge. Scooping straight from the bag can pack in too much flour.
Step 3: Chill and shape the chocolate cookie balls
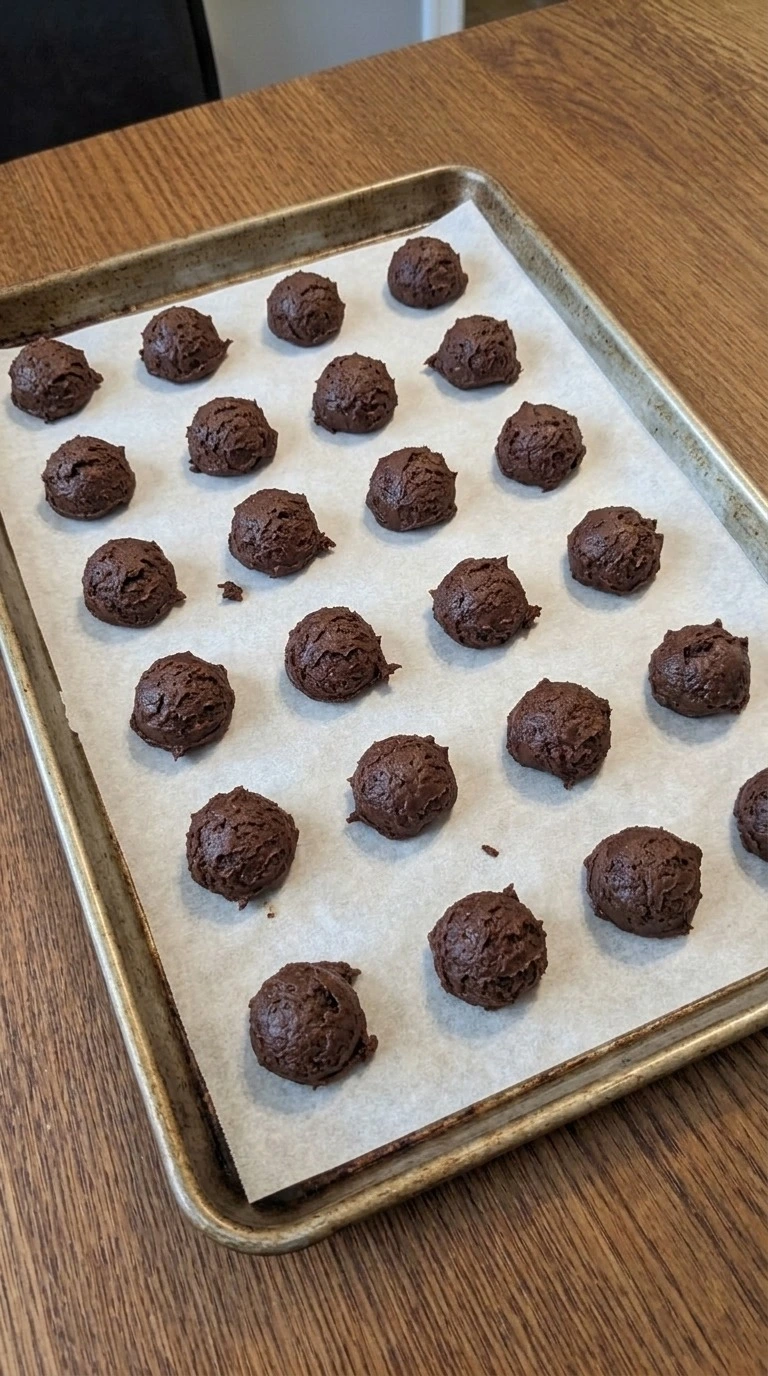
Cover the chocolate dough and chill it in the fridge at 40°F or below for at least 2 hours. You can leave it overnight if that suits your plans. When it’s firm enough to scoop, divide the batch into 24 portions of about 1 tablespoon each. Roll them between your palms with light pressure for 5 to 8 seconds per ball.
Set the balls on a parchment-lined baking sheet with at least 2 inches between them. Work fast so the dough stays cool and keeps its round shape. The portions should look dark and slightly tacky but shouldn’t smear across your hands. (I once rushed this step after a short chill.
The dough spread too far and lost its thick centers. ) Cold dough holds its shape longer.
Tip: If you’re baking in a warm kitchen above 75°F, shape half the batch first and leave the other half chilled until its turn.
Step 4: Roll the dough balls in two layers of sugar
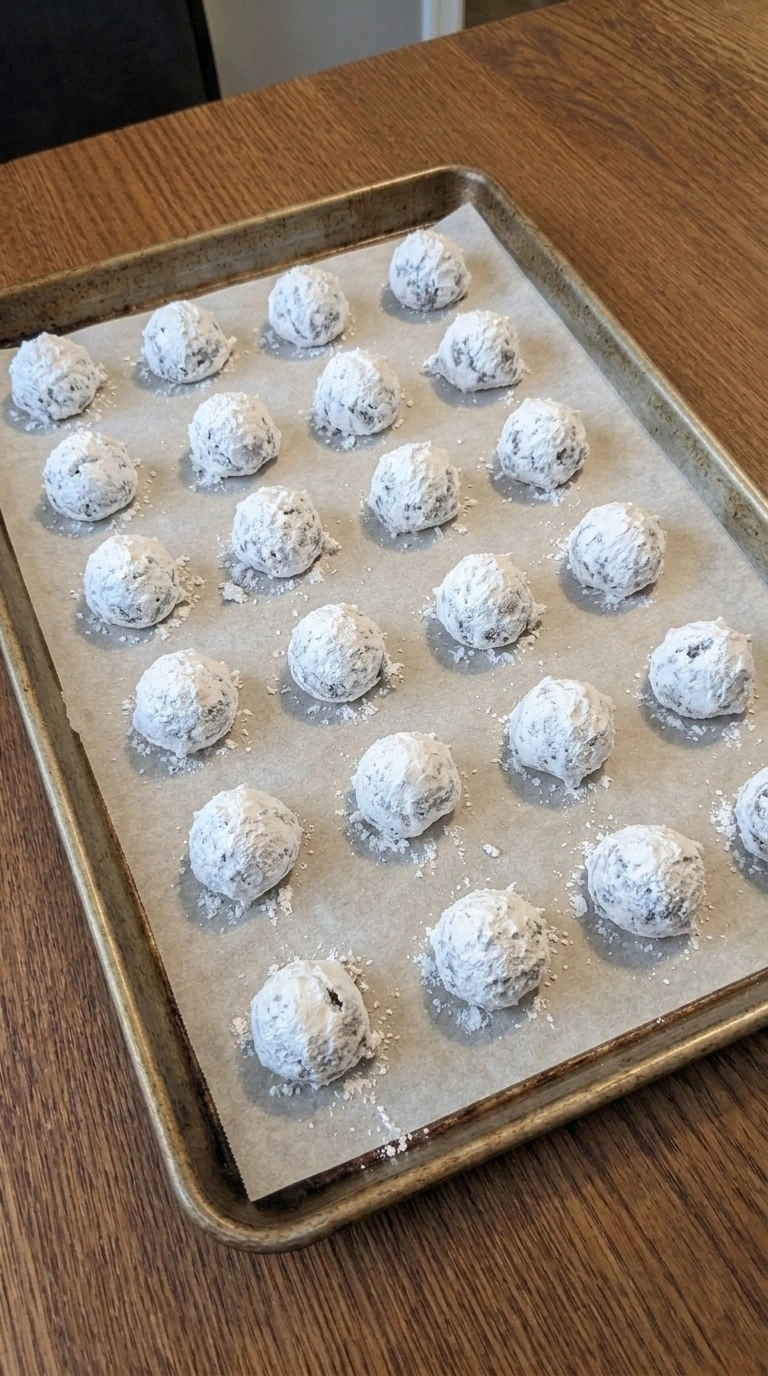
Heat the oven to 350°F while you coat the dough. Put 2 tablespoons granulated white sugar in one shallow dish and 3/4 cup powdered sugar in another. Roll each of the 24 cold dough balls in the granulated sugar first for about 5 seconds. Then move each ball into the powdered sugar and roll for another 5 to 8 seconds.
Coat every side until you can’t see much dark dough through the white layer. Place the balls back on the parchment-lined sheet with at least 2 inches of space. Don’t flatten them. Each ball should look snowy and a little uneven with loose sugar clinging to the sides.
If the coating looks thin, add another light pass through the powdered sugar. A thick coat creates clear cracks.
Tip: Use separate dishes for the two sugars so moisture from the dough doesn’t turn the entire powdered sugar supply into damp lumps.
Step 5: Bake until the snowy chocolate cracks open
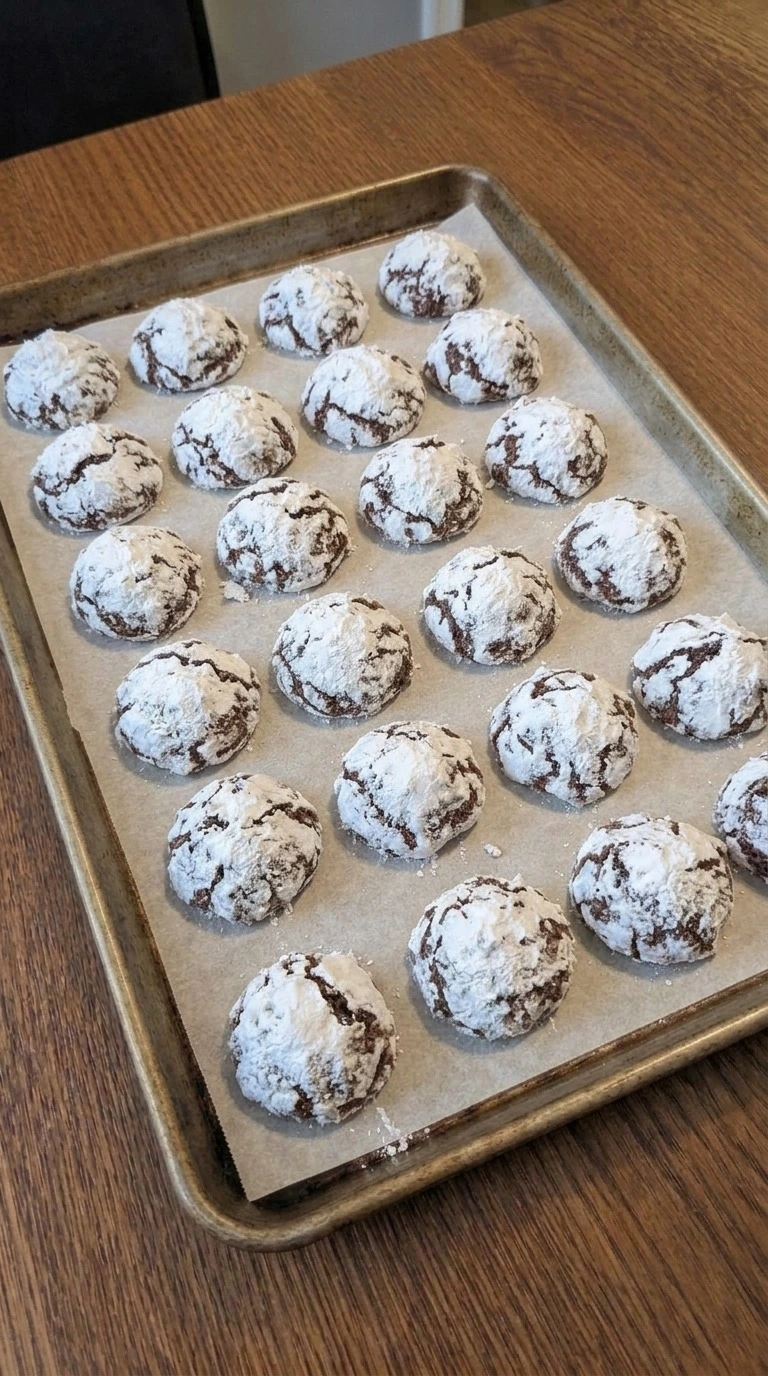
Bake the coated cookies in the 350°F oven for 10 to 12 minutes. Place the sheet on the middle rack and bake one tray at a time for even heat. The balls will puff slightly and spread into thick round cookies as the tops split. Start checking at minute 10.
Look for set edges and deep brown cracks between the white patches. The middle should still look a little soft. Don’t wait for the tops to turn dry because they’ll firm as they cool. You’ll smell warm cocoa and vanilla as the cracks widen.
Pull the tray out while the centers still give a little under a gentle touch. Bake too long and they lose their fudgy bite. Short baking protects the soft center.
Tip: If your oven runs hot, check it with an oven thermometer. Even 15°F above the setting can make small cookies dry faster.
Step 6: Cool the cookies and arrange them for serving
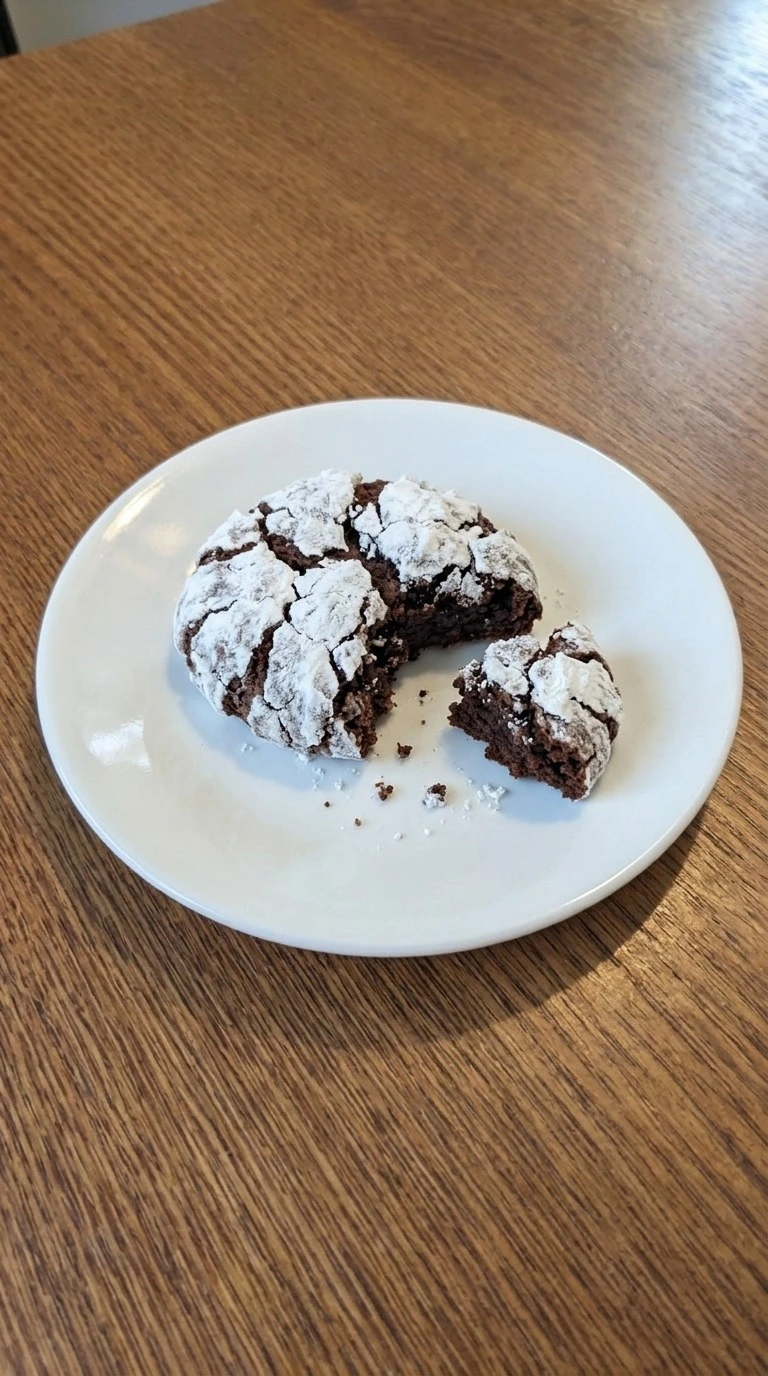
Leave the baked cookies on their sheet for 5 minutes after taking them from the 350°F oven. Then lift them with a thin spatula onto a wire rack and cool for another 15 to 20 minutes. Move them gently so the soft centers don’t split apart. Once they feel firm enough to hold, transfer the 24 cookies to a clean serving plate.
Let their sugar-coated edges overlap a little instead of stacking them tightly. This keeps the pretty cracks visible and stops the warm cookies from sticking together. The sugar tops should stay pale while the chocolate cracks look deep brown. Their edges feel set and the centers remain soft.
If you stack them while hot, the coating can turn damp. Cooling lets the crumb set.
Tip: For a holiday cookie box, place parchment between layers and let the cookies cool fully for at least 30 minutes before closing the lid.
Pro Tips
- Let the butter soften to about 68°F to 72°F before mixing. It should hold its shape when pressed rather than looking shiny or melted.
- Use unsweetened natural cocoa powder for a rich chocolate taste. If the cocoa has hard lumps, sift the measured 1/2 cup before adding it.
- Chill the chocolate dough for at least 2 hours before shaping. Cold dough won’t spread as quickly and gives the cookies thicker centers.
- Scoop portions of about 1 tablespoon each so the batch bakes evenly. Bigger dough balls may need 1 to 2 extra minutes in the oven.
- Keep at least 2 inches between the cookies on the baking sheet. They’ll spread as they bake and need space for their cracked tops to form.
- Use fresh powdered sugar for the outer coating and cover each dough ball well. A thin white layer may disappear into the warm chocolate surface.
- Check Christmas Crinkle Cookies at the 10-minute mark. Take them out when the edges look set but the centers still appear slightly soft.
- For a subtle holiday flavor, add 1/4 teaspoon ground cinnamon to the dry mixture. It brings a gentle warmth without hiding the chocolate.
- For peppermint chocolate crinkle cookies, replace 1/2 teaspoon of the vanilla extract with 1/2 teaspoon peppermint extract for a cool holiday flavor.
- Make orange chocolate crinkle cookies by folding 1 teaspoon finely grated orange zest into the dough before chilling. The citrus adds a fresh note to the rich cocoa.
- For a warm spiced version, add 1/2 teaspoon ground cinnamon and 1/8 teaspoon ground nutmeg to the flour mixture. The cookies will have a gentle holiday spice flavor.
- For extra-rich chocolate crinkles, fold 1/3 cup mini semisweet chocolate chips into the mixed dough before chilling. The centers will have small melted chocolate pockets and may need an extra minute to bake.
Substitutions
- Unsalted butter: Use 1/2 cup dairy-free baking butter in place of the regular unsalted butter. Choose a firm plant-based baking butter with at least 75% fat. Soft tub spreads contain more water and can make the cookies flatter. The dairy-free version may have slightly crisper edges.
- All-purpose flour: Replace 1 1/2 cups all-purpose flour with an equal weight of gluten-free 1-to-1 baking flour containing xanthan gum. This swap makes gluten free christmas cookies possible without changing the whole recipe. The cookies may be slightly more delicate and sandy. Chill the dough for an extra 30 minutes if it feels too soft.
- Large eggs: Replace 2 large eggs with 2 flax eggs made from 2 tablespoons ground flaxseed and 6 tablespoons water. Mix the flaxseed and water and let them thicken for 10 minutes before adding them. The cookies will be denser and less fluffy with fewer large cracks. Expect a slightly softer structure and more fragile edges.
- Unsweetened natural cocoa powder: Use 1/2 cup Dutch-process cocoa powder instead of natural cocoa powder. Dutch-process cocoa gives the cookies a darker color and a smoother chocolate taste. This recipe uses baking powder rather than baking soda, so the swap is reasonable. The final flavor will be less sharp and slightly more mellow.
- Light brown sugar: Replace 1/4 cup light brown sugar with 1/4 cup granulated white sugar. The cookies will taste a little less caramel-like and may have slightly crisper edges. Don’t reduce the chilling time because the dough still needs to firm up. For another soft cookie option, try our Soft Chocolate Chip Cookies.
Storage
Let the cookies cool fully before placing them in an airtight container. Christmas Crinkle Cookies stay fresh for up to 4 days at room temperature or 7 days in the refrigerator at 40°F or below. Put parchment between layers to protect the sugar coating.
For longer storage, freeze the fully cooled cookies in a sealed freezer-safe container for up to 2 months. Place parchment between the layers and remove as much air as possible before closing the lid. These cookies taste best at room temperature, but you can warm one in a 275°F oven for 3 to 4 minutes if you prefer a softer center.
Let frozen cookies thaw in their container for 30 to 60 minutes before opening it to reduce moisture on the coating. Don’t add water or milk because that will dissolve the sugar crust. Discard cookies that develop mold, an unusual smell or a damp sticky surface that suggests spoilage.
FAQ
Yes, you can make the dough up to 48 hours before baking and keep it covered in the refrigerator at 40°F or below. Let very firm dough sit on the counter for 5 to 10 minutes if it’s too hard to scoop. Shape the portions while they’re still cool and coat them with sugar just before baking for the brightest cracks.
Flat or faint cracks often happen when the dough is too warm or the baking powder has lost its strength. Chill the mixture for at least 2 hours and check that your baking powder is still active. Bake at 350°F so the cookies spread and rise steadily while the sugary surface breaks into distinct patches.
Yes, replace the 1 1/2 cups all-purpose flour with an equal weight of a gluten-free baking blend designed for cup-for-cup substitution. Choose one that includes xanthan gum for better structure. Let the mixed dough rest for 15 minutes before chilling so the flour can absorb moisture. The finished cookies may crumble more easily than the wheat version.
Keep fully cooled cookies in an airtight container for up to 4 days at normal room temperature. Place parchment between layers so the sugar coating doesn’t rub off. For longer storage, refrigerate them for up to 7 days and let individual portions sit out for 15 minutes before eating. Discard any cookies with mold or an unusual odor.
Yes, double every ingredient to make approximately 48 small cookies. Mix the dough in a bowl large enough to handle the extra volume and chill it in two portions for even cooling. Bake one sheet at a time at 350°F for 10 to 12 minutes rather than crowding the oven. Use fresh parchment for each new batch.
Yes, shape the dough into balls and freeze them without the sugar coating for about 2 hours until firm. Transfer them to a freezer-safe bag and keep frozen for up to 2 months. Thaw the portions overnight in the refrigerator and coat them in both sugars before baking. This helps the white finish stay bright rather than turning damp in storage.
These rich cookies pair well with warm milk or a cup of hot chocolate because the soft cocoa centers balance the drinks. For a holiday dessert platter, serve 2 cookies per person with fresh strawberries or orange slices. You can also include a second cookie variety for contrast. Keep the fruit on a separate plate so its moisture doesn’t soften the powdered sugar.
The striking cracks on chocolate crinkle cookies form as the dough expands in the oven and the outer sugar coating splits apart. The contrast between dark cocoa and white powdered sugar gives these cookies their snowy holiday look without any frosting. Each batch develops its own patterns, so no two cookies look exactly alike.