

When you need a warm family meal, this Chicken Pot Pie Casserole brings together tender chicken, creamy vegetables, and a golden biscuit topping. This chicken pot pie recipe with biscuits keeps the classic comfort of a chicken pot pie while making it easier to serve from one dish.
I love recipes that fit busy evenings without losing homemade flavor. If you enjoy hearty baked meals, try our Chicken Burrito Casserole for another filling dinner idea with simple layers.
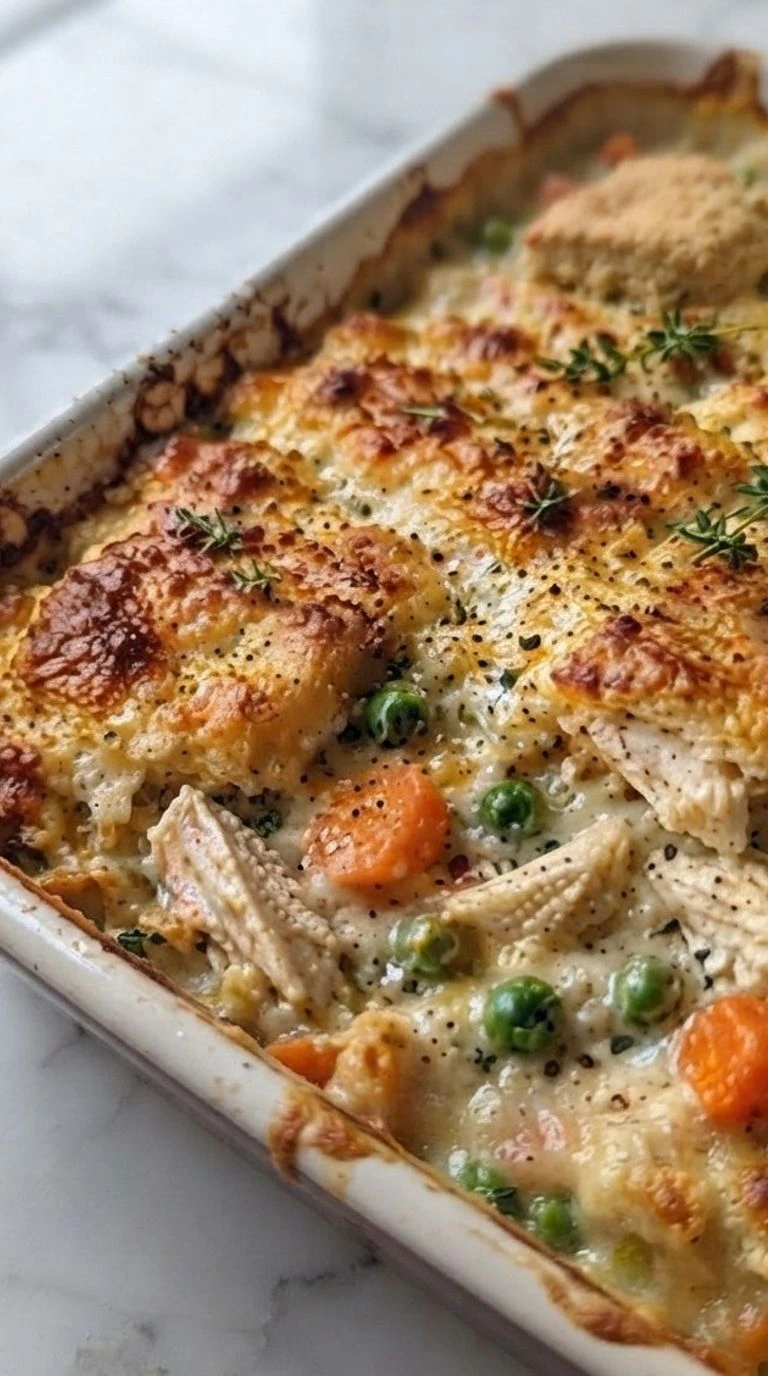
This Chicken Pot Pie Casserole is also a great choice when you want an easy chicken pot pie casserole that feels familiar but has its own twist. The creamy center and fluffy topping make it a dish people ask for again.
Why This Recipe Works
Cooking the filling first lets the flour combine with butter and broth before baking, so the sauce stays thick instead of watery. Baking at 375°F gives the biscuits time to rise while the center heats through.
The balance of milk and broth creates a creamy texture without making the dish heavy. For another comforting chicken meal, try our Gluten Free Chicken Noodle Soup when you want a lighter option.
Ingredients
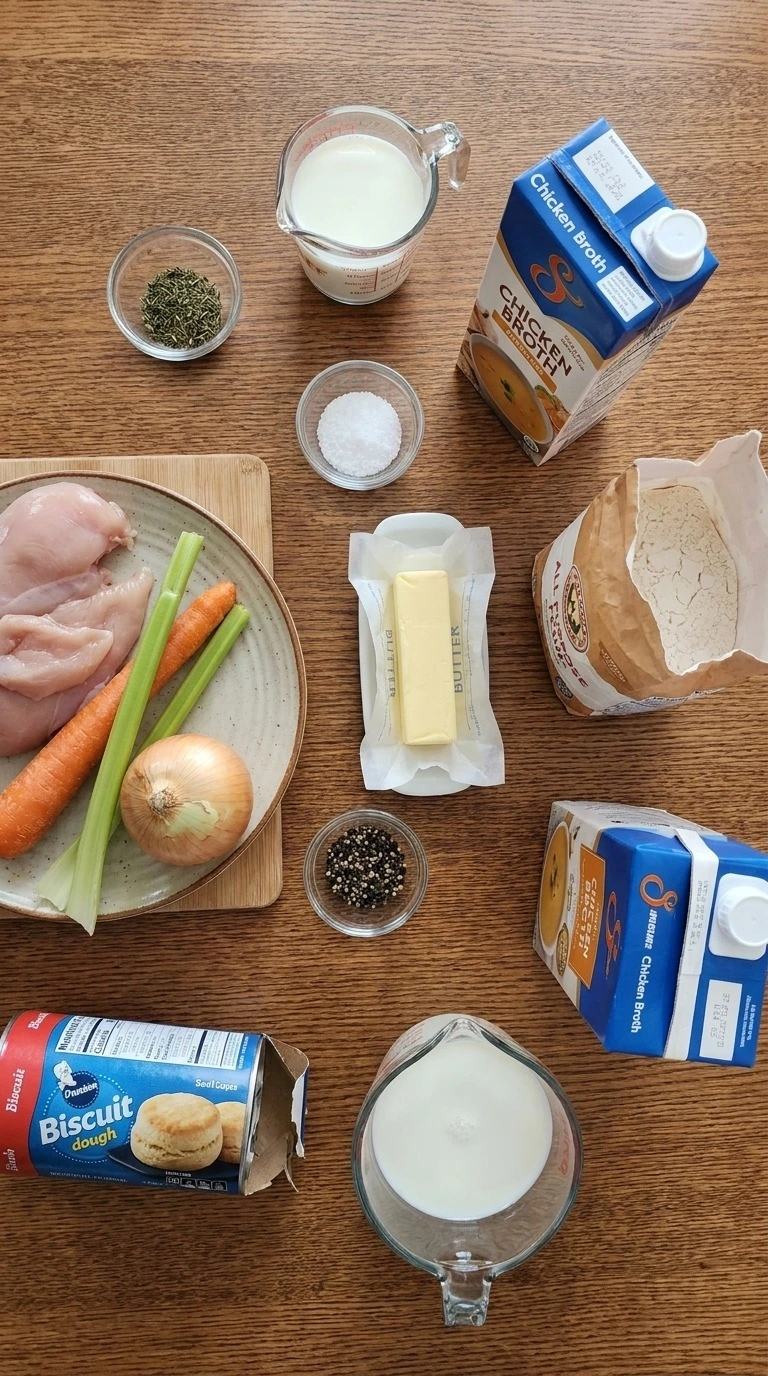
- boneless chicken breast: Cut into 1-inch pieces to keep the meat juicy during baking.
- carrot: Diced into small pieces for sweetness and texture.
- celery stalk: Diced to add fresh flavor to the filling.
- yellow onion: Diced to build the savory base.
- dried thyme: Added for a warm herbal note.
- salt: Used to season the filling.
- black pepper: Adds mild spice and balance.
- butter: Creates richness and helps form the sauce.
- all-purpose flour: Thickens the creamy filling.
- chicken broth: Builds the savory sauce base.
- whole milk: Makes the sauce smooth and creamy.
- refrigerated biscuit dough: Placed on top to create the fluffy biscuit layer.
Equipment
- 9×13 ceramic baking dish: This baking dish holds the casserole layers evenly and should be sturdy enough for 375°F baking, while a thin dish may cook the edges too quickly.
- Large skillet: A large skillet helps build the creamy filling and should have enough space for mixing without spilling, because an overcrowded pan thickens unevenly.
Instructions
Step 1: Cut the chicken and vegetables
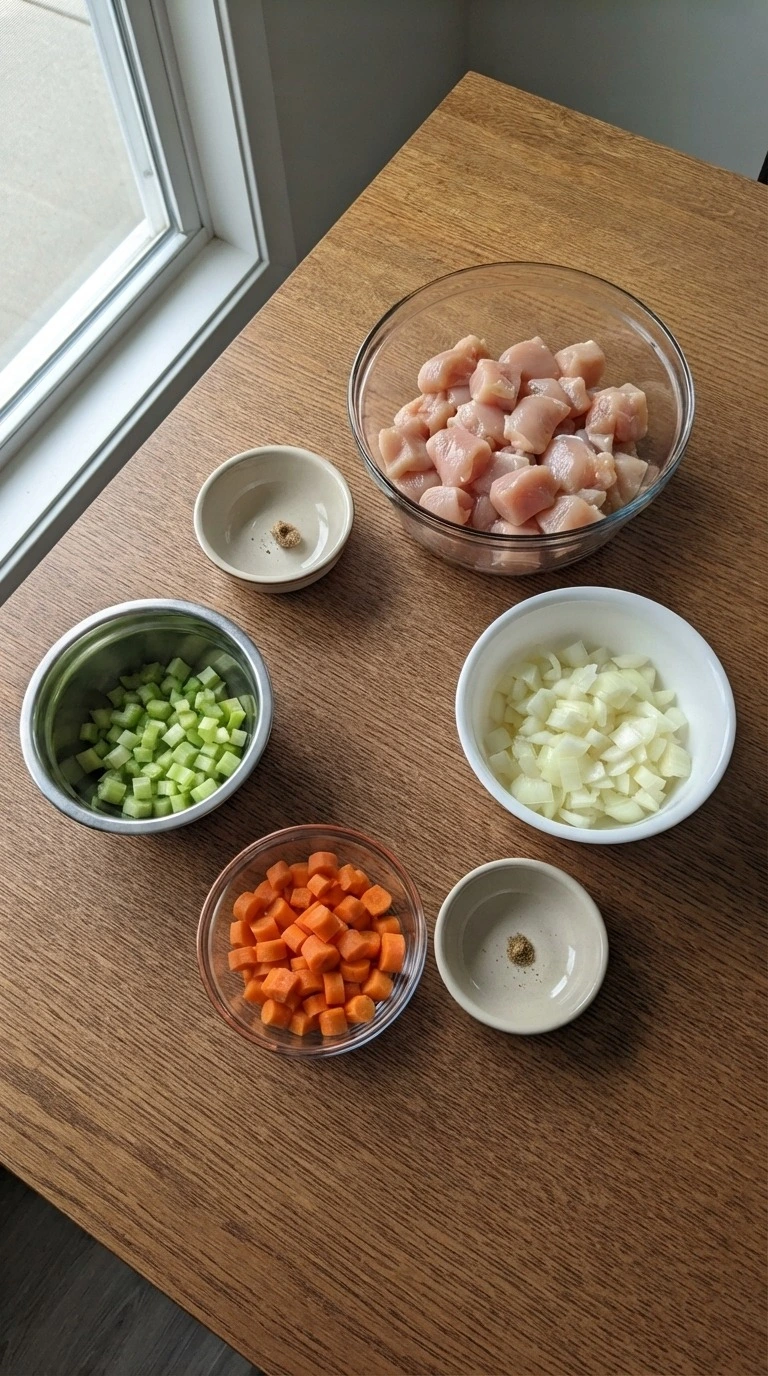
Cut 2 boneless chicken breasts into 1-inch pieces and dice 2 medium carrots, 2 celery stalks, and 1 yellow onion. Mix them with 1 teaspoon dried thyme, 1 teaspoon salt and 1/2 teaspoon black pepper in a bowl. Work with steady knife strokes for 8 to 10 minutes.
Keep the pieces uneven and natural. (I tested smaller cuts first and they dried out faster. One-inch pieces keep the bite juicy.
) You’ll see bright vegetables beside pale pink chicken and smell the thyme as it blends in. Miss this size range and the chicken texture changes before baking. Even cuts help the filling cook evenly.
Tip: Chill the chicken for 15 minutes before cutting because firmer meat creates cleaner pieces.
Step 2: Cook the creamy chicken filling
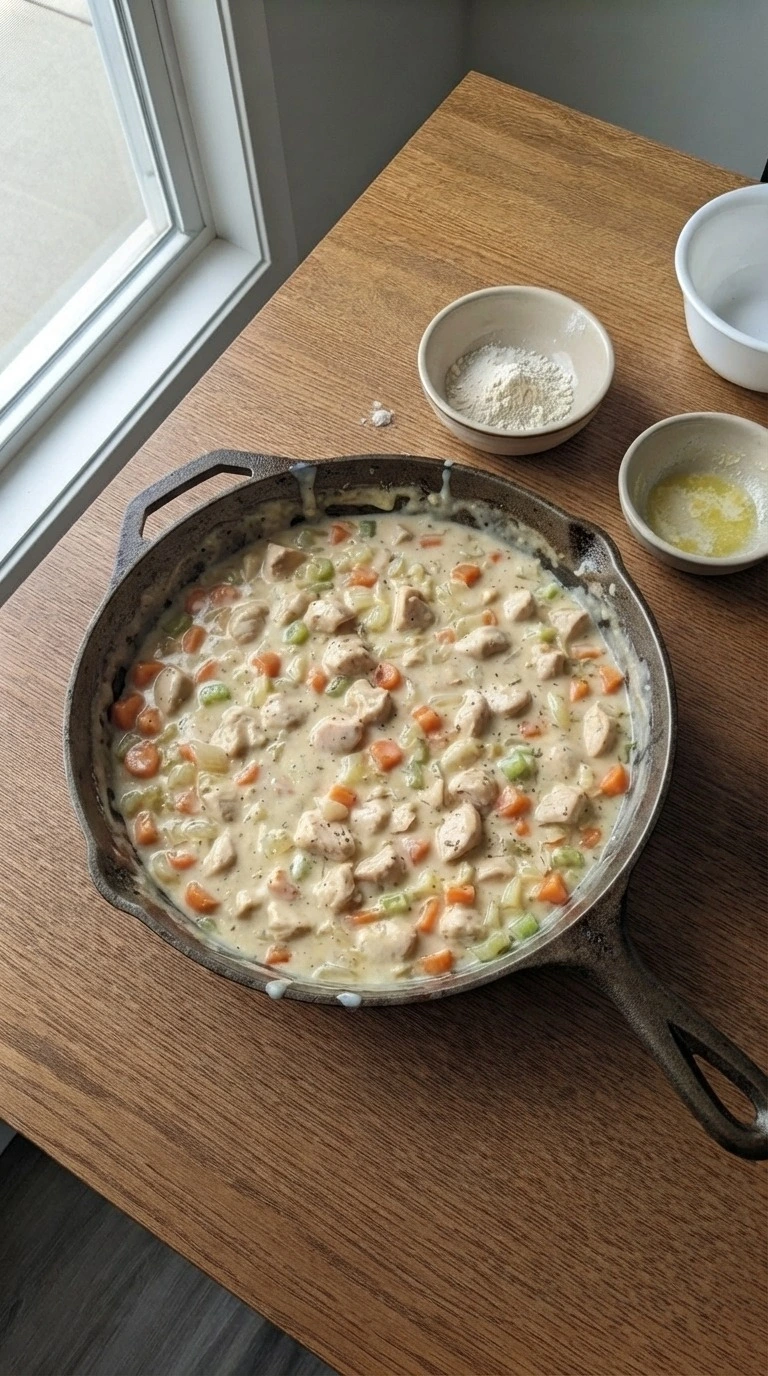
Cook the chicken and vegetables in a large skillet over medium heat, about 5 on a 10-dial, for 8 to 10 minutes until the chicken reaches 165°F inside. Stir with a wooden spoon and scrape the bottom gently while adding 4 tablespoons butter, 1/3 cup all-purpose flour, 2 cups chicken broth, and 1 cup whole milk. The sauce should coat the spoon after 5 minutes.
The filling turns creamy and the vegetables soften slightly. You’ll smell the butter and herbs together. Skip this timing and the sauce can stay thin.
Thick sauce holds the casserole layers together.
Tip: Use room temperature milk to prevent the sauce from cooling too fast when it is added.
Step 3: Layer the filling with biscuit topping
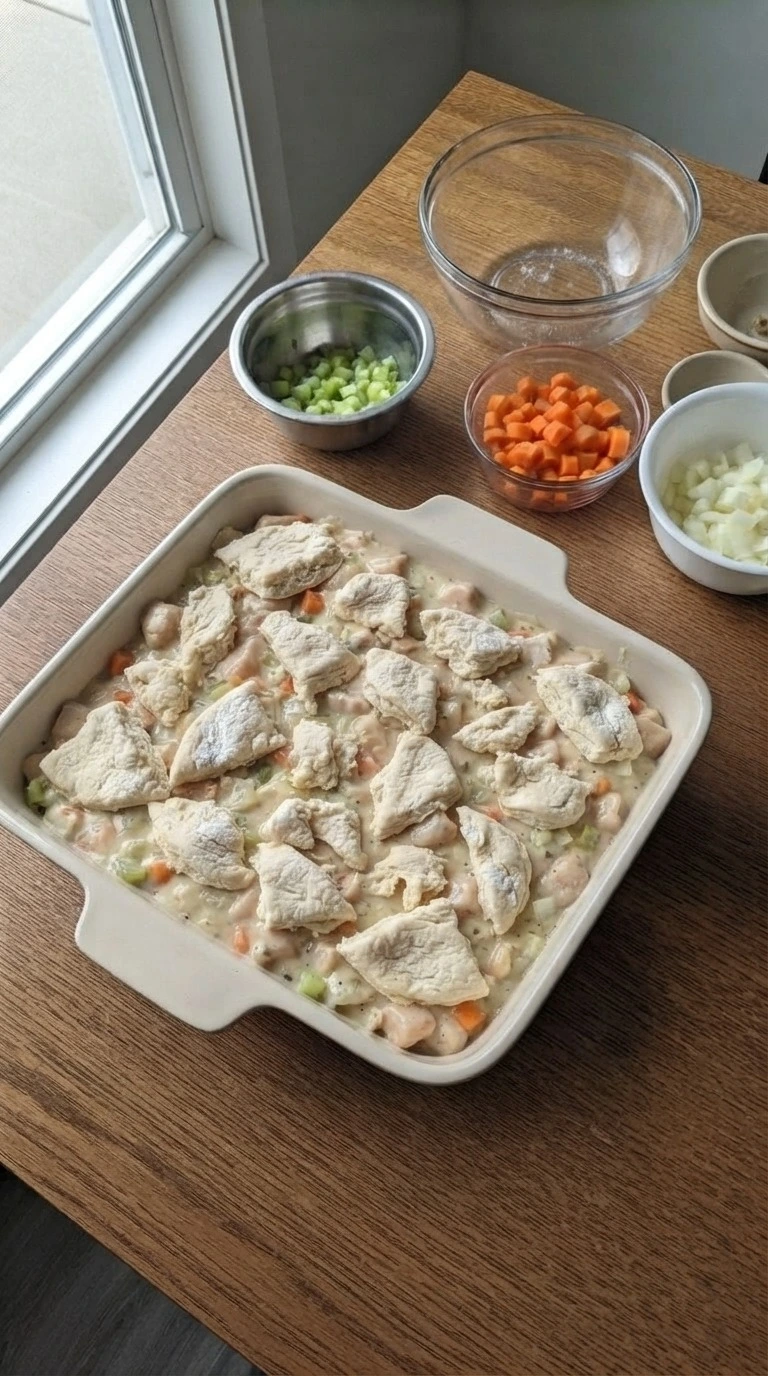
Transfer the creamy filling into a 9×13 ceramic baking dish and spread 1 can refrigerated biscuit dough pieces over the top. Arrange them with small gaps because the dough expands during baking. Bake at 375°F for 20 to 25 minutes.
Fold and press the biscuit pieces lightly with your fingers so they sit into the sauce edges. The biscuits rise and the top turns pale golden while the filling bubbles below. Go past 25 minutes and the biscuit tops can dry out.
The heat sets the biscuit structure while keeping the center tender.
Tip: Leave small spaces between biscuit pieces so steam can escape during the bake.
Step 4: Bake until the topping turns golden
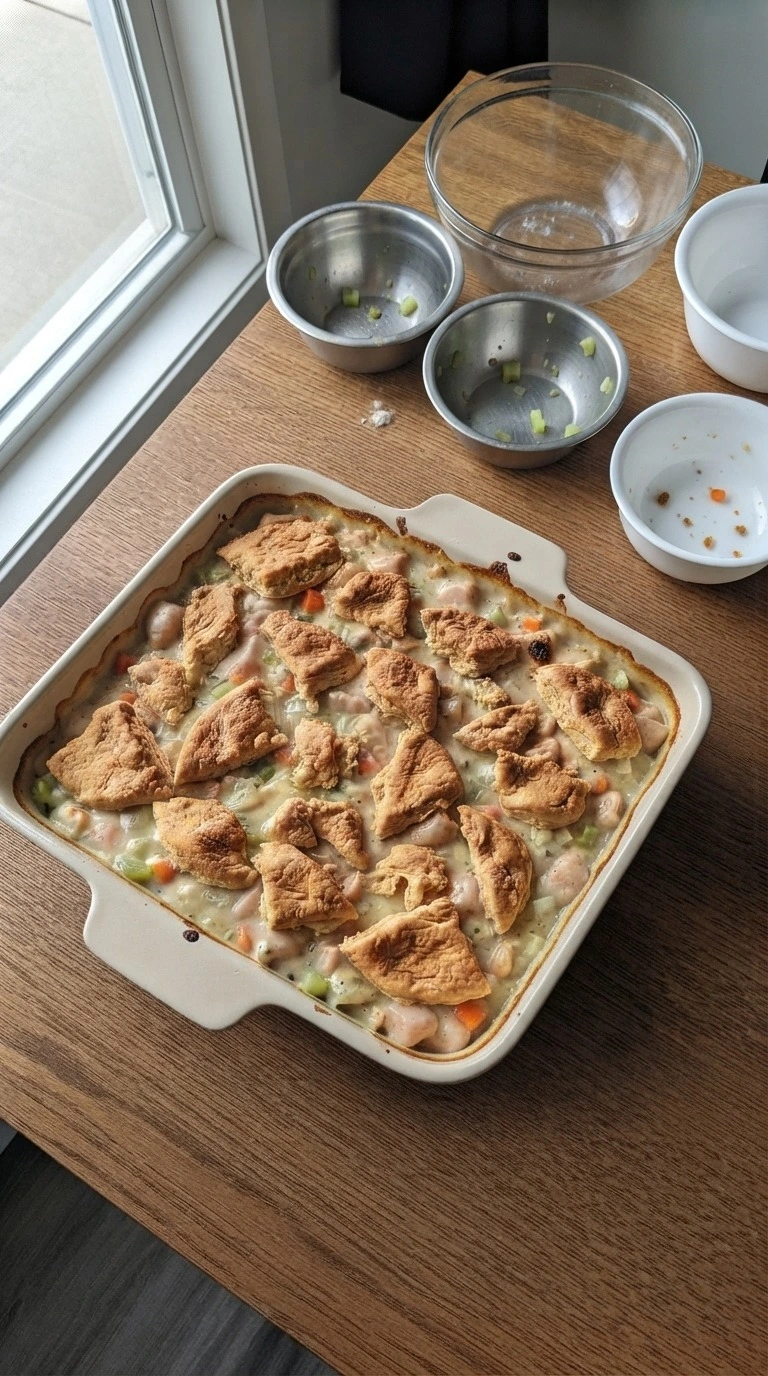
Bake the assembled casserole at 375°F for 10 to 15 more minutes until the biscuit tops reach a deep golden color. Rotate the baking dish halfway through at minute 8 and check the center with a toothpick motion. You’ll see bubbling sauce around the biscuits and hear gentle sizzling.
(My first batch used 400°F and the top browned too fast. 375°F fixed the balance. ) The smell changes from raw dough to baked butter and herbs.
Missing this window can leave the biscuit centers under-set. Steady heat finishes the topping without drying the filling.
Tip: Let the casserole sit for 10 minutes after baking so the sauce can settle.
Step 5: Serve a warm casserole portion
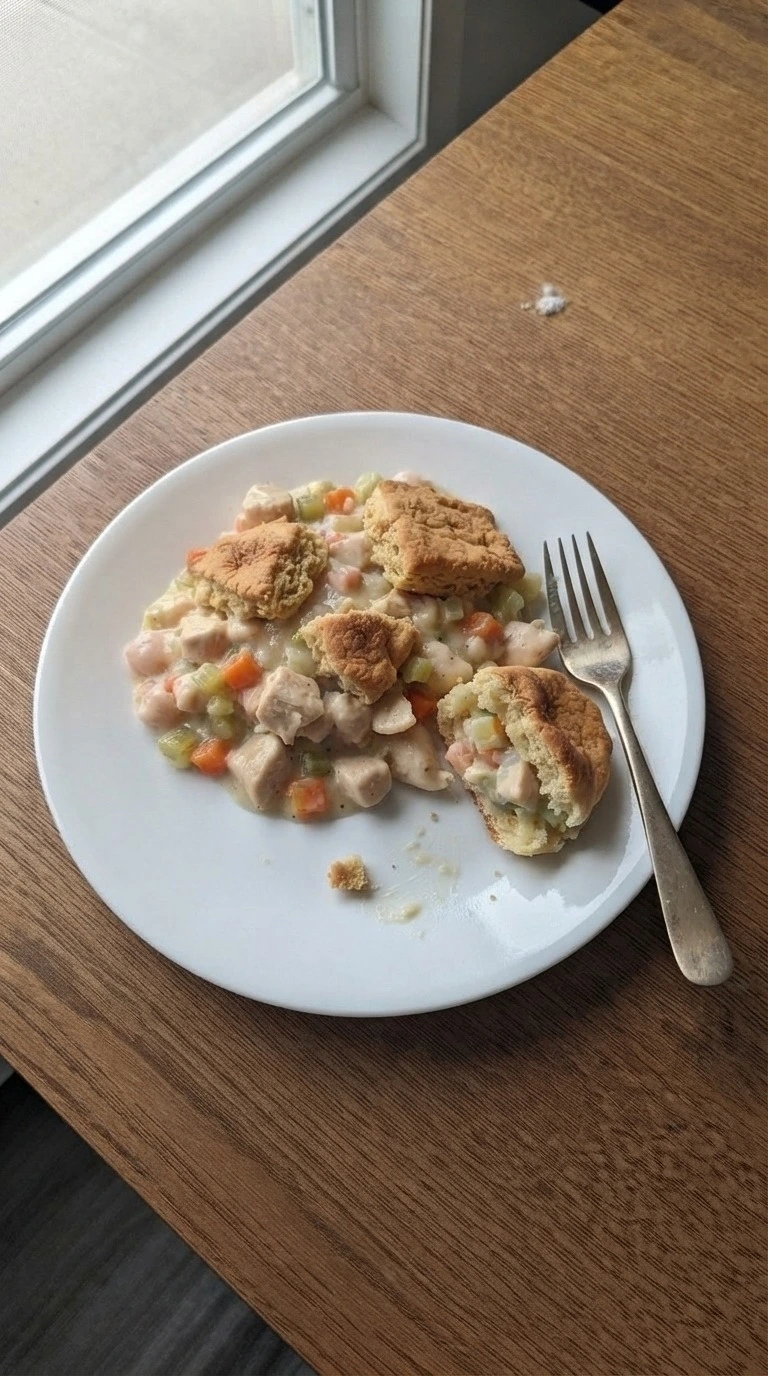
Rest the casserole at room temperature for 10 minutes, then scoop one portion onto a white plate. Cut through the biscuit layer with a gentle downward motion and reveal the creamy center.
The inside should look thick and smooth with visible chicken and vegetables. You’ll notice uneven biscuit edges and sauce between layers.
Serve too soon and the filling can spread across the plate. Resting gives the sauce time to hold its shape.
Tip: Add a small pinch of fresh thyme after serving for a brighter flavor contrast.
Pro Tips
- Cut the chicken into 1-inch pieces and keep them similar in size because uneven pieces can finish at different times during the 375°F bake.
- Choose fresh carrots and celery with firm texture because older vegetables can release extra water and make the filling thinner after 25 minutes.
- Use a 9×13 ceramic baking dish for even heat distribution, since a very thin pan can brown the biscuit topping before the center warms.
- Prepare the filling up to 24 hours ahead and store it covered in the refrigerator, then add the biscuit dough just before baking.
- Don’t overfill the dish above the rim because bubbling sauce needs space during the final 10 to 15 minutes of baking.
- Add 1/2 teaspoon extra thyme or rosemary before serving if you want a stronger herb flavor without changing the creamy texture.
- Let each portion rest for 10 minutes after baking because the sauce thickens slightly and stays inside the biscuit layers.
- Add 1 cup frozen peas and 1/2 cup diced mushrooms to the filling for a classic vegetable version with more texture.
- Mix 1 teaspoon smoked paprika into the sauce for a deeper flavor that gives the casserole a gentle smoky note.
- Replace half of the chicken breast with cooked turkey during holiday season for a leftover-friendly variation.
- Add 1/2 cup shredded sharp cheddar over the biscuit topping before baking for a richer cheesy finish.
Substitutions
- whole milk: unsweetened oat milk. Use the same 1 cup amount for a dairy-free option. The sauce becomes slightly lighter and less rich, so add 1 extra tablespoon of flour if you want a thicker filling.
- all-purpose flour: gluten-free all-purpose flour blend. Replace it cup for cup with a blend that contains xanthan gum. The filling may set a little faster, so stir carefully during the 5-minute thickening stage.
- refrigerated biscuit dough: gluten-free biscuit dough. Use a tested gluten-free biscuit dough because regular swaps can become dense. The topping may have a softer crumb and needs the same 375°F bake time.
- boneless chicken breast: boneless chicken thigh. Use the same quantity for a juicier result. Chicken thighs add deeper flavor but may need a few extra minutes to reach 165°F internal temperature.
- refrigerated biscuit dough: homemade biscuit dough. A homemade version gives a fresher butter flavor and flakier texture. If you want another simple comfort meal, try our Chicken Burrito Casserole for a different baked chicken option.
Storage
Keep leftover casserole in an airtight container or cover the baking dish tightly and refrigerate for up to 4 days. You can freeze portions for up to 3 months when wrapped well with freezer-safe packaging.
Reheat slices at 350°F for 15 to 25 minutes until the filling is hot, and add 1 tablespoon of milk if the sauce looks too thick. Discard leftovers if you notice sour smells, unusual texture, or mold.
FAQ
Yes, you can prepare the creamy filling up to 24 hours before baking and keep it covered in the refrigerator. Add the biscuit dough right before placing the dish in a 375°F oven so the topping stays fluffy instead of becoming soggy.
Store leftovers in a sealed container for up to 4 days in the refrigerator. Reheat individual portions at 350°F for about 15 minutes and check that the center reaches a warm temperature before serving.
A watery filling usually happens when the flour sauce did not thicken enough before baking or when extra liquid came from vegetables. Cook the sauce for about 5 minutes until it coats a spoon before adding the biscuit topping.
Freeze the baked casserole for up to 3 months by wrapping it tightly after it cools completely. Thaw it overnight in the refrigerator and reheat at 350°F for 25 to 30 minutes until the filling is hot.
Yes, double the ingredients and divide the mixture between two 9×13 baking dishes instead of making one deeper casserole. A deeper dish can need extra baking time and may leave the biscuit center undercooked.
Serve it with a crisp salad, roasted vegetables, or a light soup for balance. Our Gluten Free Chicken Noodle Soup is another comforting option when planning a chicken dinner menu.
Chicken pot pie has roots in old European meat pies, but modern American versions often use biscuits instead of pastry. This casserole style keeps the creamy filling while making serving much simpler.