


Turkey Gravy Without Drippings is the answer when your Thanksgiving turkey hasn’t left you enough pan juices or you’re making the gravy before the bird even goes into the oven. You still get that rich and savory flavor. No roasting pan needed. And nobody has to know you made the gravy separately.
I’ve found that a good easy turkey gravy without drippings depends more on the broth and the way you cook the flour than on anything left in a roasting pan. Butter gives it body while a little thyme and sage bring that familiar holiday flavor. If you’re planning the whole meal, our Southern Thanksgiving Soul Food Cornbread Dressing makes a great partner for this gravy. There’s also something nice about getting one more thing done before everyone arrives.
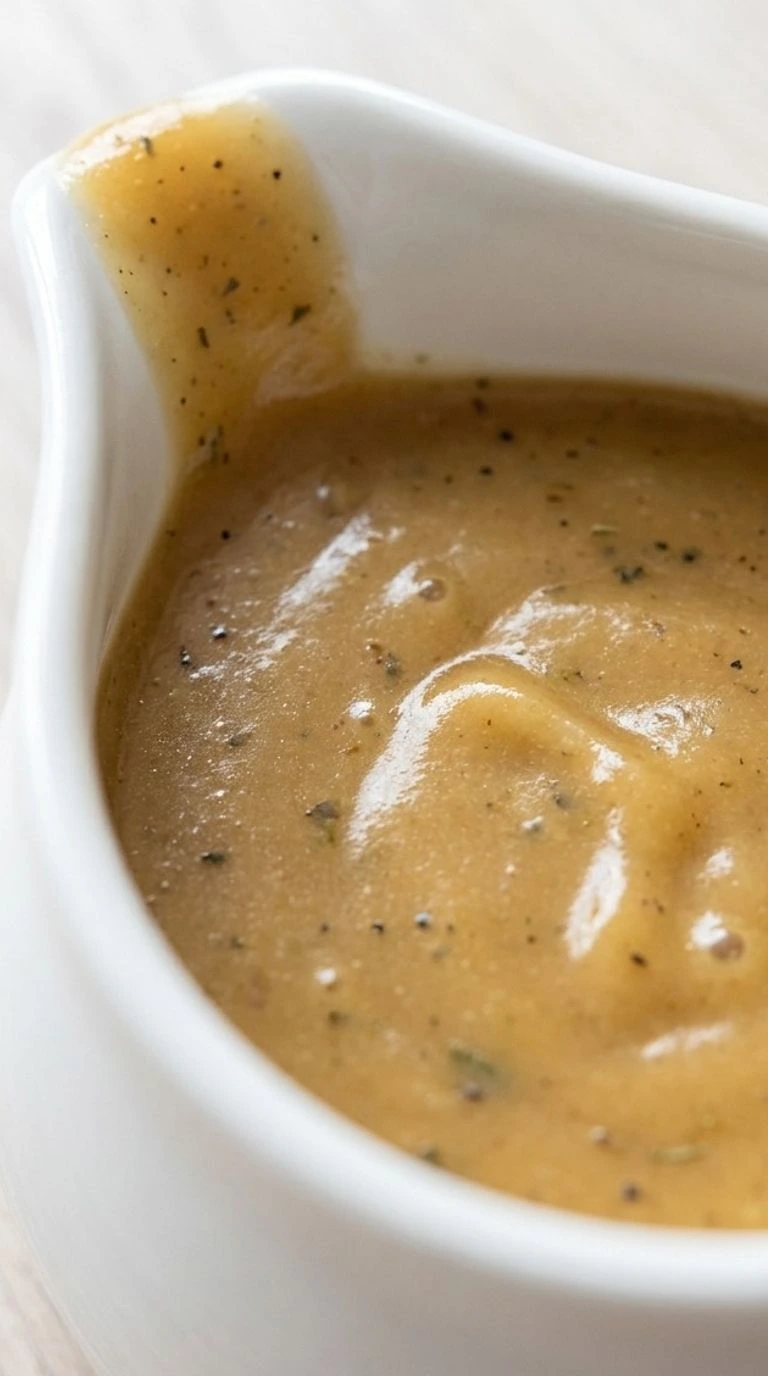
This gravy takes about 20 minutes from start to finish and you can make it ahead without losing that smooth texture. It’s good over mashed potatoes and sliced turkey. Leftover biscuits are fair game too.
Why This Recipe Works
Turkey Gravy Without Drippings gets its body from a roux made with equal amounts of butter and flour by weight. Toasting that paste for 2 to 3 minutes takes away the raw flour taste while keeping enough thickening power for 2 cups of broth.
Then warm broth blends into the paste with less fuss. A gentle simmer near 200°F lets the flour starch swell so the gravy thickens without sticking to the pan.
Sage and thyme give the sauce its holiday flavor.
Ingredients
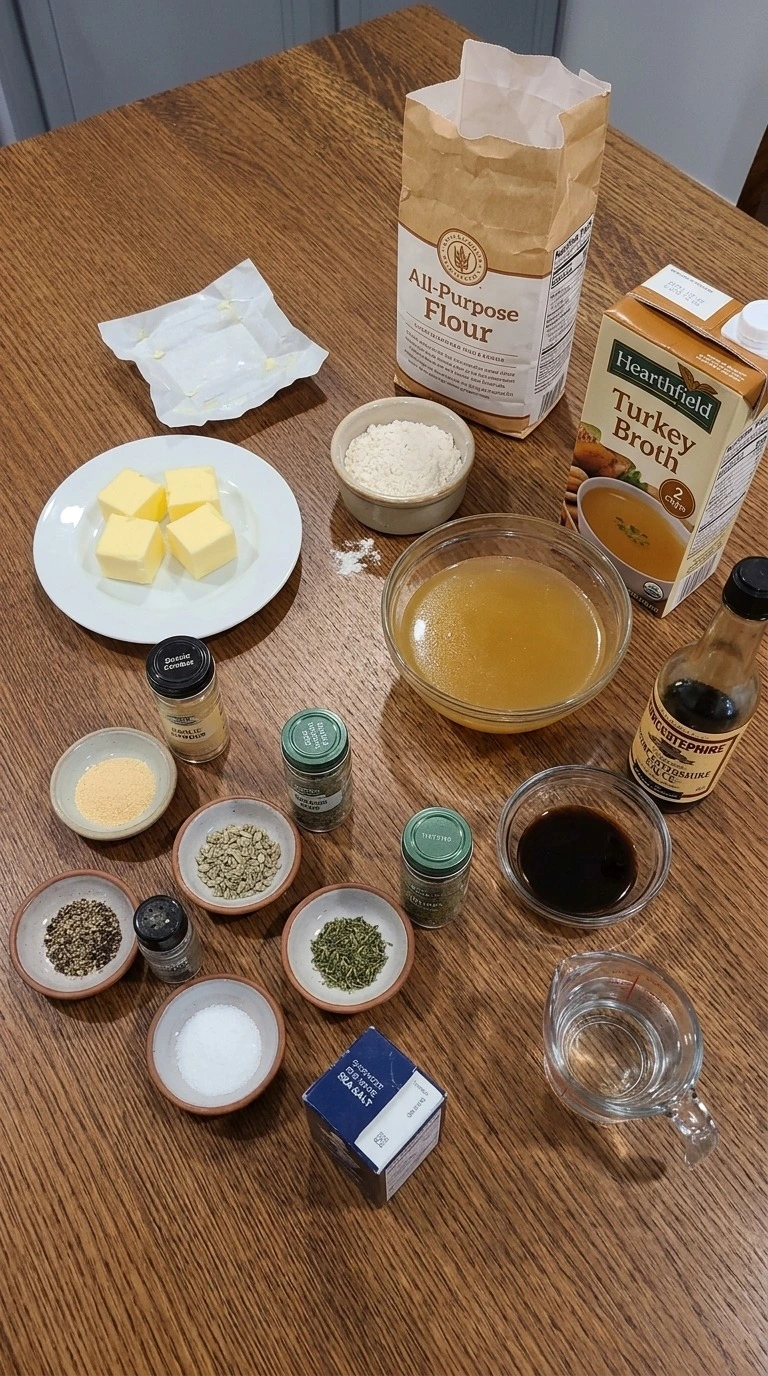
- unsalted butter: Cut into four pieces so it melts evenly and creates a rich base for the roux.
- all-purpose wheat flour: Whisked into the melted butter to thicken the gravy without leaving a raw flour taste.
- low-sodium turkey broth: Warmed to approximately 140°F before mixing to provide savory turkey flavor without roasting drippings.
- Worcestershire sauce: Stirred into the simmering sauce to add savory depth and a slightly darker color.
- garlic powder: Added with the dried herbs for a mild garlic flavor without visible garlic pieces.
- dried rubbed sage: Added during simmering for a warm herbal flavor associated with holiday turkey dinners.
- dried thyme leaves: Lightly crushed before adding to release their aroma and balance the buttery broth.
- freshly ground black pepper: Stirred into the gravy for gentle heat and tiny dark flecks.
- fine sea salt: Added near the end so the final seasoning can be adjusted to the saltiness of the broth.
- water: Heated and added only if needed to loosen gravy that has thickened too much.
Equipment
- 2-quart heavy-bottomed saucepan: A heavy-bottomed 2-quart stainless steel saucepan spreads heat evenly while the roux cooks, and a thin saucepan can scorch the flour before it turns golden.
- 10-inch balloon whisk: A flexible 10-inch stainless steel balloon whisk reaches the bottom edges of the saucepan to blend the flour smoothly, while a stiff oversized whisk can leave lumps along the sides.
- 1-quart small saucepan: A 1-quart saucepan warms the turkey broth before mixing, and a pot with a pouring lip makes gradual additions easier without spilling.
- Heat-resistant measuring cup: A heat-resistant 2-cup measuring cup helps portion warm turkey broth accurately, and a clear cup with readable markings prevents adding too much liquid.
- Measuring spoons: A set with 1/8-teaspoon and 1/4-teaspoon measures keeps the dried herbs and salt balanced, while guessing can make this small batch too salty.
- Instant-read kitchen thermometer: An instant-read thermometer with a probe suitable for liquids helps check the broth and serving temperatures, and a slow-reading thermometer makes heat control less practical.
- Small white ceramic gravy boat: A white ceramic gravy boat with a capacity of at least 2 cups and a defined pouring spout holds the finished sauce neatly, while a shallow vessel makes serving messy.
Instructions
Step 1: Melt the butter and toast the flour
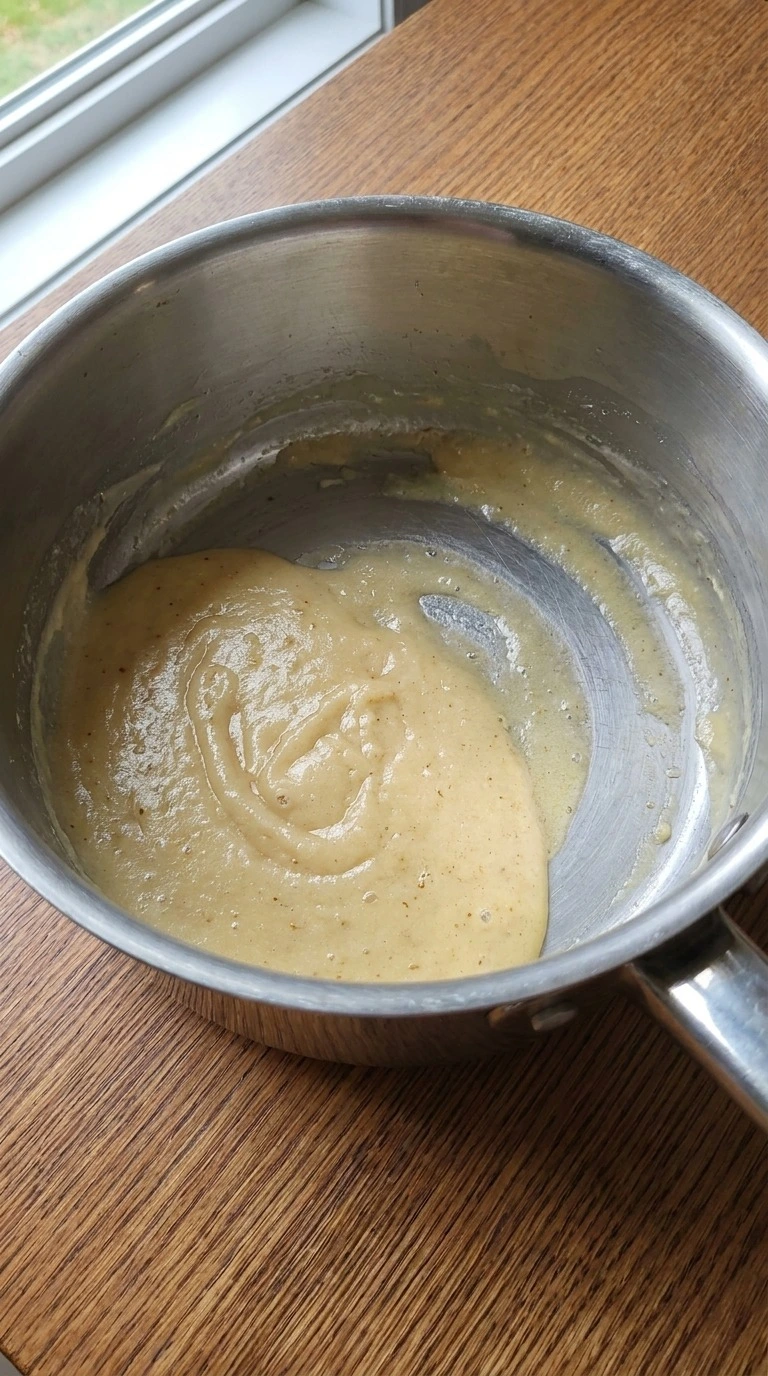
Set a 2-quart heavy-bottomed saucepan over medium-low heat (about 3 on a 10-point burner dial). Add 4 tablespoons of unsalted butter and let it melt for 1 to 2 minutes. Once the butter starts to foam gently, sprinkle in 1/4 cup of all-purpose wheat flour. Whisk in small circles until the flour and butter form a thick paste.
Keep whisking for 2 to 3 minutes so the paste turns pale gold and loses its raw flour smell. Don’t rush this part. You’re building the base that gives the gravy its smooth body. Next, watch for tiny bubbles around the edges and a light toasted smell.
The paste should look silky rather than dry or crumbly. If dark brown spots appear, the heat is too high and the flour may taste bitter. Gentle heat lets the flour toast without burning.
Tip: Use a saucepan with a heavy base that’s at least 2 quarts so the butter heats evenly and the flour doesn’t scorch in thin spots.
Step 2: Whisk in the turkey broth
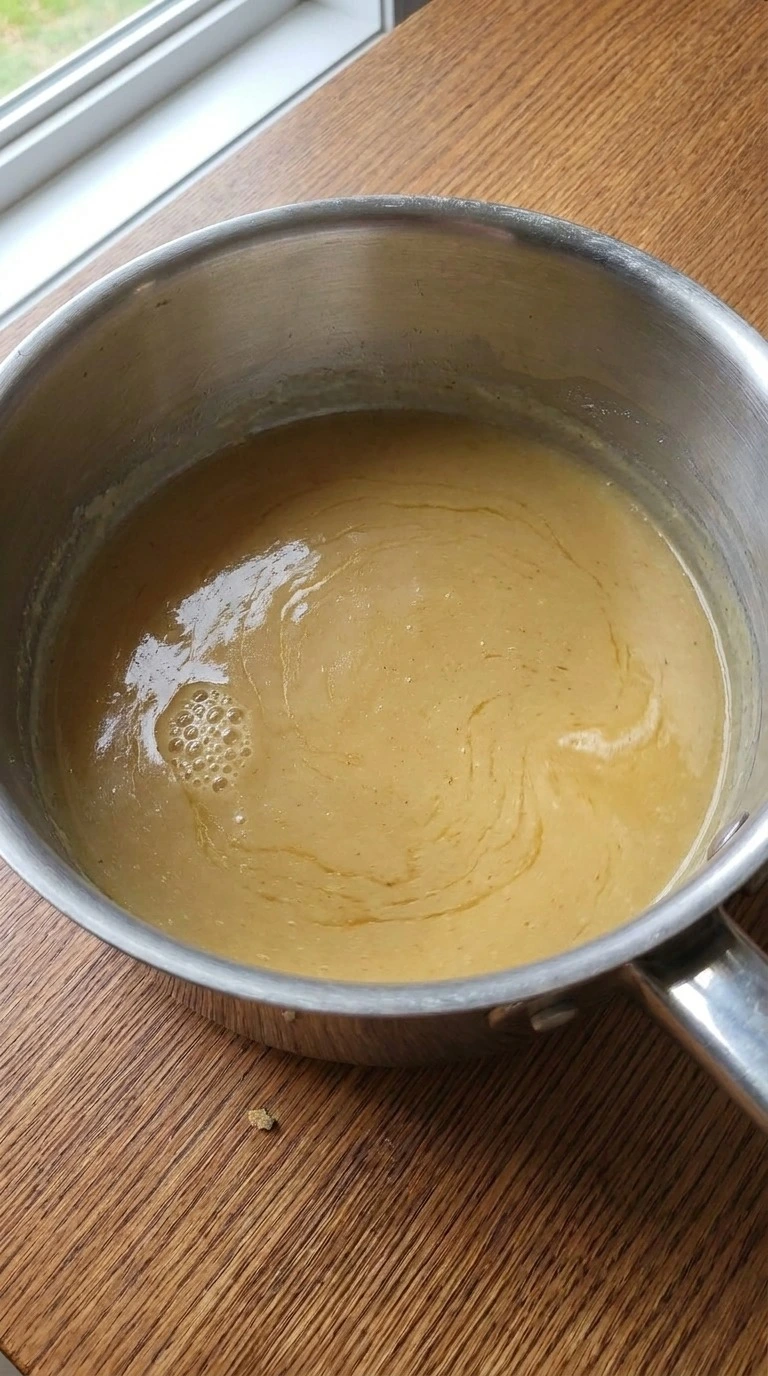
Warm 2 cups of turkey broth to about 140°F in a separate small saucepan over medium-low heat for 3 to 4 minutes. Then turn the heat beneath the roux to medium (about 5 on a 10-point dial). Pour roughly 1/2 cup of the warm broth into the flour mixture in a thin stream while whisking in tight circles. It’ll look thick at first.
Keep stirring until the paste loosens and turns smooth. Add the remaining 1 1/2 cups in three portions over 2 minutes and whisk after each addition. This steady approach helps the flour spread through the liquid. At this stage, the mixture changes from a pale paste to a thin golden sauce.
You’ll see small ripples and perhaps a few bubbles near the edges. Pouring all the broth at once can trap dry flour and leave lumps. Gradual mixing keeps the starch evenly spread.
Tip: Choose low-sodium turkey broth so you can control the final salt level. A strongly salted 2-cup carton may become overpowering as the gravy thickens.
Step 3: Add the herbs and simmer until thick
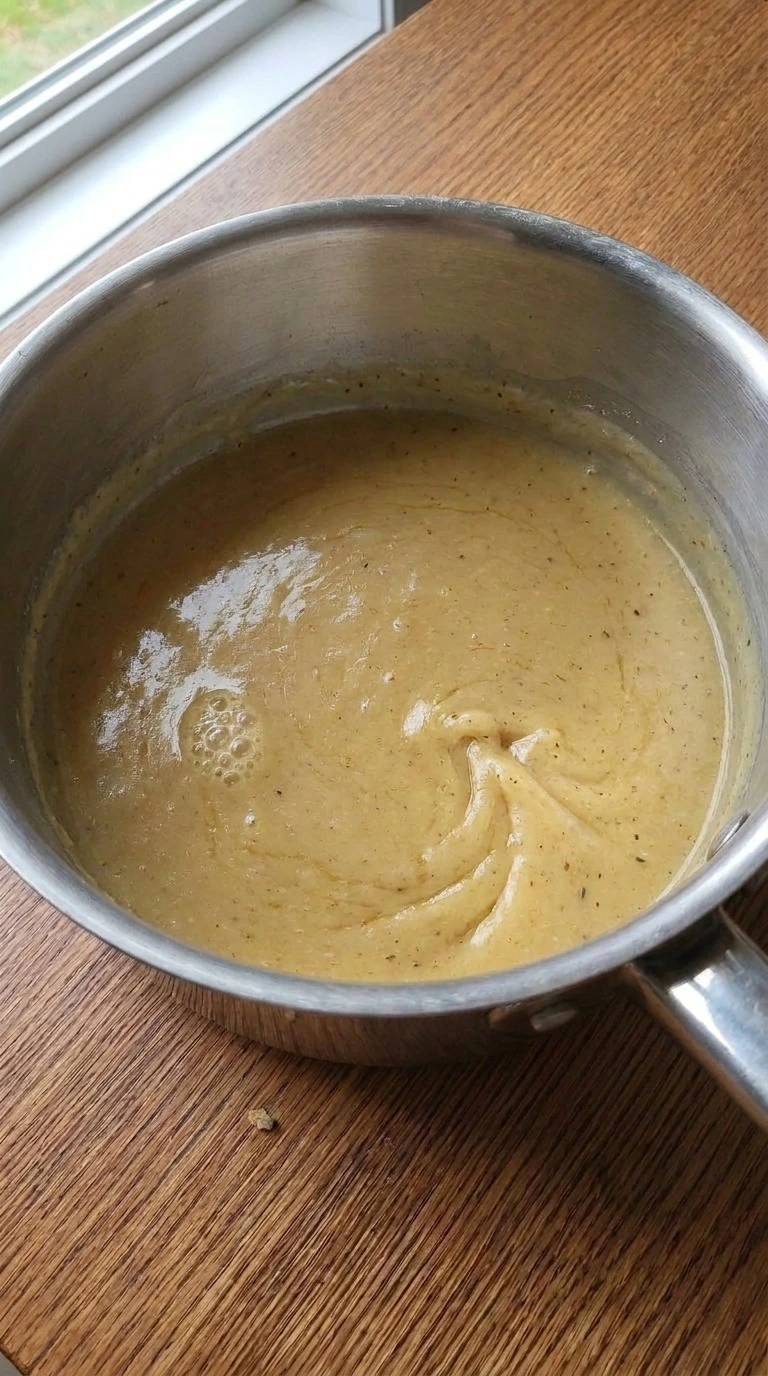
Stir 1 teaspoon of Worcestershire sauce into the gravy along with 1/4 teaspoon of garlic powder, 1/4 teaspoon of dried rubbed sage and 1/4 teaspoon of dried thyme leaves. Add 1/8 teaspoon of freshly ground black pepper. Bring the sauce to a gentle simmer over medium heat (about 5 on a 10-point dial). Aim for a sauce temperature near 200°F rather than a hard boil.
Whisk across the bottom in wide sweeps for 5 to 7 minutes as the gravy grows thicker. Pay close attention near the end because the flour thickens fast once the sauce heats through. You should see slow bubbles break the surface and leave faint rings behind. The gravy will turn a deeper golden tan with tiny herb flecks.
(I once let it bubble too hard and lost more liquid than I wanted. A gentle simmer gave me a smoother sauce. ) Keep the heat steady because rapid boiling can make the bottom scorch.
Tip: If you want a stronger herb flavor, crush the measured dried thyme leaves between your fingertips before adding them to release more aroma.
Step 4: Finish the gravy and pour into the gravy boat
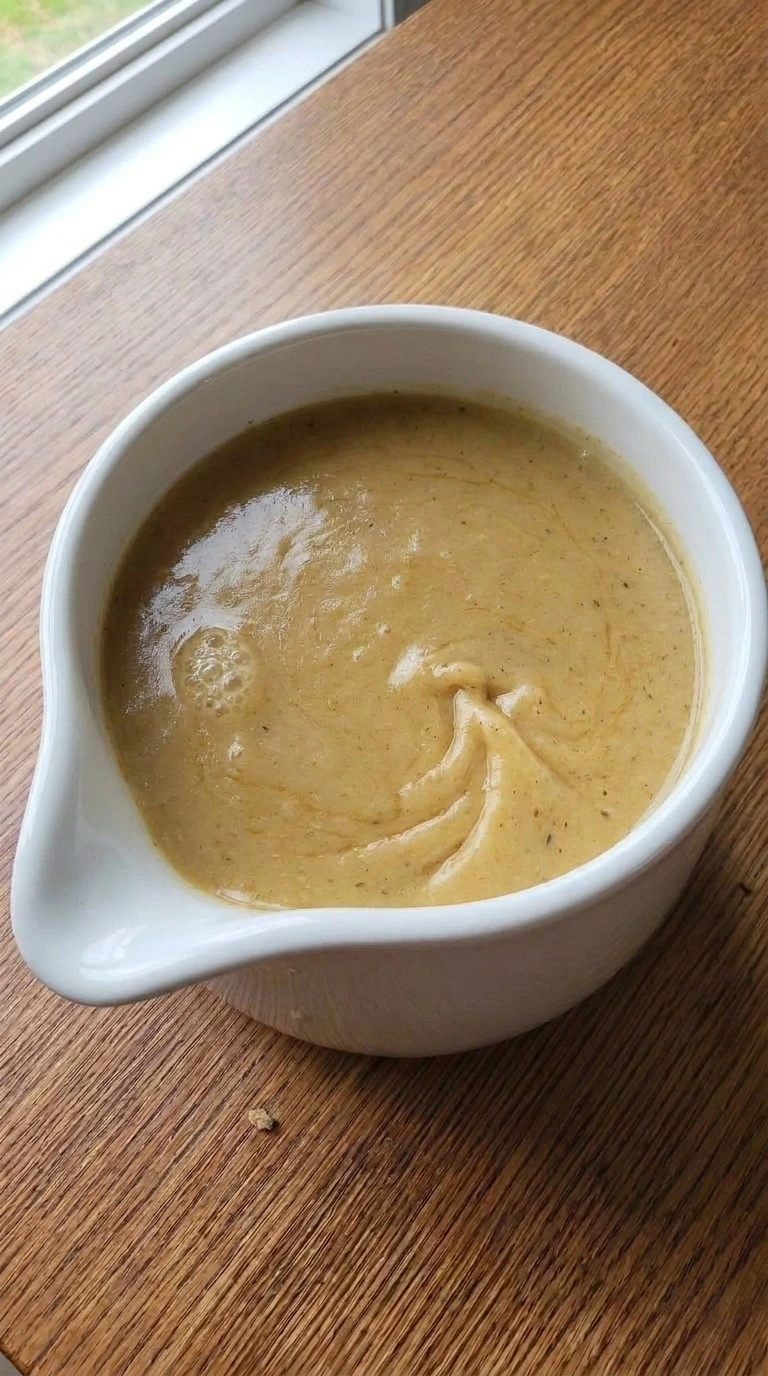
Turn the burner to low (about 2 on a 10-point dial) once the gravy coats the back of a spoon. Add 1/8 teaspoon of fine sea salt and whisk for 30 seconds. Taste a small spoonful after it cools enough to sample. Then let the sauce settle for 1 minute off the heat.
It should flow in a thick ribbon rather than fall in heavy clumps. If it has become too thick, whisk in 1 tablespoon of hot water at a time until it pours with ease. Use only as much water as needed. Finally, pour the gravy into a small white gravy boat and serve while it’s hot.
Aim for a serving temperature near 160°F. The finished sauce should look golden brown with fine flecks and a few uneven ripples. Leaving it over high heat now can make it pasty. The short rest lets the bubbles settle for a smoother pour.
Tip: Warm the gravy boat with hot water for 2 minutes and empty it before filling so the sauce stays warmer during dinner.
Pro Tips
- Toast the butter and flour mixture for 2 to 3 minutes over medium-low heat. A pale golden color means the raw flour taste has faded.
- Choose low-sodium turkey broth with turkey listed among the first ingredients. Taste it before cooking because salty broth can overwhelm a small batch.
- Use a 10-inch balloon whisk and sweep across the bottom of the saucepan every 20 seconds. This helps stop flour from collecting near the edges.
- Make the gravy up to 2 days before Thanksgiving and chill it promptly. You’ll have one less task while the turkey rests.
- If tiny flour lumps remain, pass the hot gravy through a fine-mesh strainer once. Don’t keep boiling it because extra heat won’t dissolve dry clumps.
- Add 1/8 teaspoon of freshly ground black pepper before the final simmer. The gentle heat brings out its aroma without making the gravy overly spicy.
- Check the texture after 5 minutes of simmering. If the sauce leaves a clean trail across a coated spoon, it’s thick enough for serving.
- Keep the gravy warm above 140°F if dinner is delayed. Stir every 5 minutes and avoid a hard boil that reduces the liquid too far.
- Make a mushroom turkey gravy by sautéing 1/2 cup of finely chopped cremini mushrooms in the butter for 4 minutes before adding the flour. The gravy will have a deeper earthy flavor and small mushroom pieces.
- Give the gravy a rosemary twist by replacing the 1/4 teaspoon of dried thyme leaves with 1/4 teaspoon of crushed dried rosemary. The flavor becomes more pine-like and aromatic.
- Make an onion-style holiday gravy by softening 2 tablespoons of finely minced yellow onion in the butter for 4 minutes before whisking in the flour. The onions add mild sweetness and a more rustic texture.
- Create an extra creamy version by replacing 1/4 cup of the turkey broth with 1/4 cup of heavy cream. Add the cream during the final 2 minutes and keep the heat low to preserve a smooth finish.
Substitutions
- unsalted butter: 4 tablespoons of dairy-free plant-based butter. Use a plant-based butter with at least 75% fat for a dairy-free gravy. The flavor will be less rich and some brands contain more water, so the roux may need an extra minute to thicken.
- all-purpose wheat flour: 1/4 cup of gluten-free all-purpose flour blend. Choose a gluten-free blend designed for cup-for-cup baking. The gravy may have a slightly different texture and thicken faster, so start checking it after 4 minutes of simmering. Check that the broth and Worcestershire sauce are also gluten-free.
- low-sodium turkey broth: 2 cups of low-sodium chicken broth. Chicken broth makes a lighter gravy with a milder poultry flavor. Keep the same amount and add an extra pinch of dried rubbed sage if you want a stronger holiday taste. For another comfort food idea using chicken, try our Chicken and Dumplings with Biscuits.
- Worcestershire sauce: 1 teaspoon of low-sodium soy sauce or gluten-free tamari. Soy sauce adds savory depth but lacks the tangy notes of Worcestershire sauce. Use the same amount and taste before adding salt. Choose gluten-free tamari when needed. Traditional Worcestershire sauce often contains anchovies.
- dried rubbed sage: 3/4 teaspoon of finely chopped fresh sage. Fresh sage gives the gravy a brighter herbal flavor and a few more visible green flecks. Add it during the final 3 minutes of simmering rather than at the start. This keeps the flavor from turning dull.
Storage
Turkey Gravy Without Drippings keeps well in the refrigerator for 3 to 4 days when stored at 40°F or below. Let it cool briefly and transfer it into a shallow airtight container within 2 hours of cooking. The gravy will thicken as it chills. That’s normal.
For longer storage, freeze individual portions in sealed freezer-safe containers for up to 3 months for the best quality. Leave a little room for expansion and label each container with the date. To reheat, place the gravy in a saucepan over medium-low heat for 5 to 8 minutes while stirring. Heat it to 165°F and whisk in 1 to 2 tablespoons of warm turkey broth if needed.
Don’t serve gravy with visible mold or an unusual smell. And remember that harmful bacteria don’t always change food’s appearance or odor.
FAQ
Yes, you can prepare the gravy up to 2 days before your holiday meal. Cool it quickly in a shallow container and refrigerate at 40°F or below within 2 hours of cooking. When you’re ready to serve, reheat it in a saucepan over medium-low heat for about 5 to 8 minutes while stirring. Add a splash of broth if the sauce has thickened overnight.
The flour may not have reached a full simmer long enough to thicken the broth. Let the gravy bubble gently for another 2 to 3 minutes while whisking, then check whether it coats a spoon. If it’s still thin, mix 1 teaspoon of cornstarch with 2 teaspoons of cold water and stir it into the simmering gravy. Cook for 1 more minute until the sauce thickens.
Yes, replace the 2 cups of turkey broth with an equal amount of low-sodium chicken broth. Chicken broth creates a slightly lighter flavor, but the butter and toasted flour still give the gravy a rich body. Add another 1/8 teaspoon of dried rubbed sage if you’d like a stronger holiday taste. Keep the simmer gentle and check the thickness after 5 minutes.
Store the gravy in a sealed container at 40°F or below and use it within 3 to 4 days. Refrigerate it within 2 hours of cooking and divide large batches into shallow containers so they cool faster. The gravy may become firm and slightly gelatinous while chilled. That change is normal because the butter and starch thicken as they cool, but discard it if you notice mold or an unusual odor.
Yes, double every ingredient to make about 4 cups of gravy for approximately 16 servings. Use a 3-quart saucepan or larger so you have enough room to whisk without splashing. Cook the butter and flour for the same 2 to 3 minutes, then add the warm broth gradually. The larger batch may need 2 to 4 extra minutes of gentle simmering to reach the right consistency.
Serve it over sliced roast turkey or mashed Yukon Gold potatoes for a classic Thanksgiving plate. This gravy also works well with cornbread dressing and roasted vegetables because its mild sage flavor won’t overpower the other dishes. Plan on roughly 1/4 cup per person and keep it hot for serving. If you’re feeding gravy lovers, make a double batch.
Yes, freeze the cooled gravy in airtight freezer-safe containers for up to 3 months for the best texture. Leave about 1/2 inch of space at the top because the gravy expands as it freezes. Thaw it overnight in the refrigerator and reheat over medium-low heat while whisking. Bring it to 165°F before serving and add 1 to 2 tablespoons of warm turkey broth if it seems too thick.
Traditional gravy often gets its body from flour mixed with fat and its flavor from roasting juices. But a butter-based roux can thicken broth just as well. In fact, cooking flour in fat helps keep the starch evenly spread when liquid is added. That’s why a simple saucepan gravy can turn out smooth without a single drop of turkey drippings.