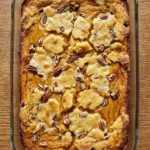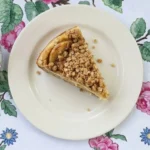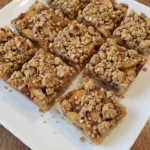


There’s something about Apple Crumble Pie that makes the whole kitchen feel like fall. The smell of cinnamon drifts through the house while the apples turn soft and the buttery crumbs begin to toast. It’s the kind of dessert that brings everyone into the kitchen before you’ve even cut the first slice. I’ve always liked an apple pie with a crisp top.
You get the sweet fruit filling and flaky bottom crust without having to roll out a second layer of pastry. And if you’re looking for another apple dessert with that same golden topping, our Apple Crisp with Oatmeal Crumble is worth trying. It’s a lovely option when you don’t feel like making a pie crust. This easy apple crumble pie uses two kinds of apples because each one brings something different to the filling.
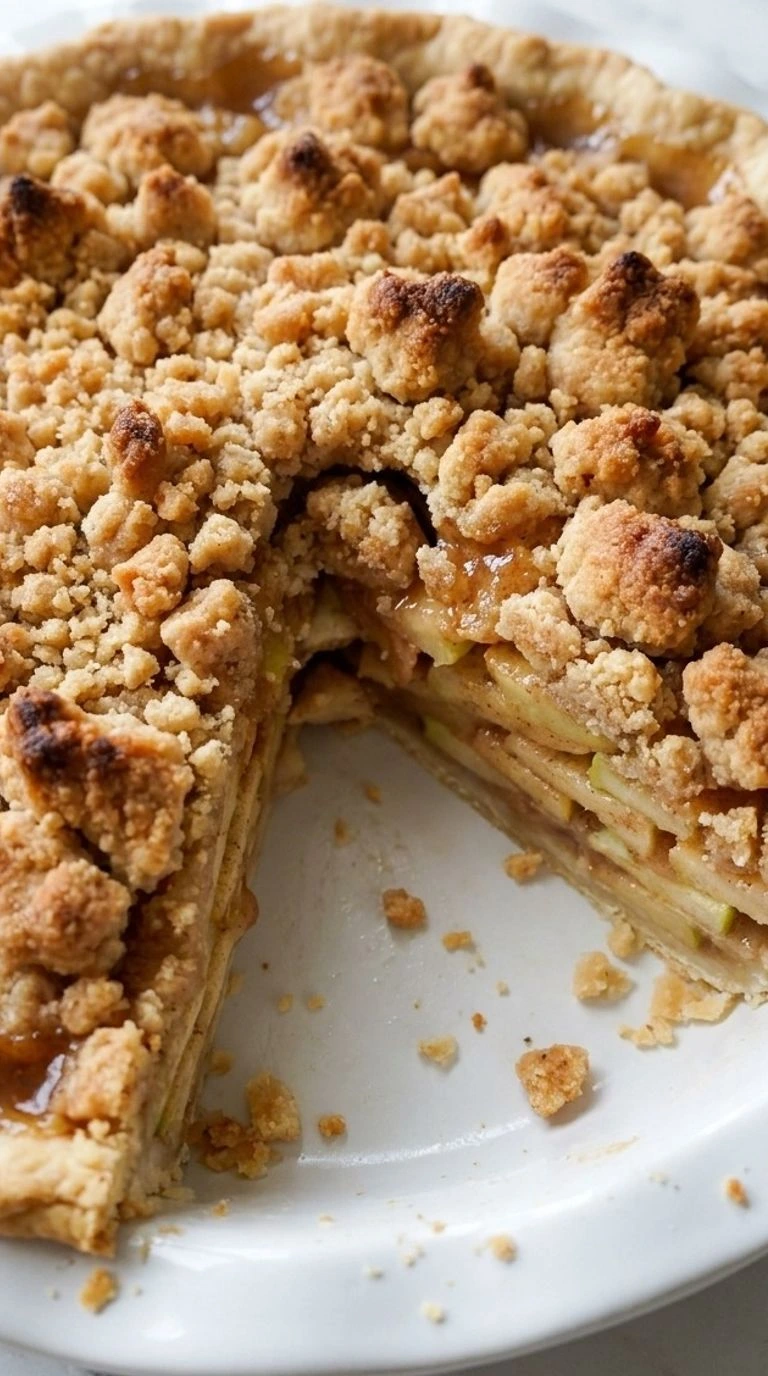
Granny Smith apples add a tart bite while Honeycrisp apples give the pie a sweeter flavor and a tender texture. The crumb topping turns golden in the oven and leaves little crisp bits around the edges. No fancy pastry work needed. Just good apples and a little patience while the pie cools.
Why This Recipe Works
Apple Crumble Pie works well because the two apple varieties soften at different rates. Granny Smith holds its shape while Honeycrisp turns more tender.
The 3 tablespoons of flour help bind the juice as the fruit heats, so the slices don’t fall apart when you serve them. Baking at 375°F gives the apples time to soften while the cold butter forms crisp crumbs on top.
And if you enjoy that mix of sweet fruit and crunchy topping, try our Apple Crisp Cheesecake for another fall dessert.
Ingredients
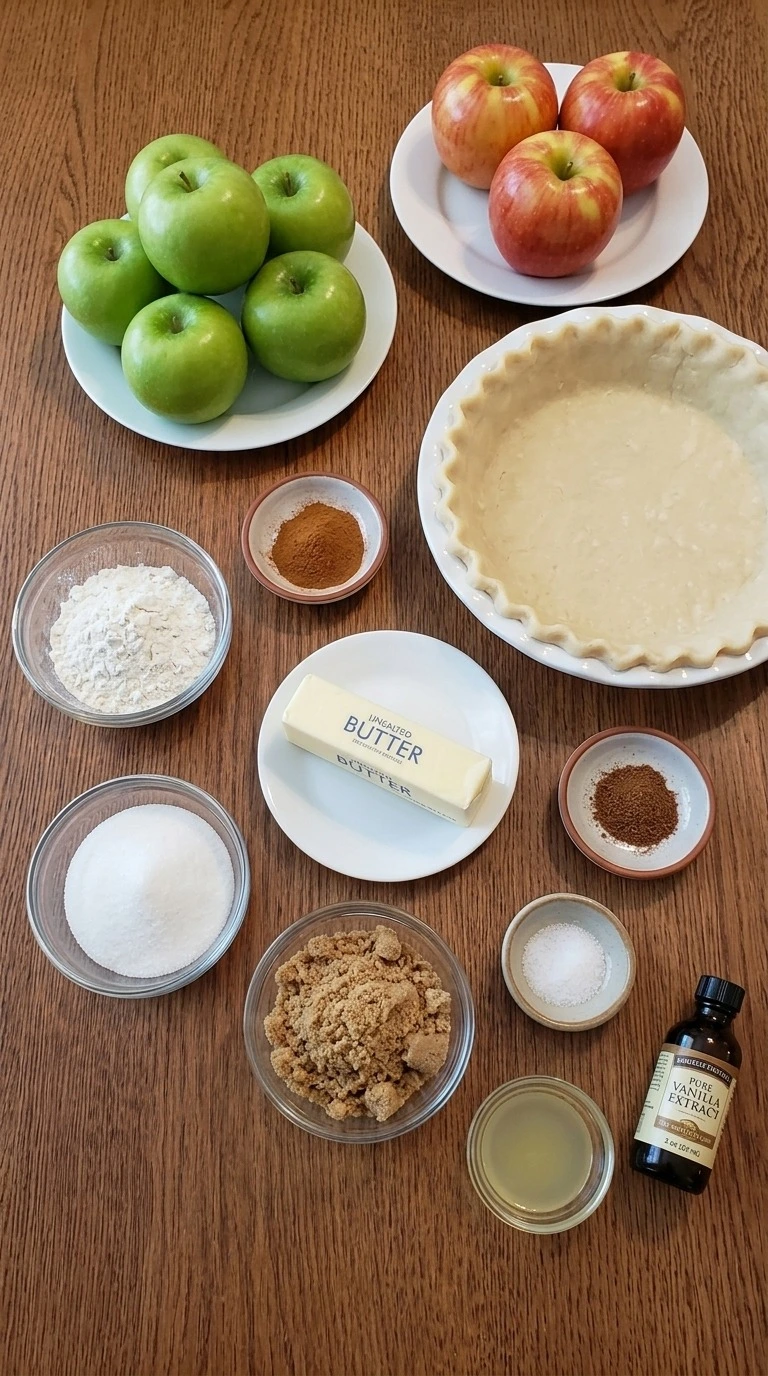
- Granny Smith apple: Peeled, cored and sliced about 1/4 inch thick. Provides tart flavor and firm apple pieces that hold their shape during baking.
- Honeycrisp apple: Peeled, cored and sliced about 1/4 inch thick. Adds natural sweetness and tender fruit texture. The combined sliced apples should measure about 6 cups.
- Refrigerated 9-inch pie crust: Unrolled and fitted into a 9-inch pie dish. Forms the flaky pastry base without requiring homemade dough.
- Granulated white sugar: Mixed into the apple filling to balance the tart Granny Smith apples and help release fruit juices.
- Light brown sugar: Packed firmly before measuring. Adds a mild caramel flavor and helps create golden clusters in the crumble topping.
- All-purpose flour: Divided into 3 tablespoons for thickening the apple filling and 3/4 cup for the crumble. Gives the topping structure while helping the fruit juices set.
- Unsalted butter: Kept cold and cut into small cubes. Creates crisp buttery crumbs as it melts into the brown sugar and flour.
- Ground cinnamon: Divided into 1 1/2 teaspoons for the apples and 1/2 teaspoon for the crumble. Adds warm spice throughout the dessert.
- Ground nutmeg: Mixed into the apple filling for a gentle warm spice that supports the cinnamon without overpowering the fruit.
- Fresh lemon juice: Squeezed from a fresh lemon and tossed with the sliced apples to add brightness and slow browning.
- Pure vanilla extract: Mixed into the apple filling to add a sweet aroma and soften the sharpness of the spices.
- Fine sea salt: Mixed into the crumble topping to balance the brown sugar and bring out the butter flavor.
Equipment
- 9-inch pie dish: Choose a 9-inch round pie dish that’s about 1.5 to 2 inches deep so the apple filling fits without overflowing, since a shallow dish can cause bubbling juices to spill.
- Large mixing bowl: A 4-quart mixing bowl gives you enough room to fold the sliced apples with sugar and spices without crushing them or spilling fruit over the rim.
- Medium mixing bowl: A 2-quart bowl works well for rubbing butter into the crumble mixture, while a much smaller bowl makes it harder to form evenly sized clusters.
- Sharp chef’s knife: An 8-inch chef’s knife makes even apple slices easier to cut, while a dull blade may slip against the firm fruit.
- Vegetable peeler: A sharp swivel peeler removes the thin apple skins without wasting much flesh, while a blunt peeler can tear away uneven chunks.
- Measuring cups and spoons: Use standard dry measuring cups and 1/4 to 1 tablespoon measuring spoons for accurate flour and spice amounts, since rough estimates can leave the filling runny or too thick.
- Rimmed baking sheet: A sturdy 13-by-18-inch rimmed baking sheet supports the pie dish and catches overflow, while a flat sheet can’t contain bubbling apple juices.
- Wire cooling rack: Choose a stable rack at least 10 inches wide to let air circulate under the hot pie dish, since a solid surface can trap heat and moisture beneath the crust.
- Pie server: A triangular pie server about 5 inches long supports the bottom crust while lifting slices, since a narrow spoon can break the fruit layers apart.
Instructions
Step 1: Peel and Slice the Apples
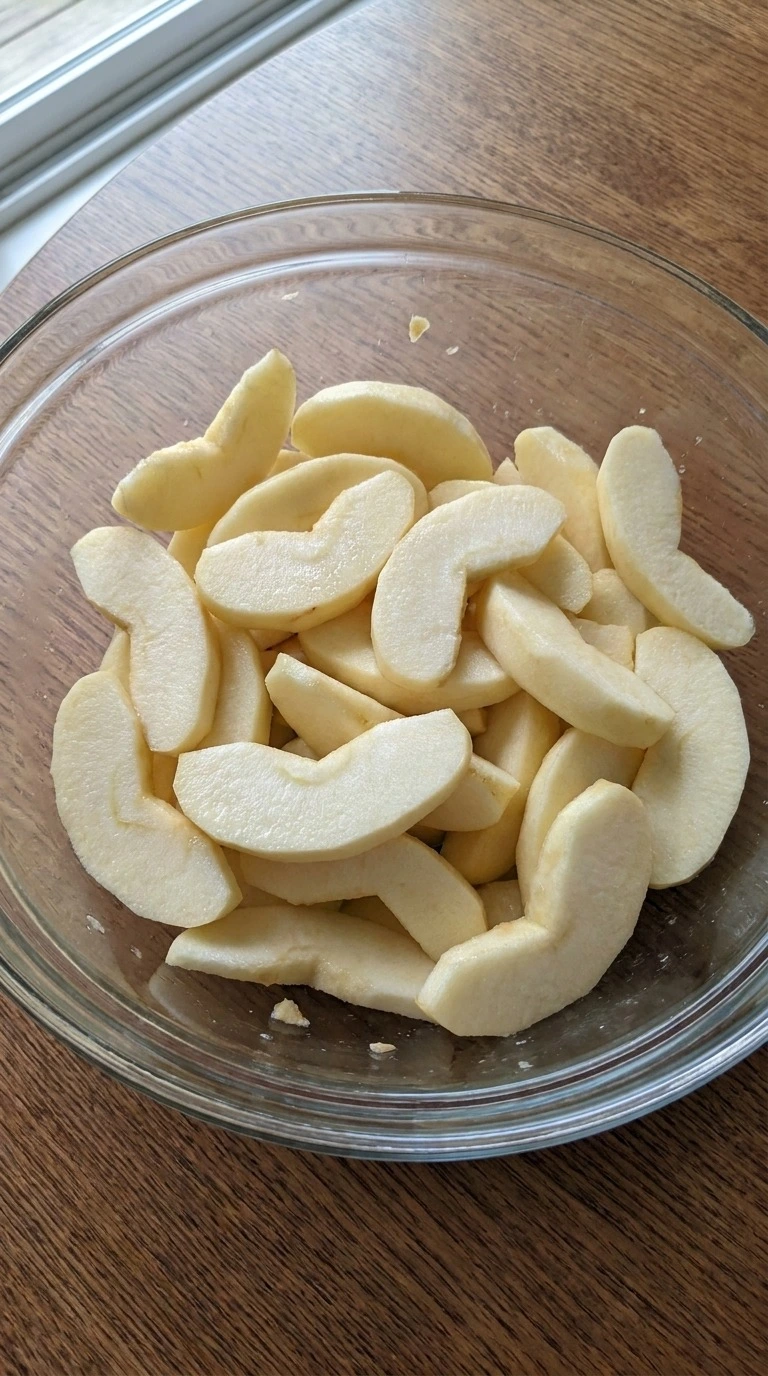
Peel and core 5 medium Granny Smith apples and 3 medium Honeycrisp apples. Cut them into slices about 1/4 inch thick so they’ll soften at the same rate. Aim for roughly 6 cups of sliced fruit. Place the slices in a large mixing bowl and add 1 tablespoon of fresh lemon juice. Then toss gently with your hands until the juice coats the fruit.
This takes about 8 to 10 minutes. While you work, set your oven to 375°F so it’s hot when the pie goes in. Keep the slices fairly even, but they don’t need to look identical. The apples should still feel firm and look fresh with a light sheen from the lemon juice. A few small pieces are fine.
But slices thicker than 1/2 inch can stay too firm after baking. The thin lemon coating also keeps cut apples from turning brown too soon. Even slices help the filling soften at the same pace.
Tip: Use apples that feel firm and heavy for their size. Soft apples can lose their shape before the crumble turns golden.
Step 2: Coat the Apples with Cinnamon Sugar
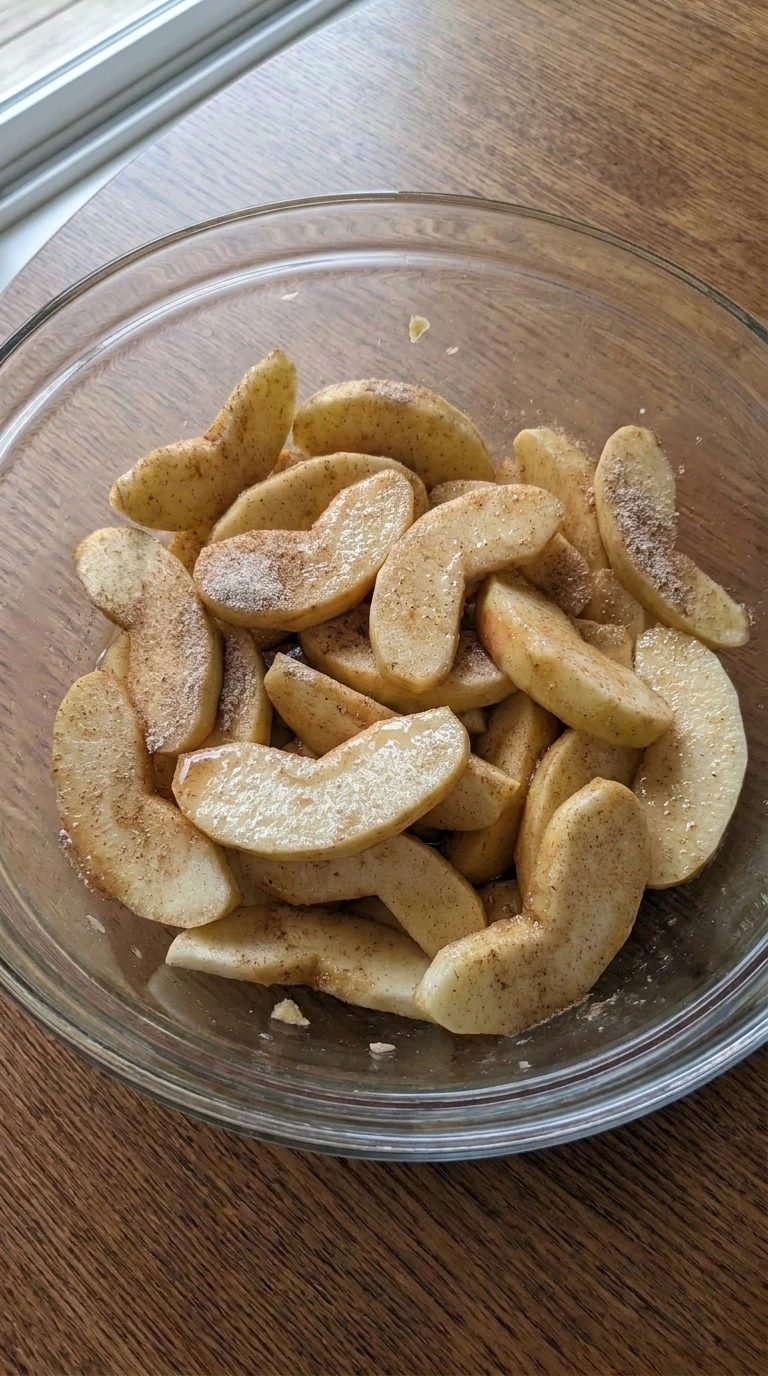
Add 1/2 cup of granulated white sugar and 3 tablespoons of all-purpose flour to the sliced apples. Sprinkle in 1 1/2 teaspoons of ground cinnamon and 1/4 teaspoon of ground nutmeg. Add 1 teaspoon of pure vanilla extract. Use a large spoon to lift the slices from the bottom and fold them over the top until the dry mix coats most of the fruit. Spend about 2 to 3 minutes on this part.
Don’t mash the apples or stir too hard. You want each slice to keep its shape because a thick layer of intact fruit holds up better under the crumble. At first, you’ll see pale flour and sugar on the apples. Then the coating will turn slightly damp and light brown as it meets the fruit juice. That’s your cue to stop mixing.
Let the filling sit for 5 minutes while you make the topping. Don’t leave it for 30 minutes because too much juice can collect in the bowl. Flour binds the juices as the filling heats.
Tip: For a stronger spice flavor, add an extra 1/8 teaspoon of ground nutmeg. Keep it small so the apple flavor stays clear.
Step 3: Mix the Buttery Crumble Topping
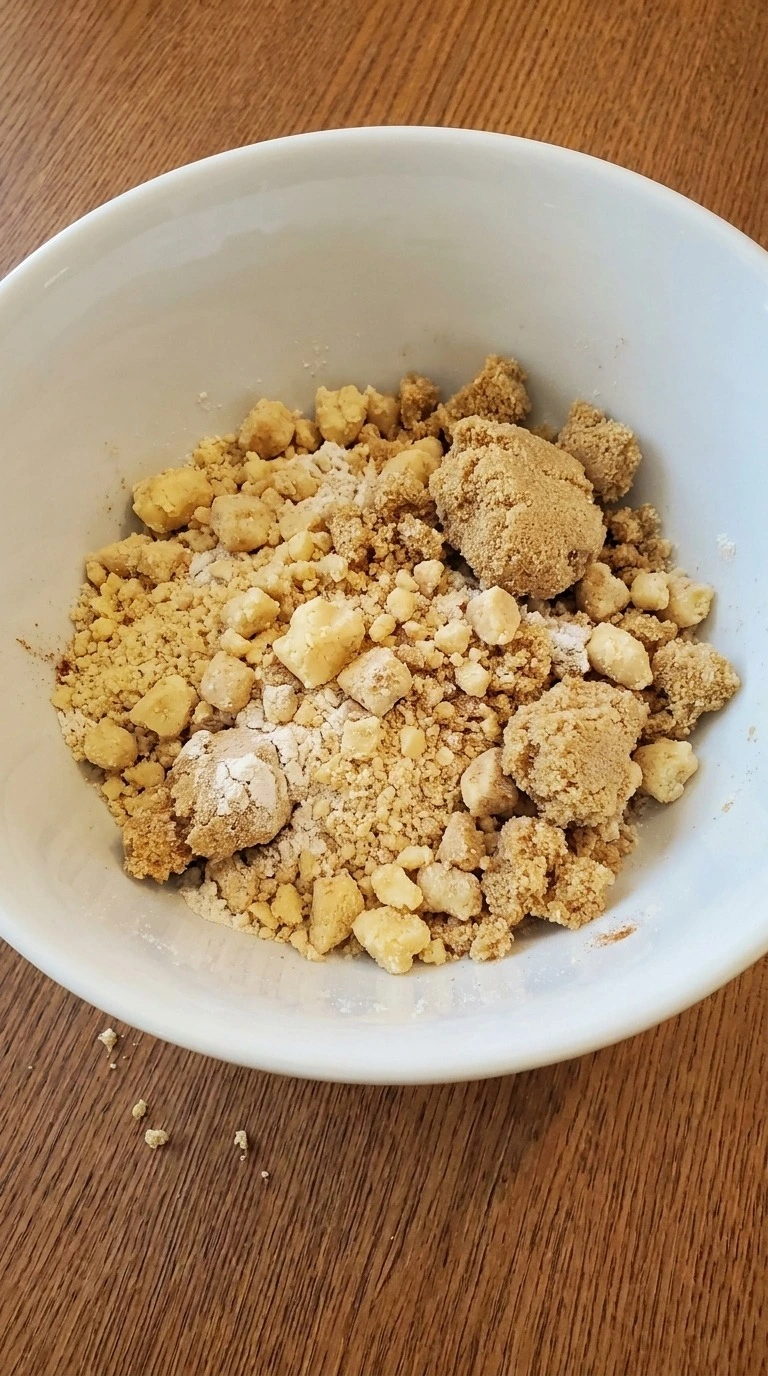
In a separate medium mixing bowl, combine 3/4 cup of all-purpose flour and 1/2 cup of packed light brown sugar. Add 1/2 teaspoon of ground cinnamon and 1/4 teaspoon of fine sea salt. Cut 6 tablespoons of cold unsalted butter into small cubes and drop them over the flour mixture. Then rub the butter into the dry ingredients with your fingertips.
Work for about 3 to 5 minutes until the mixture forms loose crumbs and small clumps. Stop when you can pinch a little together and it holds its shape. Don’t keep rubbing until it turns into a smooth dough. You’ll see pale golden crumbs with a few larger buttery clusters about the size of peas.
The mix should feel cool and slightly sandy rather than greasy. If it starts looking shiny, chill it for 10 minutes before assembling the pie. Warm butter can make the topping dense instead of crisp. Cold butter forms distinct crumbs as it melts.
Tip: If your kitchen is warmer than 75°F, chill the measured butter cubes for 10 minutes before mixing to keep the topping crumbly.
Step 4: Fill the Pie Crust and Add the Crumble
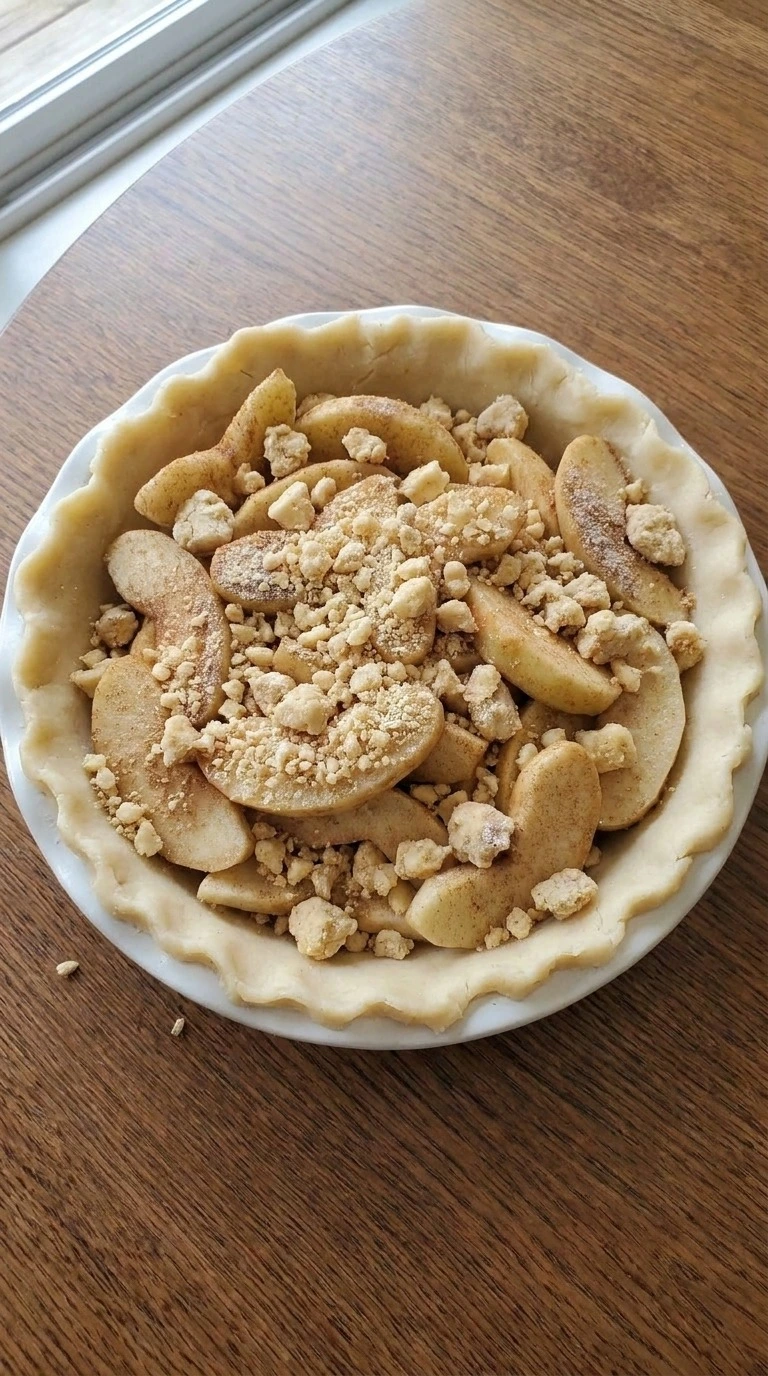
Unroll one refrigerated 9-inch pie crust and gently fit it into a 9-inch pie dish. Press the pastry against the bottom and sides without stretching it. Trim any long overhang and crimp the edge with your fingers. This takes around 4 to 5 minutes. Next, spoon in the cinnamon-coated apples and spread them into a slight mound.
Leave behind any large pool of juice in the mixing bowl. Scatter the cold crumble over the apples and cover most of the fruit without packing the crumbs down. Some apple edges can peek through. That gives the topping space to crisp in the oven. The unbaked pie should have a pale pastry rim and a rough layer of beige crumbs with no smooth patches.
It’s fine if one side looks higher than the other. (I prefer loose clusters because they leave more crisp edges after baking. ) Don’t press the crumble flat or it can bake into a hard sheet. Keep the oven at 375°F for the next step. Loose crumbs expose more edges to heat.
Tip: Set the filled pie dish on a rimmed baking sheet before baking. It catches bubbling juices and makes the hot pie easier to move.
Step 5: Bake Until the Crumble Is Golden and the Filling Bubbles
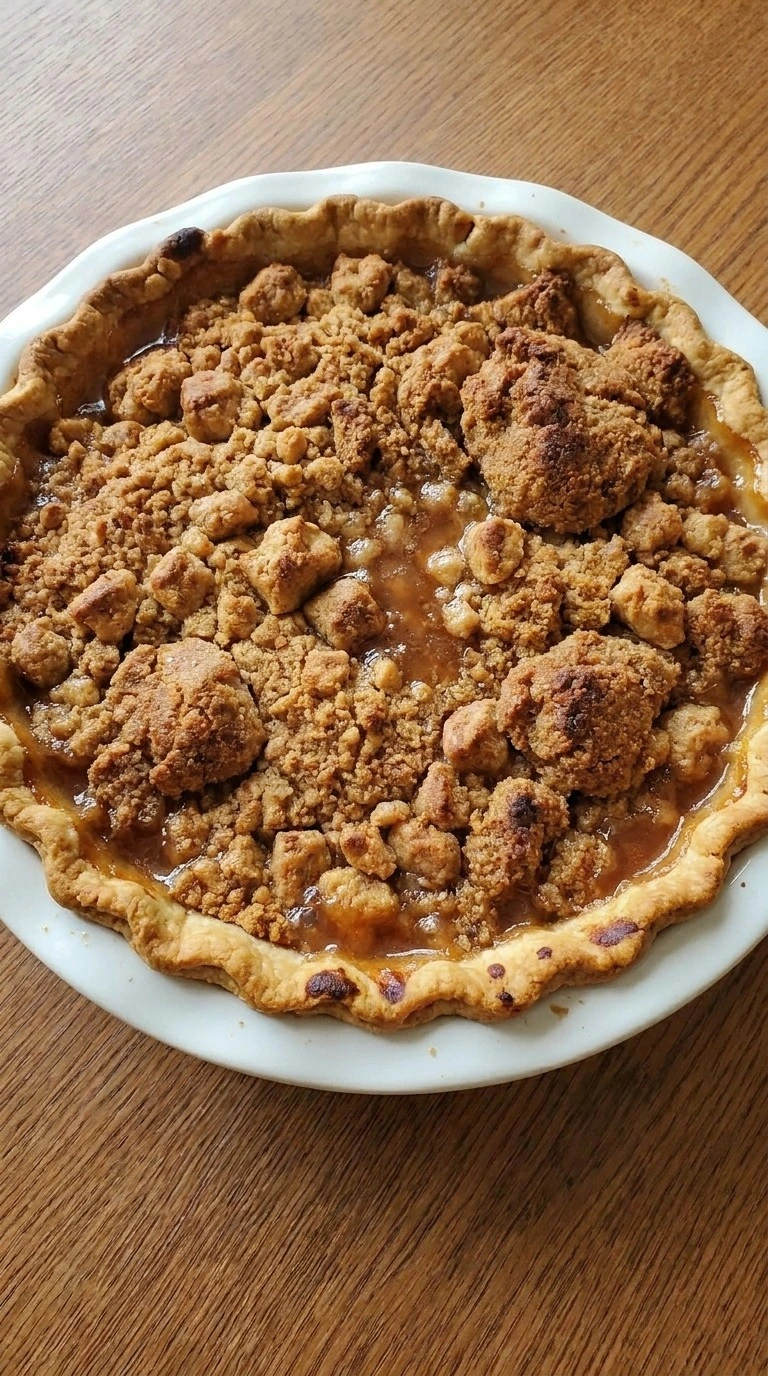
Place the pie on its baking sheet on the lower third rack of the 375°F oven. Bake for 60 to 70 minutes. Rotate the baking sheet 180 degrees after about 35 minutes so the top colors more evenly. You’ll notice the crumble turning deeper gold while the apples release thick juices through small gaps. Check the crust around minute 40.
If the edge is getting too dark, cover only that rim with a loose strip of foil. Keep baking until thick bubbles appear near the center as well as the edges. Don’t take it out just because the top looks brown. A pale center can mean the filling hasn’t thickened enough. The pie should smell of toasted butter and warm cinnamon.
The crumble will have amber edges with darker brown peaks while the apple juices bubble slowly. Then let the pie cool for at least 3 hours on a rack. Cutting too soon makes the filling spill out because the starch needs time to set. Full bubbling and cooling help the slices hold together.
Tip: If the top darkens before the filling bubbles, loosely cover the entire pie with foil for the final 10 to 15 minutes.
Step 6: Cut a Slice and Serve
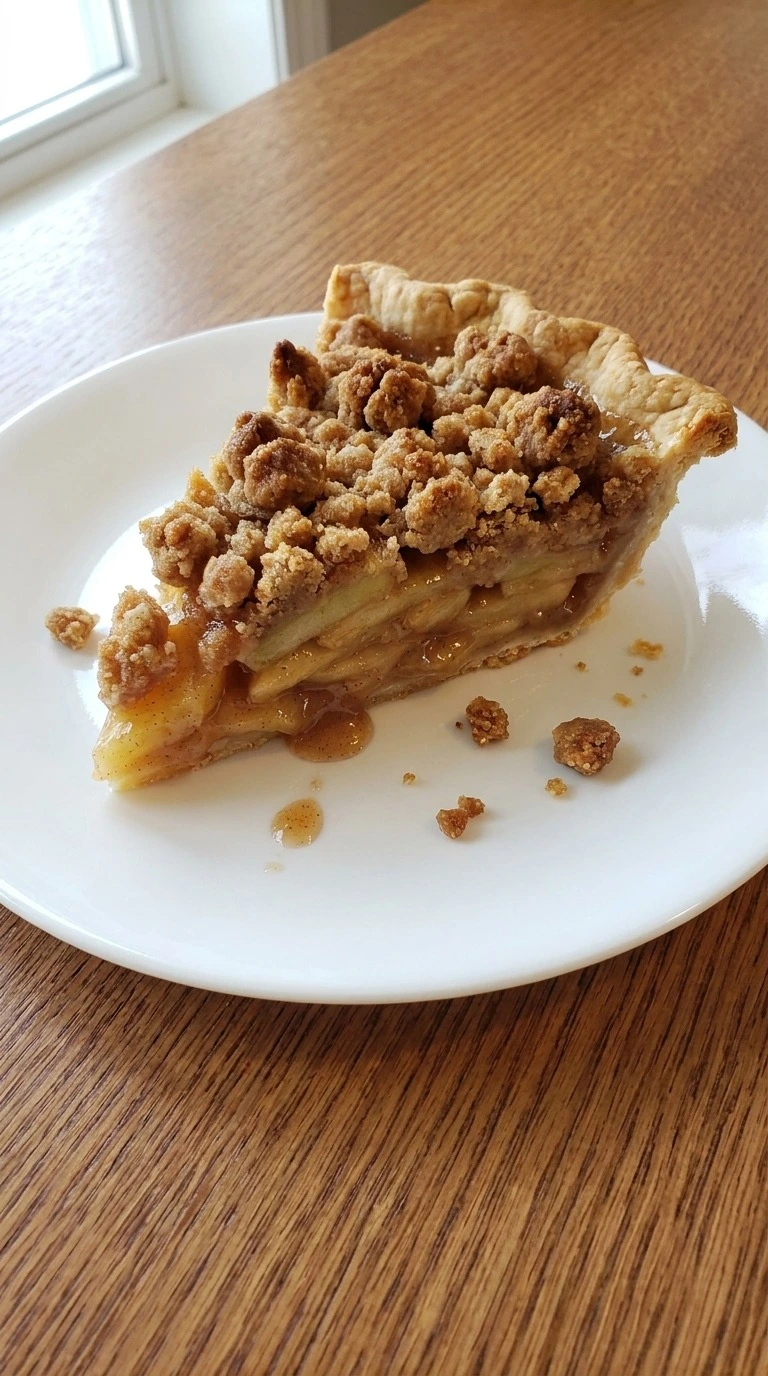
After the pie has cooled for at least 3 hours, use a sharp knife to cut it into 8 wedges. Make the first cut straight through the crumble and press gently through the softened apples and bottom crust. Then slide a pie server under one wedge and lift it onto a small white dessert plate. Keep the slice intact if you can, but don’t worry about a few falling crumbs.
The pie can be served at room temperature or warmed at 300°F for 8 to 10 minutes. If you warm it, use an oven-safe plate and watch the crust so it doesn’t dry out. The slice should reveal tender golden apple layers and a thin flaky pastry base. You’ll see darker cinnamon juices between the fruit with rough golden crumbs on top.
If the filling spreads across the plate, the pie probably needed more cooling time. Give a warm pie another 30 minutes before cutting again. Cooling lets the starch hold the fruit in neat layers.
Tip: For a clean wedge, wipe the knife after each cut and lift from beneath the bottom crust instead of pulling from the crumble.
Pro Tips
- Choose firm Granny Smith and Honeycrisp apples with smooth skins. You’ll need about 6 cups of sliced fruit for a full 9-inch pie.
- Keep the unsalted butter cold until you make the crumble. If the mixture feels greasy, chill it for 10 minutes before adding it to the pie.
- Place your pie dish on a rimmed baking sheet in the lower third of the 375°F oven. This helps the bottom crust bake and catches any fruit juices.
- Check the pie after 40 minutes and shield the pastry rim with foil if it’s getting too dark. Leave the center exposed so the crumble can toast.
- Give yourself at least 3 hours of cooling time before slicing. The apple filling thickens as it cools and holds together better when served.
- Use a thin metal pie server to lift each wedge from the bottom. Start with a narrow slice if the first piece feels hard to remove.
- For a little more crunch, replace 1/4 cup of the crumble flour with old-fashioned rolled oats. They’ll toast as the butter melts into the topping.
- If you enjoy a sharper apple flavor, add 1 teaspoon of finely grated lemon zest to the filling. It adds fragrance without extra liquid.
- Make a maple apple crumble pie by replacing 2 tablespoons of granulated white sugar with 2 tablespoons of pure maple syrup, then adding 1 extra teaspoon of flour to help manage the additional liquid.
- Give the crumble a nutty finish by adding 1/3 cup of chopped toasted pecans to the topping mixture before scattering it over the apples.
- For a cranberry apple pie, replace 1 cup of the sliced apples with 1 cup of fresh cranberries and add 2 tablespoons of granulated white sugar to balance their tartness.
- Create a spiced pear and apple version by replacing 2 cups of apple slices with 2 cups of firm Bosc pear slices and adding 1/4 teaspoon of ground ginger to the filling.
Substitutions
- Unsalted butter: Use 6 tablespoons of cold plant-based butter instead of regular unsalted butter. Choose a firm baking stick with at least 75% fat rather than a soft spread. The crumble may brown faster and taste slightly less rich, so check the topping after 35 minutes. Use a dairy-free pie crust as well if you’re avoiding dairy completely.
- All-purpose flour: Replace the flour with an equal amount of a gluten-free 1-to-1 baking flour blend. Use 3 tablespoons in the filling and 3/4 cup in the topping, just as the original recipe requires. The crumble may feel slightly more sandy and the filling can set a little softer. You’ll also need a gluten-free pie crust. For another option, explore our Gluten Free Apple Crisp Almond Flour.
- Refrigerated 9-inch pie crust: Use one homemade 9-inch butter pie crust or a prepared vegan pie crust. A homemade crust gives you more control over thickness and flavor, but it may need extra chilling before baking. Roll it about 1/8 inch thick and chill the lined dish for 20 minutes. Choose a vegan crust if you want an egg-free and dairy-free base. The original filling and crumble contain no eggs.
- Honeycrisp apple: Replace the 3 medium Honeycrisp apples with 3 medium Pink Lady apples. Pink Lady apples bring a firmer bite and a slightly sharper flavor. Add 1 tablespoon of granulated white sugar if your apples taste especially tart. Keep the slices about 1/4 inch thick and check the filling for tenderness before removing the pie from the oven.
- Light brown sugar: Use 1/2 cup of packed dark brown sugar in place of the light brown sugar. Dark brown sugar brings a deeper molasses flavor and makes the topping a little darker and moister. It can also form larger clusters. Keep the same baking temperature and cover the top loosely with foil if it browns before the filling bubbles.
Storage
Once Apple Crumble Pie has cooled, cover the pie dish tightly or move individual slices into airtight containers. Refrigerate within 2 hours after cooling begins and keep for up to 4 days. Place parchment paper between stacked slices so the topping doesn’t stick. You can also freeze the cooled pie or individual portions for up to 3 months.
Wrap each portion securely in plastic wrap and aluminum foil before placing it in a freezer-safe container. Label the package with the date so you’ll know when to use it. For a crisp topping, reheat refrigerated slices in a 325°F oven for 12 to 15 minutes. Thaw frozen slices overnight in the refrigerator before warming them.
Avoid adding water because it can soften the crumble. Discard the pie if you notice mold, an unusual sour smell or a slimy filling.
FAQ
Yes, and it’s a helpful dessert to prepare before a busy holiday meal. Bake the pie up to 2 days ahead and cool it fully before covering and refrigerating it. On serving day, warm it in a 300°F oven for 15 to 20 minutes if you’d like a crisp topping and a gently warmed filling. Let it stand for 10 minutes before cutting.
The filling may be watery if the apples released too much juice or the pie didn’t bake long enough. Use the full 3 tablespoons of flour and bake until thick bubbles reach the center, usually after 60 to 70 minutes at 375°F. Then cool the pie for at least 3 hours so the thickened juices can settle around the apple slices.
A mix of 5 medium Granny Smith apples and 3 medium Honeycrisp apples gives this pie a good balance of tartness and sweetness. Granny Smith slices stay firmer while Honeycrisp slices soften more during the 60 to 70 minute bake. If you can’t find Honeycrisp, use Pink Lady apples and cut them to the same 1/4-inch thickness for even baking.
Yes, you can freeze the fully cooled pie for up to 3 months. Wrap it tightly in plastic wrap and then add a layer of aluminum foil before placing it in the freezer. Thaw it overnight in the refrigerator and warm it at 325°F for about 20 to 25 minutes. The apples may be slightly softer after freezing, but the topping can regain some crunch.
Yes, double every ingredient and divide the filling between two separate 9-inch pie dishes. Don’t pile all 12 cups of sliced apples into one dish because the center may bake unevenly. Bake both pies at 375°F with room for air to circulate and swap their rack positions halfway through. Expect roughly 65 to 80 minutes depending on your oven.
Start with a cold pie crust and avoid pouring excess liquid from the apple mixing bowl into it. Bake on a rimmed sheet in the lower third of a fully heated 375°F oven. Don’t remove the pie until the filling bubbles near the center and the crust edge looks golden. A metal pie dish can also give the bottom more direct heat than a thick ceramic dish.
A warm slice goes well with a small scoop of vanilla bean ice cream or 2 tablespoons of lightly sweetened whipped cream. For a Thanksgiving dessert table, you can also serve it alongside our Pumpkin Roll with Cream Cheese Filling. If you’re serving ice cream, warm individual slices at 300°F for 8 to 10 minutes first so the topping stays crisp.
A crumble topping is often called streusel in American baking. Unlike a traditional double-crust apple pie, this version uses a loose mix of flour, butter and sugar over the fruit. As the pie bakes, the butter melts and the sugar helps the crumbs turn golden and crisp. The result is a pastry base with a sweet and crunchy top instead of a second sheet of dough.