

Fall Desserts with Apple Pie Filling should feel like something you can bake on a cool afternoon without making pie dough from scratch. These crumble bars use canned filling with an oat-rich base and a buttery topping, so you get pie flavor with far less fuss. When I’m craving fall desserts with apple pie filling, this is the pan I make first.
The base gets a short bake before the apples go in, which keeps the bottom firm instead of soft and damp after cooling. That matters. You still get a tender bite, but the square can be picked up without the filling sliding away from the crust.
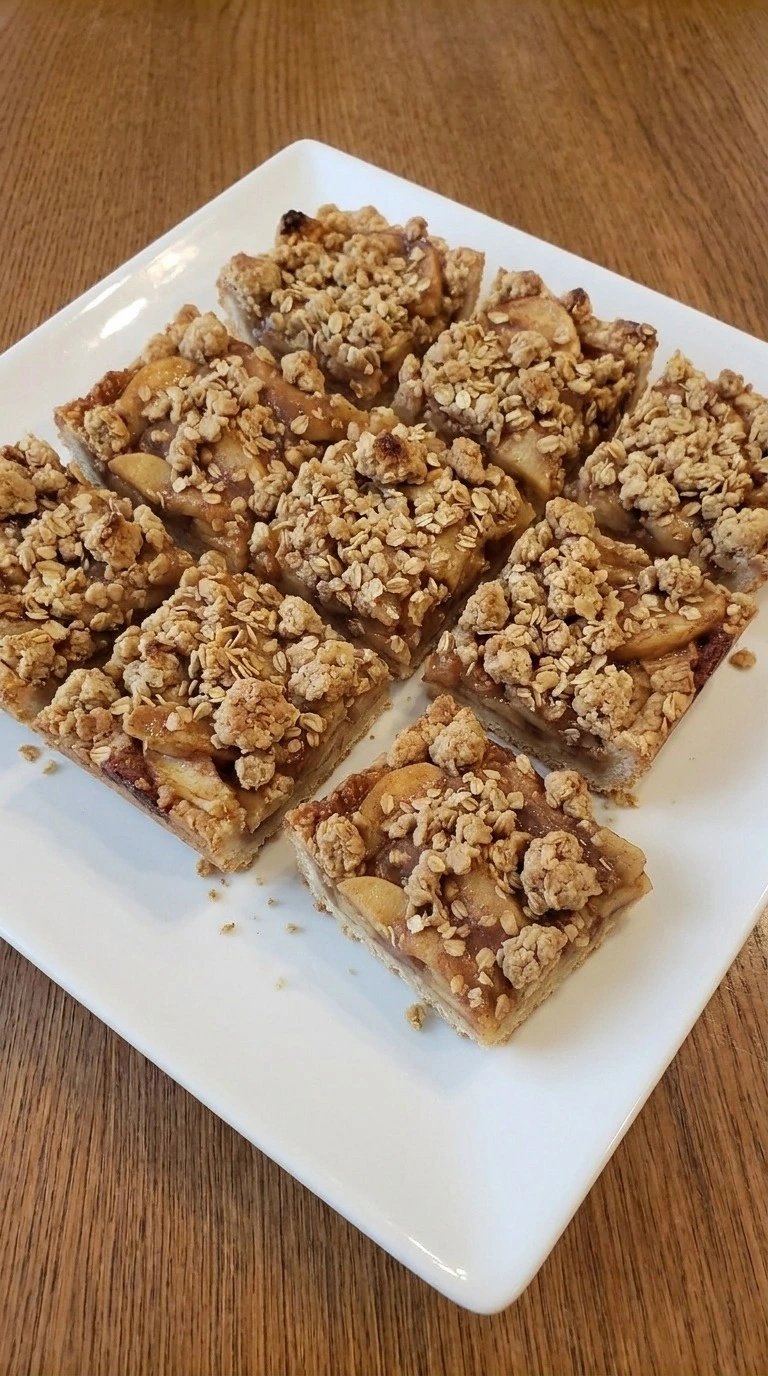
And the topping stays intentionally rough. I pinch it into uneven crumbs because the smaller bits toast fast while the larger pieces stay buttery inside, and that mix gives each bar a more homemade texture. Serve them warm for dessert or let them cool fully for neat slices.
Why This Recipe Works
Fall Desserts with Apple Pie Filling can turn soggy when wet fruit sits on raw crumbs, so this version par-bakes the oat base at 350°F first. The par-bake runs 14 to 16 minutes.
Then the topping goes on in uneven clusters with small gaps, which lets steam escape while the filling bubbles and thickens beneath it. Baking the full pan at 350°F for 30 to 35 minutes gives the oats time to toast without driving the apple syrup into a hard candy edge.
Ingredients
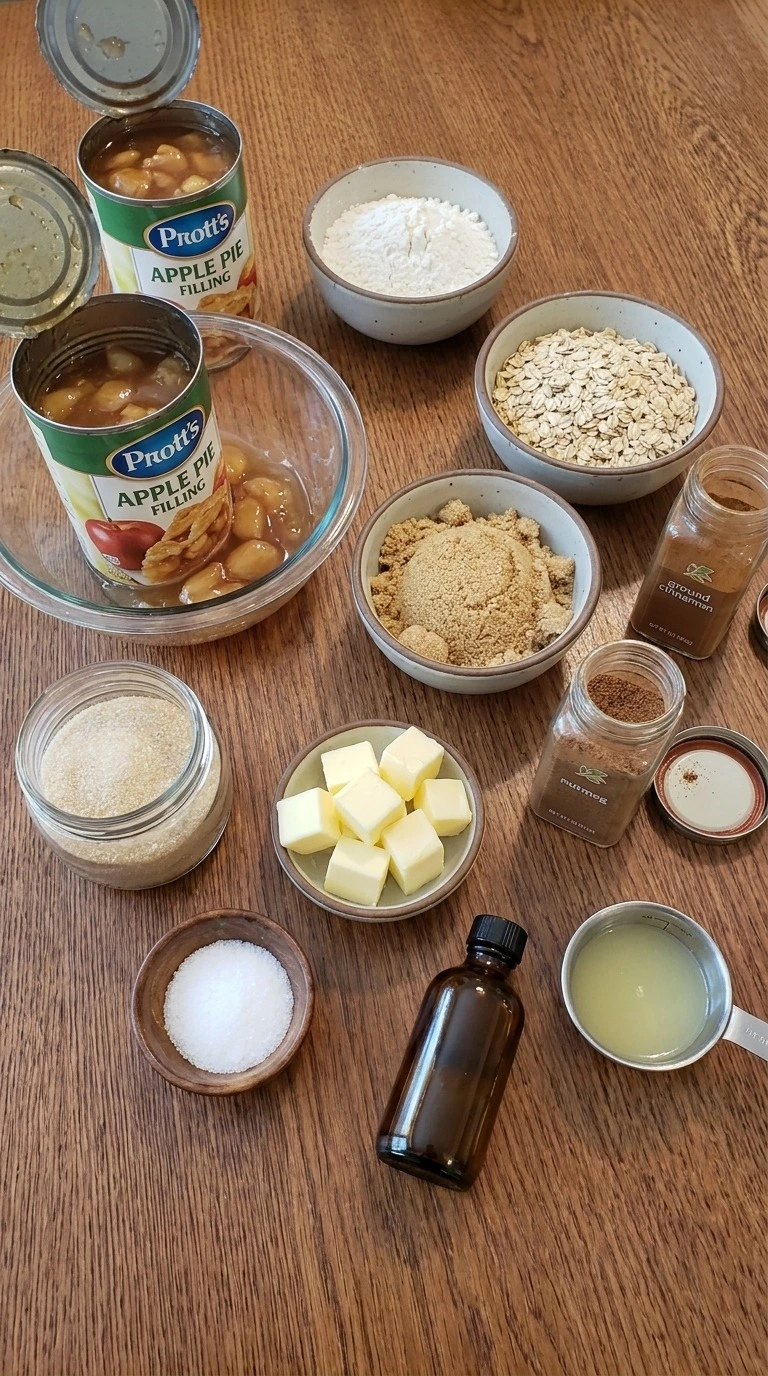
- all-purpose flour: Spoon and level, or weigh 240 grams, to give the crust enough structure without turning dry.
- old-fashioned rolled oats: Use whole rolled oats for visible texture and a crisp crumble rather than a fine oat paste.
- light brown sugar: Pack lightly so the molasses adds moisture and caramel flavor to the base and topping.
- granulated cane sugar: Use fine crystals so the crumble sweetens evenly and develops crisp edges.
- ground cinnamon: Mix through the dry crumble so warm spice reaches both the base and topping.
- fine sea salt: Use fine grains so the salt disperses evenly and balances the sweet filling.
- unsalted butter: Melt, then cool to about 95°F before mixing so the crumble stays clumpy instead of greasy.
- pure vanilla extract: Stir into the melted butter to add a rounded vanilla note without changing the texture.
- canned apple pie filling: Choose a filling with visible apple slices, then keep the fruit mostly intact when stirring.
- fresh lemon juice: Stir into the filling to brighten the canned apples and cut some of the sweetness.
- ground nutmeg: Add to the filling for a warm spice note that stays softer than extra cinnamon.
Equipment
- 9 x 13-inch light-colored metal baking pan: A light-colored 9 x 13-inch metal pan bakes the base evenly and limits dark edges, while a very dark pan can brown the crust before the center sets.
- Large mixing bowl: A 4-quart mixing bowl gives the crumble enough room to fold without crushing the oats, while a smaller bowl makes butter pool at the bottom.
- Rubber spatula: A firm 10 to 12-inch rubber spatula folds the crumble and filling without breaking apple slices, while a flimsy one struggles with the thick mixture.
- Parchment paper: A sheet wide enough to leave 1/2-inch side overhang lets you lift the cooled slab cleanly, while wax paper can soften and isn’t oven-safe.
- Wire cooling rack: A rack at least 14 inches long lets air move under the hot pan so the base doesn’t steam, while a flat counter traps heat underneath.
- Chef’s knife: An 8-inch chef’s knife makes long clean cuts through the cooled bars, while a short paring knife drags filling and breaks the crumb top.
Instructions
Step 1: Mix the buttery oat crumble
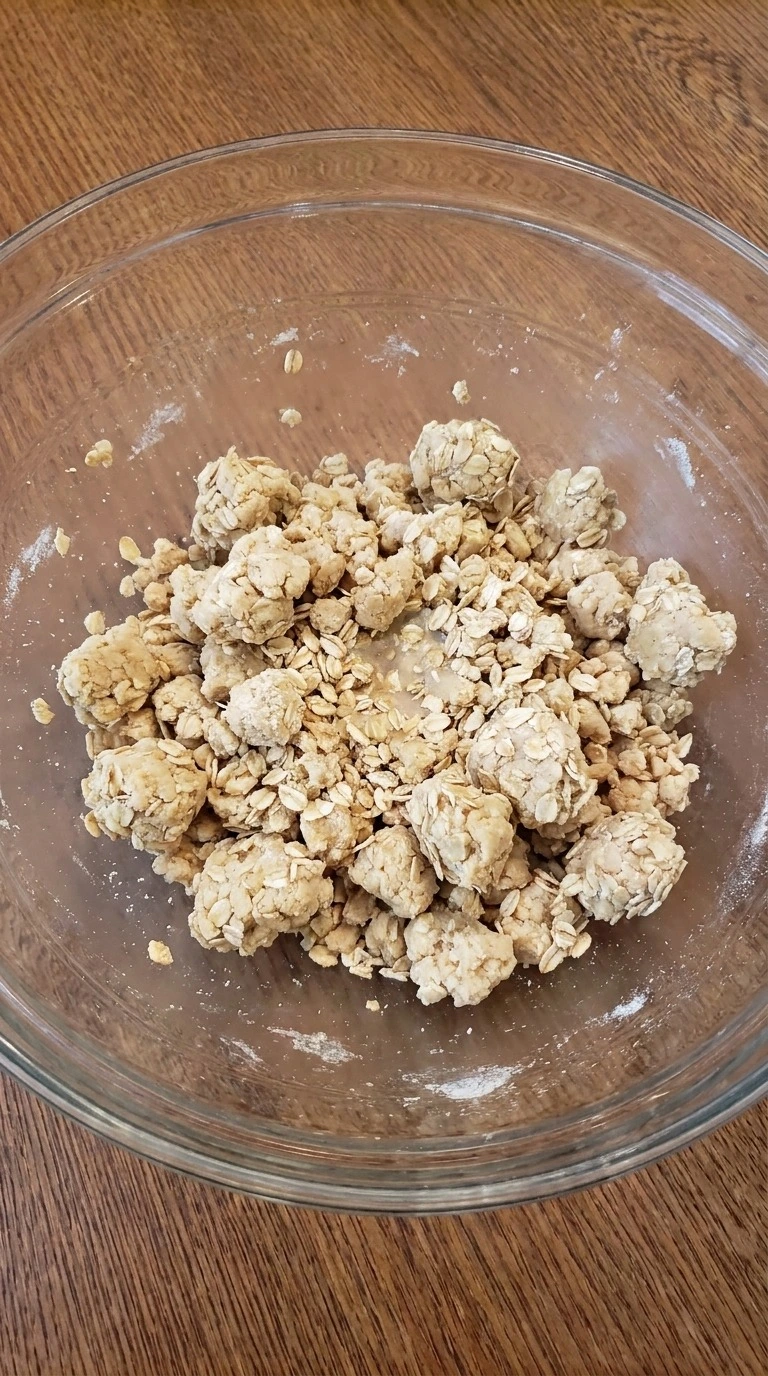
Combine the all-purpose flour, old-fashioned rolled oats, light brown sugar, granulated cane sugar, ground cinnamon and fine sea salt. Mix for 20 seconds so the dry ingredients look even, then pour in unsalted butter cooled to 95°F and the pure vanilla extract around the bowl. Fold with a rubber spatula in broad J-shaped strokes for 45 to 60 seconds, scraping the bottom once halfway through.
Stop there. If the butter is hotter than 110°F, the sugar melts too fast and the mixture turns greasy instead of crumbly. The mixture is ready when squeezed clumps hold together but loose oats still fall away around them.
You’ll smell butter and cinnamon without any toasted note yet. Keep the butter near 95°F because cooler fat leaves distinct crumbs.
Tip: Weigh the flour at 240 grams if possible. A packed measuring cup can add 20 grams and make the base dry.
Step 2: Press and par-bake the crust
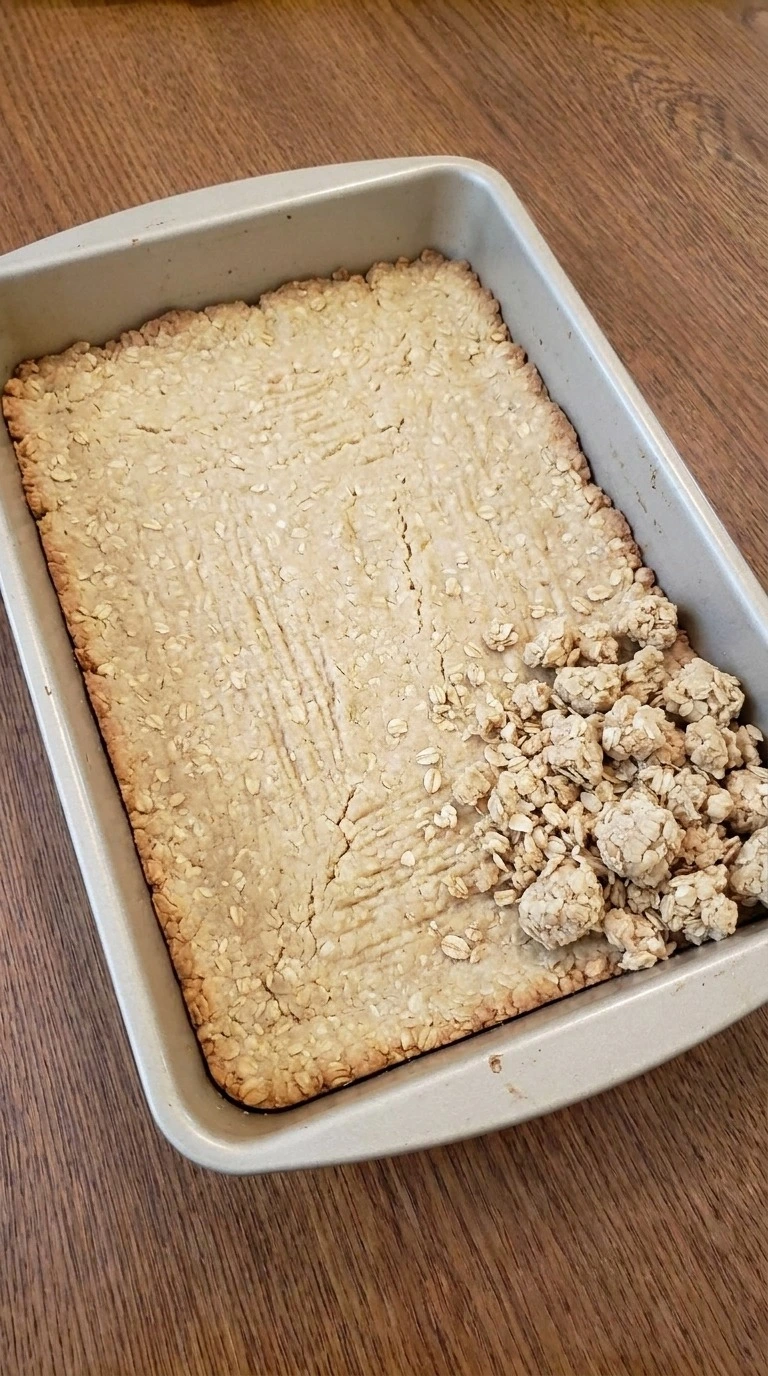
Line a 9 x 13-inch pan with parchment, then press about two thirds of the crumble mixture into an even 1/4-inch base while leaving the rest loose for topping. Bake at 350°F for 14 to 16 minutes, and press the crumbs firmly with the heel of your hand before the pan goes in so the layer bonds. For Fall Desserts with Apple Pie Filling, this short first bake keeps the syrupy apple layer from soaking straight into the crust.
Don’t overbake it. Go past 18 minutes and the base can turn hard after the second bake. The edges should look pale gold while the center stays light beige, and you’ll smell toasted oats just before the timer ends.
Let the crust stand 10 minutes. Par-bake at 350°F because early browning builds a moisture barrier.
Tip: Leave a 1/2-inch parchment overhang on both long sides. It makes the cooled slab easier to lift without cracking.
Step 3: Layer the apple filling and crumble
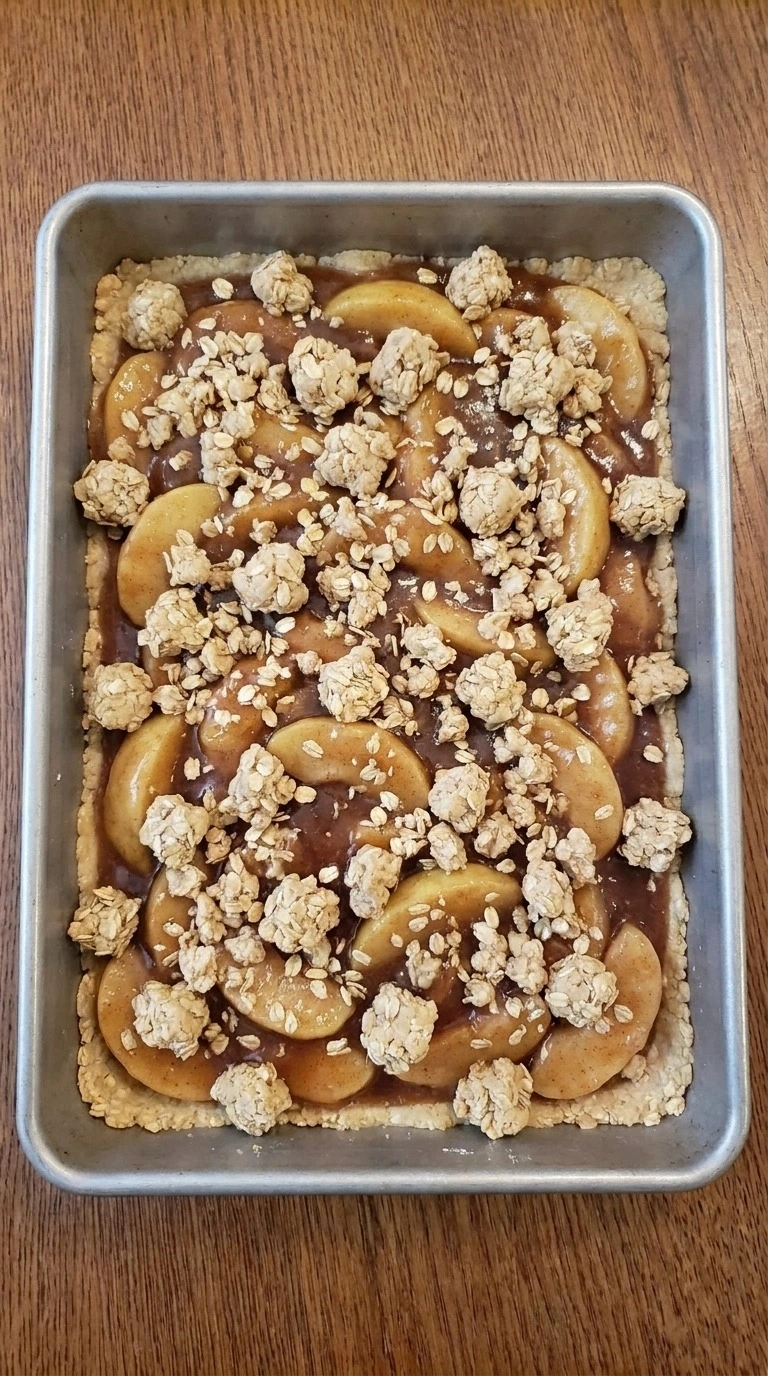
Keep the oven at 350°F while the crust rests for 10 minutes, then stir the canned apple pie filling with fresh lemon juice and ground nutmeg for 30 seconds. Use broad folding strokes so the apple slices stay mostly intact. Spread the filling over the warm crust in an uneven layer about 3/4 inch deep.
Then pinch the reserved crumble into mixed small and medium clusters and scatter it over the apples. Fall Desserts with Apple Pie Filling look better when a little fruit stays visible. Cover every inch and the topping steams instead of crisping.
You should see glossy apple slices peeking through dry crumb islands, with a few syrupy pockets showing near the edges. The filling should mound rather than run. Leave small gaps because exposed fruit lets steam escape during baking.
Tip: If your canned filling has very large slices, cut only the longest pieces in half so each 12-bar portion gets apple.
Step 4: Bake until the apple layer bubbles
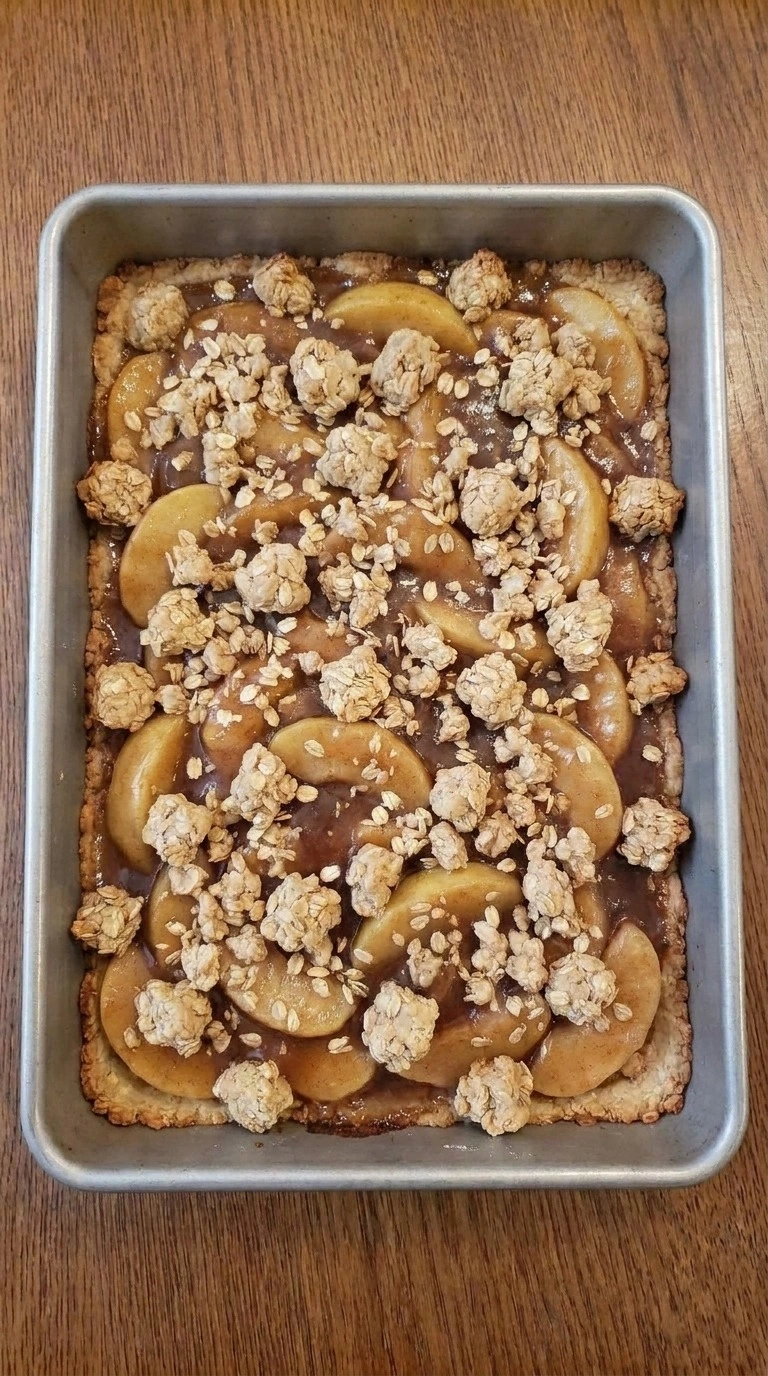
Bake the assembled pan at 350°F for 30 to 35 minutes, and rotate it 180 degrees at minute 18 so the topping colors more evenly without disturbing the crumbs. The loose clusters will set as butter melts through the oats, while the apple filling thickens and pushes small bubbles through the gaps. (My first batch went 40 minutes and the edge syrup turned chewy.
Thirty to 35 minutes gave me a softer center. ) Fall Desserts with Apple Pie Filling need that bubbling cue. Pull the pan before the exposed apple syrup turns dark amber and sticky.
The top should show deep golden peaks with lighter valleys, and slow bubbles should rise along two or three edges. You’ll smell toasted brown sugar. Bake only until bubbling because longer heat hardens the filling as it cools.
Tip: Set the pan on the middle oven rack, about 6 to 8 inches from the top element, so the crumble colors without scorching.
Step 5: Cool and cut into twelve bars
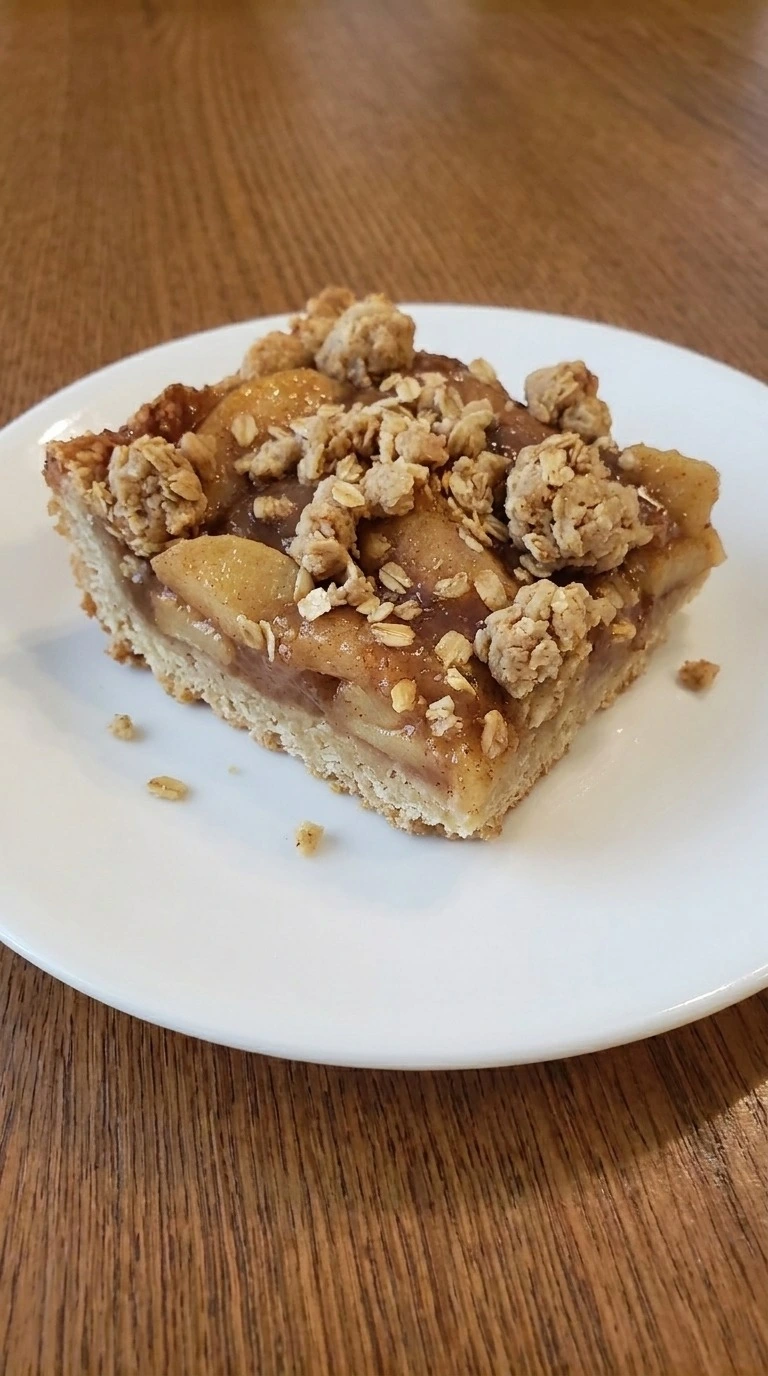
Cool the pan for 90 minutes until the center drops below 90°F, then lift the slab out by the parchment and cut it into 12 bars with long straight strokes. Wipe the blade after every two cuts so the apple filling doesn’t drag through the crumb layer. For Fall Desserts with Apple Pie Filling, the wait is part of the structure because the hot syrup needs time to set around the apple slices.
Don’t rush it. Cut before 60 minutes and the center can slump while the crust tears at the corners. The bars are set when the apple layer stays in place after the first cut and the top feels crisp under light pressure.
Plate one slightly uneven square with its apple cross-section visible. Cool below 90°F because thickened fruit holds cleaner layers when sliced.
Tip: For sharper bakery-style edges, chill the fully cooled slab for 20 minutes before cutting, then let portions sit 10 minutes before serving.
Pro Tips
- Cool the melted butter to about 95°F before mixing. Butter above 110°F starts dissolving the sugar and leaves fewer distinct crumble clusters.
- Par-bake the crust for 14 to 16 minutes at 350°F. Pull it when the edges turn pale gold but the center still looks light.
- Measure the flour at 240 grams if you have a scale. Even 20 extra grams can make the finished base dry and prone to cracking.
- Leave small gaps between crumble clusters so you can still see 15 to 20 percent of the apple layer. Those openings let steam escape.
- Rotate the pan once at minute 18 during the final bake. This helps the topping color evenly without breaking or flattening the crumb clusters.
- Cool the finished slab for at least 90 minutes before cutting. Warm apple syrup hasn’t set yet and will drag through the crust if rushed.
- For cleaner slices, chill the cooled bars for 20 minutes and wipe the knife after every two cuts. The layers stay sharper without becoming firm and cold.
- Warm individual bars at 300°F for 6 to 8 minutes before serving. The crumble crisps again while the apple center becomes soft without turning runny.
- Add 1/2 cup chopped toasted pecans to the reserved crumble for a nuttier version with extra crunch and a deeper roasted flavor.
- Mix 1/3 cup dried cranberries into the apple filling before assembly for a tart fall variation that cuts through the brown sugar sweetness.
- Replace 1/2 teaspoon of the cinnamon with 1/2 teaspoon apple pie spice for stronger clove and allspice notes without making the filling bitter.
- Drizzle each cooled portion with 1 tablespoon warm caramel sauce just before serving for a richer dessert, but don’t add it before baking because the topping can soften.
Substitutions
- all-purpose flour: 1-to-1 gluten-free baking flour. Use the same 2-cup amount and choose a blend that contains xanthan gum. The crust will be slightly more tender and may need 2 extra minutes during the first bake.
- unsalted butter: plant-based baking butter. Replace the butter 1 to 1 with a firm dairy-free baking stick. Avoid soft tub spreads because their extra water can make the oat base greasy and less crisp.
- canned apple pie filling: homemade apple pie filling. Use about 5 cups of thick homemade filling and cool it below 100°F before layering. A loose homemade filling can soak the crust, so simmer it until the syrup coats the apples.
- old-fashioned rolled oats: certified gluten-free old-fashioned rolled oats. Use the same 1-cup amount when making a gluten-free batch. Quick oats can work in a pinch, but they’ll create a finer and less craggy topping.
- light brown sugar: dark brown sugar. Replace it 1 to 1 for a deeper molasses flavor and slightly softer crumble. The darker sugar also makes the topping brown a little faster near the edges.
Storage
Store Fall Desserts with Apple Pie Filling in a tightly covered container in the refrigerator for up to 4 days. For longer storage, wrap individual cooled bars and freeze them for up to 2 months, then thaw overnight in the refrigerator before reheating.
Reheat portions at 300°F for 6 to 8 minutes so the crumble regains some crispness without drying the apple layer. Discard bars that develop a sour smell, visible mold or unusually wet filling because those signs point to spoilage.
FAQ
Yes. Bake the bars up to 2 days ahead and cool them completely for at least 90 minutes before covering. Keep the uncut slab refrigerated, then let it stand 20 minutes before slicing so the crust softens slightly without losing its structure.
The filling usually stays loose when the bars leave the oven before bubbles appear around the edges. Bake at 350°F for the full 30 to 35 minutes, then cool for 90 minutes because the syrup thickens much more as its temperature drops.
Yes, but use about 5 cups and make sure it isn’t runny. Simmer homemade filling until the syrup clings to the apple slices, then cool it below 100°F before spreading so the warm liquid doesn’t soften the par-baked crust.
Yes, but bake two separate 9 x 13-inch pans instead of one extra-deep batch. Keep both at 350°F and swap rack positions around minute 18, then continue until each pan shows bubbling apple filling and deep golden crumb peaks.
Place individual bars in a 300°F oven for 6 to 8 minutes. Avoid the microwave when you want a crisp topping because 20 to 30 seconds of microwave heat softens the oat crumble even though the apple center warms quickly.
Yes. Cool and slice them first, then freeze the pieces in a single layer for 1 hour before wrapping each bar tightly. Store them frozen for up to 2 months and reheat from thawed at 300°F for about 8 minutes.
Serve each bar slightly warm with a small scoop of vanilla ice cream or 2 tablespoons lightly whipped cream. If you’re serving them at brunch, add fresh apple slices or plain Greek yogurt so the sweet filling doesn’t dominate the plate.
Apple crumble bars hold their shape better after cooling because the fruit syrup thickens as its dissolved sugar and starch lose heat. That 90-minute rest changes the slice almost as much as the baking does.